Showing posts with label Crafter's Companion. Show all posts

Friday, 30 November 2018

Kindred Stamps - Family Bookmarks

Hey Everyone,

Today I am working with Kindred Stamps Family Is Forever, how cute is this stamp set :-) You may remember me using it recently to do  a No Line Colouring Technique card, today I am making some bookmarks.


I started by cutting the bookmark shapes using MFT Stamps Tall Tag Duo dienamics, I used X-Press It Blending Cardstock and ran the dies through my Gemini Machine.

I popped the stamps onto Lawn Fawn Acrylic Blocks and inked them up using Memento Tuxedo Black ink, then stamped them onto the bookmarks I had created.

Using Copic Markers I coloured the images up, I will add a list at the end of my blog post of all the Copic Markers I had used. I cut a second set of the bookmarks and added them to the back of the ones I had coloured so that you wouldn't see the Copic Markers through the back.

I added some Washi Tape from my stash, I grabbed some patterned ribbons from the On The Go set I had in my stash and used some Silver Twine to tie around the ribbon, that was my bookmarks completed. They were nice and easy to create, the colouring is probably the part that took the longest haha.

You Can Watch The Video Here


I hope you have enjoyed my post today, if you have any questions feel free to send me a message or contact me via facebook (all links can be found below).


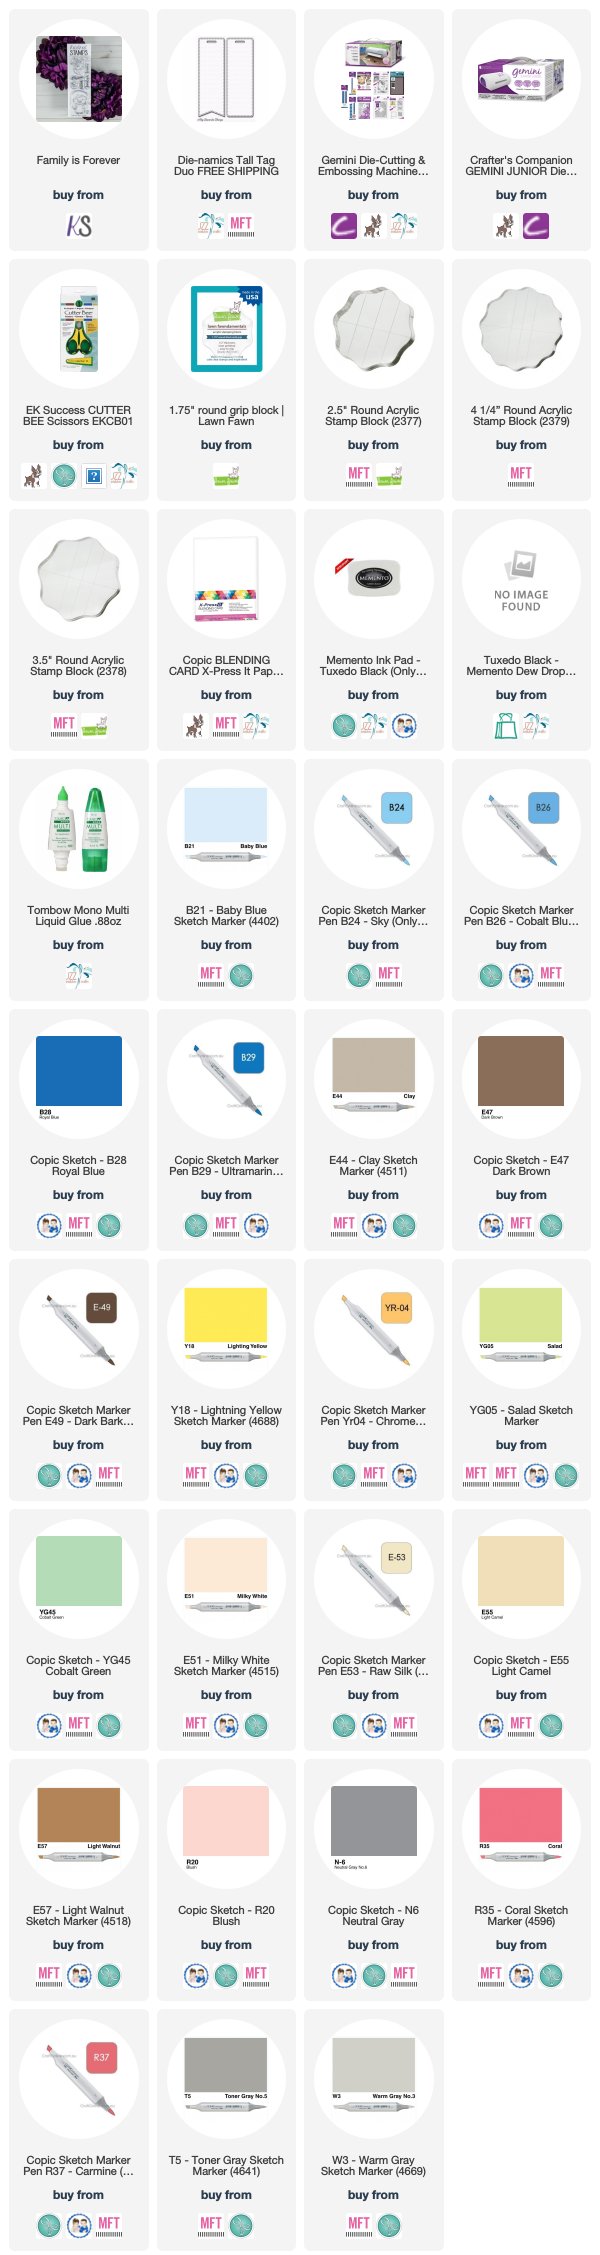
Products Used On My Card (Affiliate Links Used Where Possible)


Copic Markers Used
E50, E51, E53, E55, R20
B21, B24, B26, B28, B29
C7
E71, E74, E77, E79
R35, R37

Thanks for stopping by, Deni

CAMERA SET UP - FOR YOU TUBE VIDEOS ONLY
Blue Yeti Microphone
Sony Handycam HDR CX4-05
Tripod – Manfrotto MKCompactaCN-BK

S O C I A L MEDIA 
B L O G : http://angelhandmadepapercraft.blogspot.com.au/
I N S T A G R A M : http://instagram.com/angelhandmadepapercraft
YOU TUBE: http://www.youtube.com/c/AngelHandmadePapercraft
F A C E B O O K: http://www.facebook.com/angelhandmadepapercraft
PINTEREST: https://www.pinterest.com.au/angelhandmadepapercraft

PERSONAL BLOG 
ANGEL HANDMADE PAPERCRAFT: http://angelhandmadepapercraft.blogspot.com.au/

I am an Ambassador for Copic Marker Australia and NZ


Friday, 23 November 2018

Kindred Stamps - Family Is Forever

Today I have made a card using a stamp set from Kindred Stamps called Family Is Forever.

I stamped the images onto X-Press It Blending Cardstock using Lawn Fawn Acrylic Blocks and Memento Desert Sand (I have other similar colour ink pads linked up) and coloured the images up using Copic Markers.


I fussy cut the images using EK Success Cutterbee Scissors, the tip to fussy cutting is to move the card not the scissors so much.

I ran a MFT Rounded Rectangle die through my Gemini to create the stitched look on the background. I then grabbed a Ranger Mini Blending Tool and blended some Distress Inks. I ran MFT Puffy Clouds Die through my Gemini using some leftover white cardstock and adhered them using American Tombow Mono Multi Liquid Adhesive.

If you are interested you can see me colouring up the images here on my You Tube Channel.


The patterned papers I actually created myself using X-Press it Blending Cardstock, Lawn Fawn Acrylic Block, some of the stamps from the set and some Memento Tuxedo Black.
The little flowers I coloured using Distress Inks and a Roymac Revolution Taklon, these brushes are no longer available so I have linked some other brushes that I have and use.

I added some Nuvo Crystal Drops in Red Berry to the bottom of my card. Finally adhering all the layers to a Couture Creations Card Base using Scotch ATG.

I hope you have enjoyed my post today, if you have any questions feel free to send me a message or contact me via facebook (all links can be found below).


Products Used On My Card (Affiliate Links Used Where Possible)


Copic Markers Used

B21, B24, B26, B28, B29
E44, E47, E49
Y18, YR04
YG05, YG45
E51, E53, E55, E57, R20
N6
R35, R37
T5, W3

Thanks for stopping by, Deni

CAMERA SET UP - FOR YOU TUBE VIDEOS ONLY
Blue Yeti Microphone
Sony Handycam HDR CX4-05
Tripod – Manfrotto MKCompactaCN-BK

S O C I A L MEDIA 
B L O G : http://angelhandmadepapercraft.blogspot.com.au/
I N S T A G R A M : http://instagram.com/angelhandmadepapercraft
YOU TUBE: http://www.youtube.com/c/AngelHandmadePapercraft
F A C E B O O K: http://www.facebook.com/angelhandmadepapercraft
PINTEREST: https://www.pinterest.com.au/angelhandmadepapercraft

PERSONAL BLOG 
ANGEL HANDMADE PAPERCRAFT: http://angelhandmadepapercraft.blogspot.com.au/

I am an Ambassador for Copic Marker Australia and NZ


Monday, 27 August 2018

Kitty says Hooray - Whimsy Stamps

I have an extra Inspiration Post for you for Whimsy Stamps today.

I am using a Stamp set called "A Girl's Best Friend" which I got my hands on recently.


I wanted to try and work with black cardstock and white embossing powder, so I grabbed a piece of American Crafts Cardstock and cut it to size using Cutterpillar Pro. I then turned it over so I was using the Reverse side without the pattern on it as I needed a flat smooth surface to work with.


I prepped the area using EK Success Powder Tool. I grabbed the images I wanted to use and popped them onto Lawn Fawn Acrylic Blocks. I inked them up using Versamark Watermark Stamp Pad and stamped each of the images onto my card, I could see what I was doing so I didn't bother to put Embossing Powder on until the end.


Once I had all the images stamped down I grabbed my Ranger Super Fine White Embossing Powder and added it all over my cardstock then tapped off the excess. I then used my Crafter's Companion Heat Tool to melt it all.

                                                   A Girl's Best Friend Clear Stamps

I used some Red Lawn Fawn Ink to add the little foot prints into the areas that were not stamped on. This didn't show up so much on the photos you will see on my post today. I added everything to a pre-made card base from Lawn Fawn and then I was done.


I hope you have enjoyed my post today, if you have any questions feel free to send me a message or contact me via facebook (all links can be found below).

Whimsy Stamps "A Girl's Best Friend"
Mondi Color Copy 250GSM
American Crafts Cardstock
Cutterpillar Pro
Scotch ATG
Scotch ATG Refill Club
American Tombow Mono Multi Liquid Adhesive
Twiddleybitz Card Base

Sizzix Big Shot
EK Success Powder Tool
Ek Success Cutterbee Scissors
Versamark Watermark Pad
Ranger Super Fine Embossing Powder  - White
Lawn Fawn Acrylic Block
Fiskars Surecut Trimmer
American Crafts #summer 6x6
Prismacolor Pencils
Lawn Fawn Ink - Lobster Ink Pad
Universal Crafts - Heat Gun Tool


Thanks for stopping by, Deni

You can find my cards for sale here
https://www.facebook.com/angelhandmadepapercraft

My You Tube Here
https://www.youtube.com/user/Denielle1983/

Instagram Here
http://instagram/angelhandmadepapercraft

Pinterest Here
https://www.pinterest.com.au/DeniAngelHandmade/

Monday, 13 August 2018

A Rose Between Pages - Heartcraft Paper

Hi Everyone,

This week has been a rough one for me (no dirty laundry sharing), when I am at worst I create my best so today I am sharing with you this gorgeous rose bookmark I created for Heartcraft Paper.
You can check out the current HCP Challenge on the Blog Here.

I purchased these Disney Beauty and The Beast Sentiment Stamps about two weeks ago and today I had this bright idea to use them in conjunction with the gorgeous Rose digital stamp from Heartcraft Paper.

Can I just say how much I love this Rose image, it is one of the most stunning ones I have seen in a while, in the shop there is also some beautiful other flowers so please go and check them out.

Anyway, onto my bookmark, I imported the image in to MS Word (no fancy programs here), I then resized the image to the size I would need to fit the bookmark dies I had chosen. I decided to use the My Favorite Things Tall Tag Duo Bookmark dies as I love the faux stitching.

Once I had the images resized I layed them out onto my page so I was able to cut a second one from the same page. I printed the images using my Brother Laser Printer and Mondi Color Copy 250GSM Cardstock.


The images were printed and ready to cut, I adhered the dies over my image using Washi Tape just incase they moved. I ran them through my Crafter's Companion Gemini Machine so I could run them through in one run instead of having to cut them into small sections.

You can watch the colouring and making process video here


After they were die cut I used My Favorite Things Hybrid Ink in Black Licorice and Lawn Fawn Acrylic Blocks and the sentiments and the stars came from a Disney stamp set called Belle, I then grabbed the Copic Markers I wanted to use and got to work.


I coloured the images up using the following markers

Copic Markers Used

G40, G43, G99
E42, E47
Y21
E35
R35, R37, R39


Once I had coloured the image up I added Uni-ball Signo to the rose and at you Spica in Gold to the bow just to give them some definition and some sparkle and shine .


Colouring is now finished, I cut another bookmark piece to use as a backing to cover the bleeding of the Copic Markers, I adhered it using American Tombow Mono Multi Liquid Adhesive and used red Ribbon from Krafty Savers and on the second bookmark I added Whimsy Farm Twine in Rosalie.


After the bookmarks were finished I kept looking at them and decided to add some Nuvo Crystal Drops in Autumn Red.


Products Used On This Card

My Favorite Things - Tall Tag Duo
Lawn Fawn Acrylic Block
My Favorite Things Hybrid Ink - Black Licorice
Mondi Color Copy 250GSM
Copic Markers
EK Success Cutterbee Scissors
Krafty Savers Red Ribbon
Crafters Companion Gemini
American Tombow Mono Multi
Whimsy Farm Twine - Rosalie
at you spica - Gold
Uni-ball Signo White Gel Pen
Disney - Belle Stamp Set
Brother Laser Printer
Nuvo Crystal Drops - Autumn Red

Copic Markers Used

G40, G43, G99
E42, E47
Y21
E35
R35, R37, R39

I hope you have enjoyed my post today, if you have any questions feel free to send me a message or contact me via facebook (all links can be found below).


Thanks for stopping by, Deni

You can find my cards for sale here
https://www.facebook.com/angelhandmadepapercraft


You Tube Here
https://www.youtube.com/user/Denielle1983/
Instagram Here
http://instagram/angelhandmadepapercraft

Pinterest Here
https://www.pinterest.com.au/DeniAngelHandmade/

Sunday, 12 August 2018

Time For Tea Designs - Hi Sunshine

Hello Everyone!

I thought i'd share some sunshine and happiness with you all as we move our way through August we begin to realise how fast this year is going and how quickly we are moving through all the seasons. It is currently winter, I think we are just about finished now as the days are beginning to warm up a little.

I coloured up this gorgeous Sunflower Girl from Time For Tea Designs, she is a little cutie that I have had in my digital stash for a little while and came across her again today in my pre- coloured images (this is a tray i keep next to my desk of images I have coloured up and not used or sometimes I just have bulk colouring days and colour up a storm ready for projects).

The image was orgiginally released as Digital File - Sneaky info here - She will be getting released as a rubber woohoo :-) But shhh you didn't hear that from me :-0


Don't forget to check out our current challenge on the Time For Tea Blog here and you can check out the blog here.

She is coloured with Copic Markers however I do not have listed colours to share with you on her.

I started out by hunting down in my stash a patterned paper pad that would match the colours I had used on this image. I ended up going with American Crafts #Summer, it matched perfectly like I had done my image to match the papers haha.

I then began to cut all my mat layers from American Crafts/ Kaisercraft Cardstocks using my Cutterpillar Pro. I then layered them all using Scotch ATG.

Next I moved onto cutting patterned papers to add to the mat layers, I wrapped some Whimsy Farm Twine in Bella around the centre section. I added a doily using American Tombow Mono Multi.

I then added my image which had already previously been die cut on to the doily layer using X-Press It Mounting Tape and Scotch ATG. I also cut the sentiment from the same patterned paper pad and added the mat layers.

I then grabbed Lawn Fawn Spring Showers dies and ran them through my Crafters Companion Gemini using leftover bits of Cardstock, then adhered them using American Tombow Mono Multi.

Next I added all the layers onto a Pre-made Twiddleybitz Card Base using Scotch ATG. I also made extra layers for the inside of the card.


Lastly I added some Tonic Studios Nuvo Crystal Drops in Dandelion Yellow to finish off my project.

I hope you have enjoyed my post today, if you have any questions feel free to send me a message or contact me via facebook (all links can be found below).

Products Used On This Card

American Crafts Cardstock
Kaisercraft Cardstock
Tonic Studios Nuvo Crystal Drops
EK Success Cutterbee Scissors
Cutterpillar Pro
Crafters Companion Gemini
Scotch ATG
Lawn Fawn - Spring Showers
Doily - Stash
Mondi Color Copy 250GSM
Whimsy Farm Twine - Bella
American Tombow Mono Multi
Copic Markers
Twiddleybitz Card Base


Thanks for stopping by, Deni

You can find my cards for sale here
https://www.facebook.com/angelhandmadepapercraft

My You Tube Here
https://www.youtube.com/user/Denielle1983/

Instagram Here
http://instagram/angelhandmadepapercraft

Pinterest Here
https://www.pinterest.com.au/DeniAngelHandmade/

Sunday, 8 July 2018

Time For Tea Designs - Make A Wish

Good Morning All,

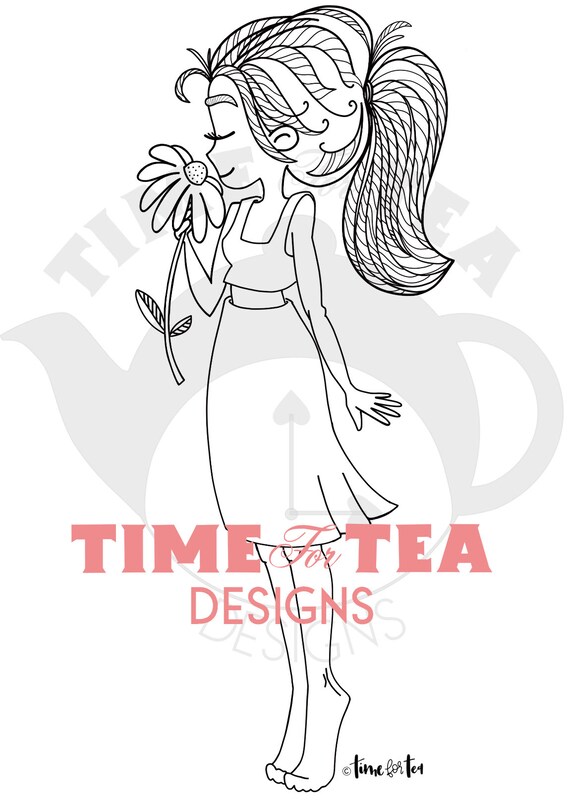
Today I am sharing some inspiration for Time For Tea Designs using Sweet Smell Of Spring. She is from the Blooming Lovely Collection. She can be purchased as a single image or as part of the collection using the links above. Such a sweet image to colour up and put onto a card.


I don't have any fancy programs on my computer so I imported her into MS Word where I resized her to the size I was after then printed her onto Mondi Color Copy 250GSM using Brother Laser Printer.


First step was colouring her up, I used Copic Markers to colour her in, I had an idea of the paper collection I was thinking about using so I coloured her up to match those colours and patterns.

The patterned papers are from Hopscotch 6x6 Paper pad from Fancy Pants Designs. I don't have a lot of full sheets left so I made my card using a few leftover pieces, nothing wrong with that I do it all the time, it's the best way to make use of every bit of your paper pads.

I cut banners into some of the pieces using EK Success Cutterbee Scissors, I love how sharp they are and that they come to a fine point which allows you to cut nice and straight.

I grabbed a circle die from Lawn Fawn stitched Circle Dies and ran it through my Crafter's Companion Gemini with the image I had coloured up.

I cut some mat layers using Kmart Cardstock and Canson Cardstock using my Cutterpillar Pro.

I stamped the sentiment onto the circle using Memento Tuxedo Black and a Lawn Fawn Acrylic Block, I used My Favorite Things Handwritten Happiness.

Everything was adhered using American Tombow Mono Multi Liquid Adhesive and Scotch 3M ATG, depending on what I was attaching.

After all the layers were stuck together I added them to a Twiddleybitz Card Base.

To finish the card off I added Tonic Nuvo Crystal Drops in Dandelion Yellow, Carnation Pink and Caribbean Ocean.


Products Used On This Card

Mondi Color Copy 250GSM
Copic Markers
My Favorite Things Handwritten Happiness
Memento Tuxedo Black
Crafter's Companion Gemini
Lawn Fawn - Stitched Circles
Doily - Stash
Fancy Pants Designs Hopscotch 6x6 Paper Pad
Tonic Studios Nuvo Crystal Drops
      Dandelion Yellow
      Carnation Pink
      Caribbean Ocean
Kmart Cardstock
Twiddleybitz Card Base
Scotch 3M ATG
Tombow Mono Multi Liquid Adhesive

Copic Markers

E000, E00, E21, E11, E04, R20
Y15, Y19, Y38, YR14
RV11, RV14, RV17
E31, E35, E37
BG15, BG07, BG57
G09

I hope you have enjoyed my post today, if you have any questions feel free to send me a message or contact me via facebook (all links can be found below).


Thanks for stopping by, Deni

You can find my cards for sale here
https://www.facebook.com/angelhandmadepapercraft

My You Tube Here
https://www.youtube.com/user/Denielle1983/

Instagram Here
http://instagram/angelhandmadepapercraft

Pinterest Here
https://www.pinterest.com.au/DeniAngelHandmade/

Sunday, 1 July 2018

Time For Tea Designs Blooming Lovely

It's my turn to give inspiration for Time For Tea Designs today,

I have created a card using Blooming Lovely, she was so inspiring to me and my creative that I was able to get this card coloured and put together pretty quickly. I love it when I have days like this :-)


I coloured her up with Copic Markers after printing her onto Mondi Color Copy 250GSM.


I used patterned papers from Fancy Pants Designs Hopscotch 6x6 Paper Pad, I ran a Lawn Fawn Stitched Circles die through my Crafter's Companion Gemini Machine. I added a doily from my stash and cut the banners using EK Success Cutterbee Scissors, after trimming with Cutterpillar Pro.

I added some Nuvo Crystal Drops in Dandelion Yellow and Carnation Pink. Everything was adhered onto a Twiddleybitz Card Base.


I hope you have enjoyed my post today, if you have any questions feel free to send me a message or contact me via facebook (all links can be found below).


Thanks for stopping by, Deni

You can find my cards for sale here
https://www.facebook.com/angelhandmadepapercraft

My You Tube Here
https://www.youtube.com/user/Denielle1983/

You Tube Here
https://www.youtube.com/user/Denielle1983/
Instagram Here
http://instagram/angelhandmadepapercraft

Pinterest Here
https://www.pinterest.com.au/DeniAngelHandmade/

Saturday, 23 June 2018

Magic Unicorn - Whimsy Stamps

Have I ever mentioned how much I love Unicorns? Well here I go.. I love them to bits :-)

So when I seen this image I knew I wanted to create magic, it didn't quit turn out the way I had planned, but really how often does that actually happen?.. very rarely in my books lol.

 I used the Unicorn image from the June 2018 release over at Whimsy Stamps, she is a Dove Art image and of course I adore her :-) "Her" being my Unicorn of course lol. Unfortunately at the time of this blog post she is out of stock, make sure you pop in your email address so you will be notified when she comes back into stock.

                          *NEW Unicorn
I stamped the image onto Mondi Color Copy 250GSM Card stock using Tsukinedo Tuxedo Black ink, using a Lawn Fawn Acrylic Block.


There was a lot of die cutting involved in this card today, but most of it was done with the same die set which makes it a hell of a lot easier, I used the Spellbinders labels Twenty Two and my Crafter's Companion Gemini Machine (I purchased the large one which is awesome when you have lots to do you can get it all through in one pass).

I cut the pink layer and the purple layer from the die set using Kmart Cardstock, I fussy cut the Unicorn so I wouldn't lose anything when I ran her through also.

I added a doily and some polka dot paper I had laying around in my stash. I cut the larger of the pink and purple layers to use as the mating, I then popped up the purple die cut onto X-press it Foam Mounting Tape and adhered all the layers onto a doily and then onto those matte layers. I added Tonic Studios Nuvo Crystal Drops in Dandelion Yellow, Carnation Pink and Violet Galaxy. I added Wink Of Stella to the Unicorn and that was my card done. All the Copic Markers will be listed below.

Products Used On This Card

Whimsy Stamps -Unicorn
American Tombow Mono Multi
Scotch 3M ATG
X-Press it Foam Mounting Tape
EK Success Cutterbee Scissors
Spellbinders Labels Twenty Two
Tonic Studios Nuvo Crystal Drops
    Dandelion Yellow
    Carnation Pink
    Violet Galaxy
Crafter's Companion - Gemini
Cutterpillar Pro
Twiddleybitz Card Base
Kmart Cardstock
Copic Markers
Mondi Color Copy 250GSM
Doily - stash
Wink Of Stella Clear Glitter Brush

 Copic Markers Used

RV55, RV66
V06, V09
RV25, RV29
Y06


I hope you have enjoyed my post today, if you have any questions feel free to send me a message or contact me via facebook (all links can be found below).


Thanks for stopping by, Deni

You can find my cards for sale here
https://www.facebook.com/angelhandmadepapercraft

My You Tube Here
https://www.youtube.com/user/Denielle1983/

My Blogs Here
Angel Handmade Papercraft http://angelhandmadepapercraft.blogspot.com.au/

Auzz Trinklets N Crafts http://auzztrinkletsnkrafts.blogspot.com.au/

Whimsy Stamps https://whimsystamps.blogspot.com.au/

Sunday, 17 June 2018

Birthday Wishes - Relax and Smell The Flowers

I have had an awesome few weeks lately with creations, I feel like after a few months of craziness I finally have my mojo back. You guys have no idea how good that feels!

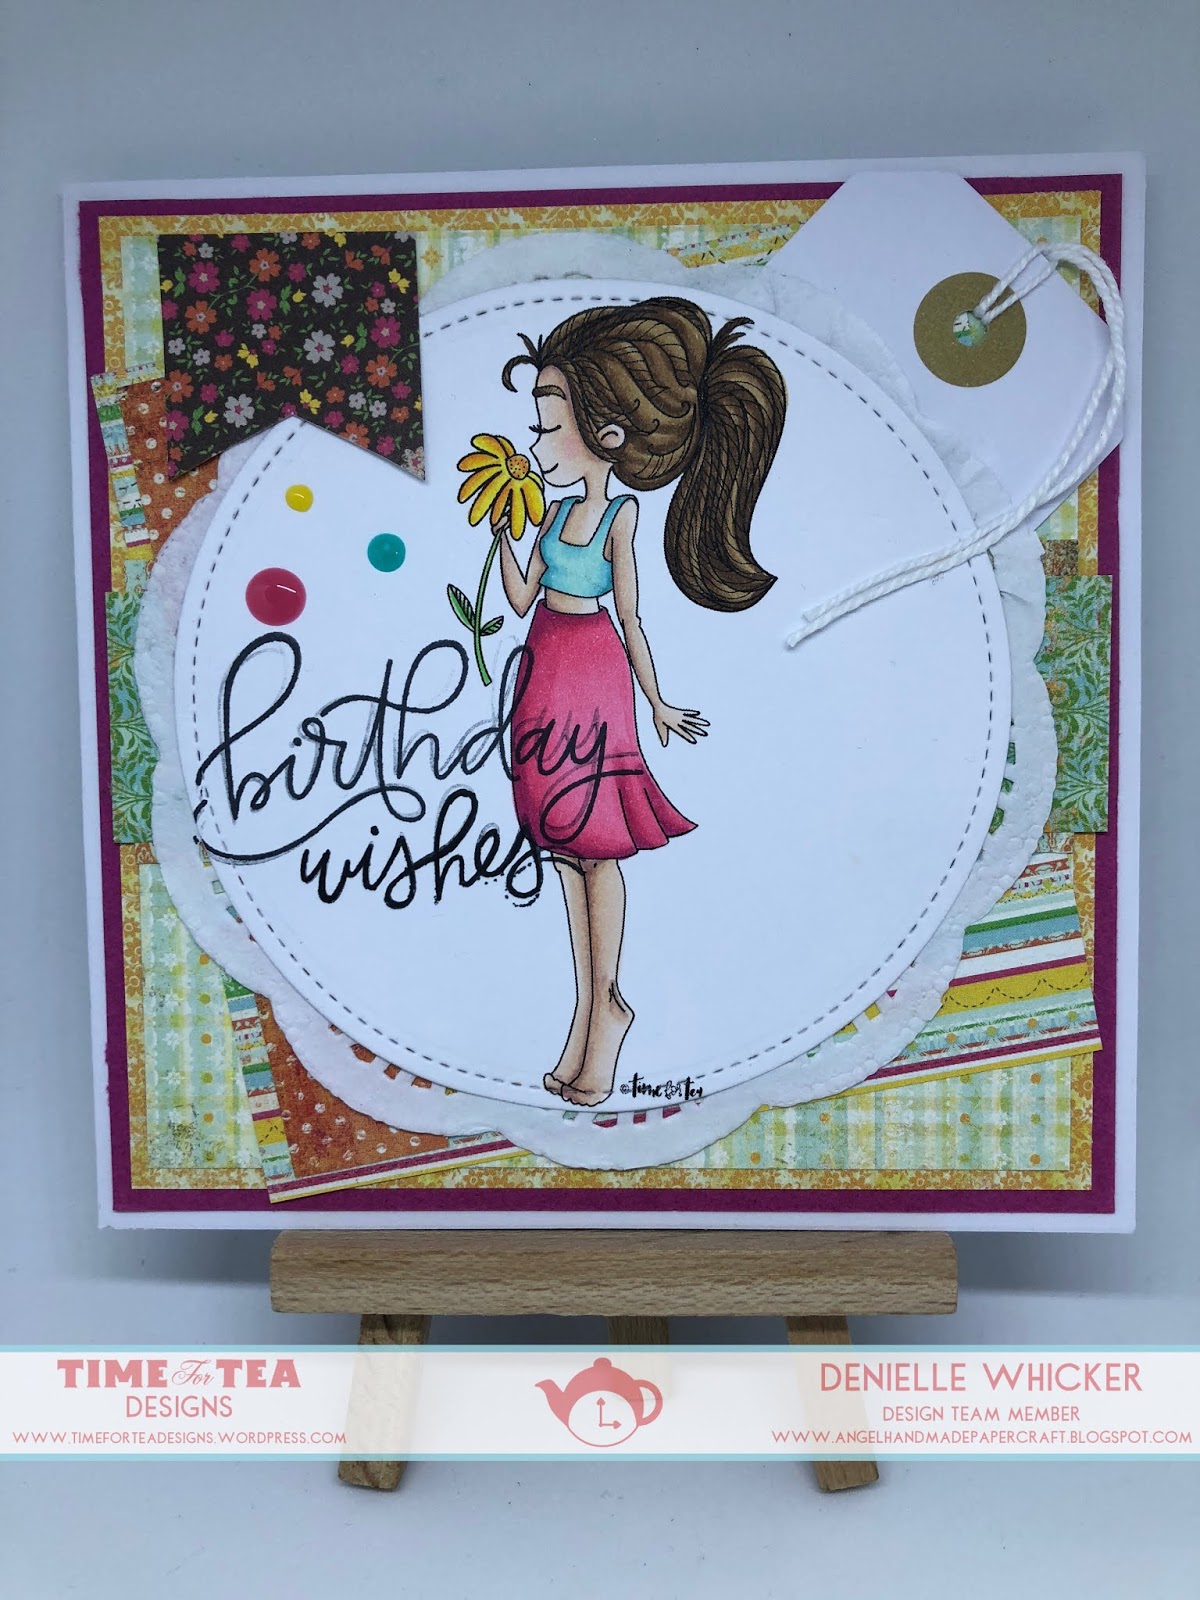
Today I have a card to share with you using an image from Time for Tea Designs called Sweet Smell Of Spring, it is from the April 2018 Release - Blooming Lovely.


The image was printed onto Mondi Color Copy then printed on Brother Laser Printer. I then ran the image through my Crafter's Companion Gemini Machine with a Lawn Fawn Stitched Circles Die.


I coloured the image using Copic Markers (you will find these listed below).

Patterned papers are from Fancy Pants Designs - Hopscotch 6x6 paper pad, I cut them all up to the layers I needed using my Cutterpillar Pro. I trimmed some into banners using EK Success Cutterbee Scissors. Pink card stock is from Kmart, some that i've had for a few years and just working my way through the last of the sheets.

I adhered all the layers I had cut onto the pink card stock using Scotch ATG, I then added a doily from my stash using Tombow Mono Multi Liquid Adhesive. I adhered the image onto the doily using Tombow Mono Multi liquid adhesive. This is when I realised I forgot to add the tag I had prepared for the card, so I carefully cut the tag down so I was still able to slide the tag in under the circle image. I then added the twine to the tag.

I added the Tonic Studios Nuvo Crystal Drops to the image circle. I wanted to stamp the sentiment on the front of the image - I used My Favorite Things All About You sentiments and Memento Tuxedo Black and a Lawn Fawn Acrylic Block.

It was at this moment once I stamped the sentiment I didn't push enough on the whole sentiment and the bottom didn't stamp out, so i tried to line it up and re-stamp it.. big mistake.. because I had so many layers that were all over the place underneath I wasn't able to stamp it evenly.. I carefully went over the bottom half of the sentiment but you could still see the double stamping on the top half :-( I was so upset because I very rarely stamp over an image because I am prone to messing things up.. My Mum was over that afternoon and told me it actually looks like a shadow... I'd love to know what you guys think drop a comment below.

Products Used On This Card

Mondi Color Copy 250GSM
Lawn Fawn Stitched Circles
Doily - Stash
Scotch ATG
Cutterpillar Pro
Fancy Pants Designs - Hopscotch 6x6 paper pad
Memento Tuxedo Black
Home & Co Parcel Tags
Crafter's Companion - Gemini
Kmart Card Stock
Twiddleybitz Cardbase
Tonic Nuvo Crystal Drops
      Caribbean Ocean
      Dandelion Yellow
      Carnation Pink
EK Success - Cutterbee Scissors
My Favorite Things - All About You

Copic Markers Used

E000, E00, E21, E11, E04, R20
RV13, RV14, RV17
Y13, Y15, Y19
YR65, YR68
BG11, BG53, BG57
E55, E57, E59
G12, G14


I hope you have enjoyed my post today, if you have any questions feel free to send me a message or contact me via facebook (all links can be found below).


Thanks for stopping by, Deni

You can find my cards for sale here
https://www.facebook.com/angelhandmadepapercraft

My You Tube Here
https://www.youtube.com/user/Denielle1983/

My Blogs Here
Angel Handmade Papercraft http://angelhandmadepapercraft.blogspot.com.au/

Auzz Trinklets N Crafts http://auzztrinkletsnkrafts.blogspot.com.au/

Whimsy Stamps https://whimsystamps.blogspot.com.au/

Sunday, 10 June 2018

Time For Tea Designs - Balloon Birthday

It's Time For Tea Designs time on my blog today :-)

I am sharing a gorgeous card using "Balloons" from the Blooming Lovely Collection, she is available individually or as a bundle.
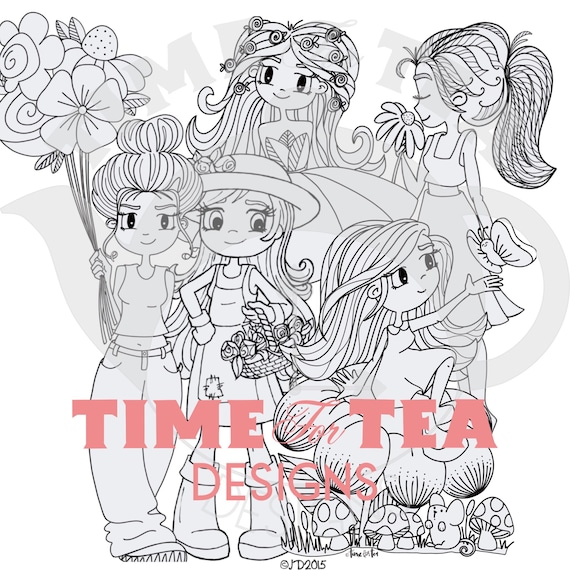


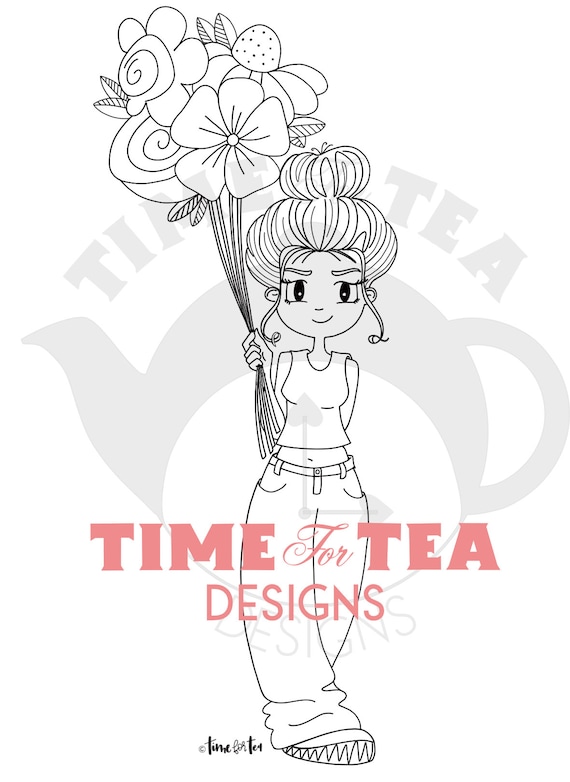
I had so much fun colouring up this young lady, so many colours went into her and she turned out exactly how I had envisioned. You can watch the colouring process here.


I printed her onto Mondi Color Copy 250 GSM, this is my go to for Copic Markers, X-Press it would be my favourite with availability here in Australia but unfortunately with the amount of colouring I do it just isn't affordable for me.

I coloured her up using Copic Markers, once that was done I went looking for papers and something to make her stand out. These days most of the time I colour once I have found papers to match but today I was having a colouring day and just coloured up a few images to get myself into the crafting mood.

I also had this leftover die cut word on my desk which fit my card perfectly. The die cut was from a My Favorite Things Die-Namics set called Sending Hugs, the sentiment was also from  My Favorite things, it was a stamp set called More Essential Sentiments. That was actually a set I had sitting on my desk from one of my last deliveries that I had not yet used.

I ran the die set through my Sizzix Big Shot (in a previous sitting) using Canson Cardstock. The sentiment I popped onto a Lawn Fawn Acrylic Block and inked up using Memento Tuxedo Black, I stamped it onto some leftover Mondi Color Copy 250GSM Cardstock that I had sitting on my desk.

I decided I wanted to cut the image out using a Spellbinders Die, I already had the Kraft piece on my desk so I grabbed the matching die - Spellbinders Labels Eighteen and using a pacer pencil carefully traced the inside of the die. I then used my EK Success Cutterbee Scissors to cut it out, then erased the pencil markings. That then left the Kraft piece showing a border. I carefully cut around the shoe and the top flower so they were outside of the die shape and I didn't trim them off.

I then layered out the "Sending" die cut and the sentiment and adhered them where I wanted on the image before I went any further.

I had a Hopscoch 6x6 Paper Pad sitting out from another project. I cut the flowered looking layer using a My Favorite Things die - Stitched Rounded Rectangles, which I ran through my Crafter's Companion Gemini. (Yes you will be happy to know he finally made it out of the box he has been sitting in for months.. oops my bad)

I found the orange strip sitting inside the Hopscotch Paper Pad that I used and it was the perfect leftover piece to fit my card.

All the layers were trimmed etc using Tonic Studios/Tim Holtz Guillotine and adhered using Scotch 3M ATG or Tombow Mono Multi Liquid Adhesive.

I layered everything onto a Twiddleybitz Cardbase. Final touches I added some Tonic Nuvo Crystal Drops in Antique Rose.

Products Used On This Card

My Favorite Things - More Essential Sentiments
Memento Tuxedo Black
Hopscotch 6x6 Paper Pad
Scotch ATG
My Favorite Things Stitched Rounded Rectangles
Mondi Color Copy 250GSM
EK Success Cutterbee Scissors
Tim Holtz Tonic Studios Guillotine
Lawn Fawn Acrylic Block
Spellbinders Nestabilities - Labels Eighteen
Tombow Mono Multi Liquid Adhesive
Crafter's Companion - Gemini
Tonic Studios - Nuvo Crystal Drops - Antique Rose
My Favorite Things - Sending Hugs Dienamics
Twiddleybitz Card Base

Copic Markers Used On This Card

E000, E00, E21, E11, E04, R20
Y13, Y15, Y18
YR14, YR15, YR18, YR27
YG05, YG09, YG67
RV13, RV17, RV19
V04, V05, V07, V09
E55, E57, E59
BG07, BG57
B93, B95, B97, B99
R35, R37, R39


I hope you have enjoyed my post today, if you have any questions feel free to send me a message or contact me via facebook (all links can be found below).


Thanks for stopping by, Deni

You can find my cards for sale here
https://www.facebook.com/angelhandmadepapercraft

My You Tube Here
https://www.youtube.com/user/Denielle1983/

My Blogs Here
Angel Handmade Papercraft http://angelhandmadepapercraft.blogspot.com.au/

Auzz Trinklets N Crafts http://auzztrinkletsnkrafts.blogspot.com.au/

Whimsy Stamps https://whimsystamps.blogspot.com.au/

Friday, 8 June 2018

Whimsy Stamps - Let's Play Ball

Having fun playing with Penguin Baseball Player from Whimsy Stamps this week, including the gorgeous matching Sentiment Set - Baseball Sentiments, you can purchase them both in the Whimsy Shop here

Penguin Baseball Player - Digital Stamp   Baseball Sentiments - Digital Sentiments

I created this super cute card after merging the image and one of the sentiments together.


I merged them using MS Word, I don't have any fancy programs to use so this is where I do my basic editing.  Once I merged them I printed them onto Mondi Color Copy 250GSM using my Brother Laser Printer.

Once I had the image printed I ran it through my Gemini using a My Favorite Things Rounded Rectangles. I then moved onto colouring using Copic Markers. Copic Markers are my go to medium most of the time because I am comfortable with them. I do try to use my pencils but I really need to give them more practice.

I used a Kaisercraft 6x6 Paper Pad for my patterned papers, there was a cute paper in there that these gorgeous triangles and I thought they would be cute to cut out and use as a banner on my card. I grabbed my EK Success Cutterbee scissors to carefully fussy cut two of them out. I then ran some Tombow Mono Multi Liquid Adhesive down a small amount of the twine then attached the triangles. This banner turned out exactly the way I had imagined.. now I needed to work on the rest of the layout for the card.

I still had a few dies sitting on my desk so decided to bring the circle die and another of the stitched rounded rectangles into my card, I ran more of the patterned paper though my Gemini with those dies. I then adhered everything onto a pre-made Twiddleybitz card base using a mixture of Tombow Mono Multi Liquid adhesive and Scotch 3M ATG.

I was so happy with the way this card turned out, it was everything my head had imagined and more :-)


I hope you have enjoyed my post today, if you have any questions feel free to send me a message or contact me via facebook (all links can be found below).


Thanks for stopping by, Deni

You can find my cards for sale here
https://www.facebook.com/angelhandmadepapercraft

My You Tube Here
https://www.youtube.com/user/Denielle1983/

My Blogs Here
Angel Handmade Papercraft http://angelhandmadepapercraft.blogspot.com.au/

Auzz Trinklets N Crafts http://auzztrinkletsnkrafts.blogspot.com.au/

Whimsy Stamps https://whimsystamps.blogspot.com.au/

Saturday, 26 May 2018

Whimsy Stamps - Welcome Little Chicks

Hello my wonderfuls!

Today I am sharing some cards for Whimsy Stamps, I recently purchased this stamp so thought it would be cute to make some new baby cards with.

The stamp set is a red rubber and is called "Little One", it's has really nice details that stamp perfectly. I used my Fishers Stamp Press to stamp the image out onto Mondi Color Copy 250GSM (I normally would use my Misti but it was in our bedroom from trying to get some work done the other night whilst we were watching a movie in bed and I was too lazy to go and get it lol).

                                                       Little One
I used Memento Tuxedo Black to stamp the image out and I just used a wet baby wipe to clean the stamp off when I was done. You will find generally red rubber stamps do not stain but I am annoyingly OCD when it comes to cleaning my stamps.


I wanted to use one of my MFT Blueprints die sets to make these cards today as I wanted to make two cards exactly the same but one in pink and one in blue (so I was also able to use the same paper pad).

I coloured the images up using Copic Markers  then carefully used my EK Success Cutterbee Scissors to fussy cut the images out. Thinking now after the fact that I should have cut the grass off but originally I wanted to use the stamp in one piece.

All the papers are from a Patterned paper pad that I purchased on sale at Kmart a few days ago, it was on clearance for $1 each, so like every other crafter I grabbed all the ones that were left on the shelf hahah. The Kraft coloured cardstock was also part of the patterned pad. I ran the patterned paper sheets I decided to use with the MFT Blueprints 14 dies in my Crafter's Companion Gemini machine. I then ran them through a second time in the opposite colour.

I cut the sentiment on my Tim Holtz Tonic Studios Guillotine, then used my EK Success Cutterbee scissors to banner the end and cut the excess off once I adhered it.

I adhered all the layers using Scotch ATG, this is my go to tape runner when it comes to my cards, I go through so much tape it's not funny. I actually have a monthly subscription with Create By Me Studio, so every month I have an automated debit and they auto send me a package every month, it's fantastic.

Once all my layers were attached together I added them onto a Twiddleybitz pre-made card base.

I added some Wink Of Stella - Clear Glitter Brush to the bonnets of the little chick's and their ribbons.

I hope you have enjoyed my post today, if you have any questions feel free to send me a message or contact me via facebook (all links can be found below).


Thanks for stopping by, Deni

You can find my cards for sale here
https://www.facebook.com/angelhandmadepapercraft

My You Tube Here
https://www.youtube.com/user/Denielle1983/

My Blogs Here
Angel Handmade Papercraft http://angelhandmadepapercraft.blogspot.com.au/

Auzz Trinklets N Crafts http://auzztrinkletsnkrafts.blogspot.com.au/

Whimsy Stamps https://whimsystamps.blogspot.com.au/
Saturday, 19 May 2018

Digi Stamp Boutique Pony Ride

Who doesn't love a pony ride! Well me actually because I am allergic to horses.. i'd love to though :-)

Today I am sharing with you Abi and Pony from Digi Stamp Boutique, I have had this image for a while but for some reason had not used it, I found it in my printed tray so I was in colouring mood and decided to colour her up.

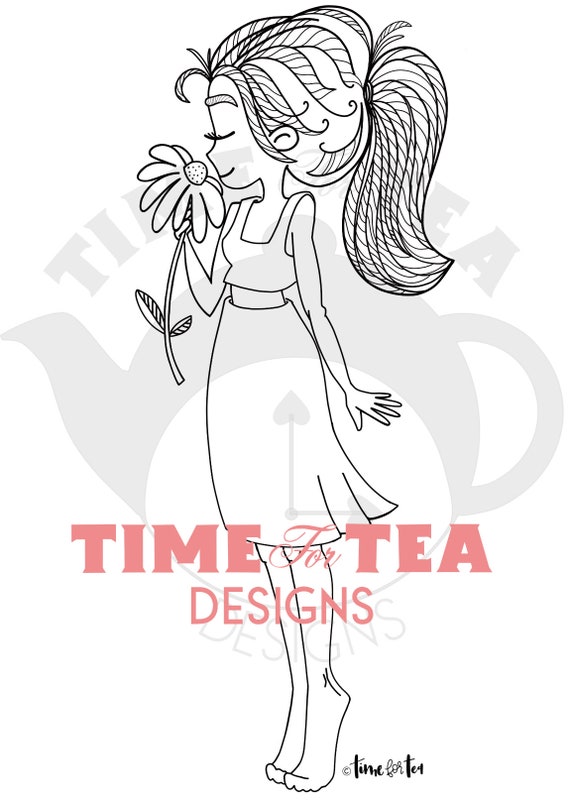
Abi and pony


I love the way this little horsey is drawn, it's a great style and makes me happy.

I printed the image onto Mondi Color Copy 250GSM using my Brother Printer, I then coloured the image up using Copic Markers.

I ran the image through my Gemini machine using a Lawn Fawn Stitched Circle Die, I then used Ranger Distress Ink in Walnut Stain and a Ranger Mini Ink Blending Tool to carefully ink around the edge of the circle.

Patterned papers were from Crate Paper Hopscotch 6x6 Paper Pad, I cut them using Cutterpillar Pro and inked all the edges using the Walnut Stain ink. I used my EK Success Cutterbee scissors to create banners out of some of the leftover pieces. I used the edge of my scissors to rough up all the edges before I inked them.

I adhered all the layers using Scotch ATG and Tombow Mono Multi on all the smaller pieces.

I then added all the layers to a Twiddleybitz Card Base using the ATG then added Nuvo Crystal Drops in Antique Rose and Bubblegum Blush.

Products Used On This Card

Tim Holtz Ranger Distress Ink - Walnut Stain
Scotch 3M ATG
Tombow Mono Multi Liquid Adhesive
Nuvo Crystal Drops - Antique Rose and Bubblegum Blush
Ranger Mini Ink Blending Tool
Lawn Fawn - Stitched Circle Dies
Cutterpillar Pro
Crafter's Companion - Gemini
EK Success - Cutterbee Scissors
Twiddleybitz Cardbase
Copic Markers
Mondi Color Copy 250GSM


I hope you have enjoyed my post today, if you have any questions feel free to send me a message or contact me via facebook (all links can be found below).


Thanks for stopping by, Deni

You can find my cards for sale here
https://www.facebook.com/angelhandmadepapercraft

My You Tube Here
https://www.youtube.com/user/Denielle1983/

My Blogs Here
Angel Handmade Papercraft http://angelhandmadepapercraft.blogspot.com.au/

Auzz Trinklets N Crafts http://auzztrinkletsnkrafts.blogspot.com.au/

Whimsy Stamps https://whimsystamps.blogspot.com.au/

Friday, 18 May 2018

Whimsy Stamps Challenge May 2018

Good Morning Everyone,

I'm a little late in posting but wanted to share with you guys the card I created for the May 2018 Challenge over at Whimsy Stamps. You can check out the current challenge here and the shop here.

I have used a rubber stamp this month - Penguin Bride and Groom, this stamp just drew me in and i've been hanging to use it :-) At the time of this posting, the stamp is also on sale so jump on it quick.. you need it..

Penguin Bride and Groom 

I stamped the image using Memento Tuxedo Black onto Mondi Color Copy 250GSM, I then coloured the image up using Copic Markers, I don't have a list of them today as I was in my own little world colouring this one up and had put them away before I wrote them down. I ran the image through my Crafter's Companion Gemini using a My Favorite Things Stitched Circle Die.

The patterned papers I was using came from a 6x6 Paper Pad Called Love Notes from Crate Paper. I actually use this paper pad a lot and it's almost finished, and this is why when I buy a new paper pad I try to purchase more than one lol.

I cut the patterned paper layer using Cutterpillar Pro, I cut the banner from the same patterned paper using My Favorite Things Stitched Fishtail Flags Stax die which I ran through my Crafter's Companion Gemini. I adhered the flag off centre onto the first paper sheet I cut then trimmed the excess from the top using EK Success Cutterbee Scissors. I adhered using Scotch ATG.

I grabbed a doily from my stash, not sure of brands I have had them for a very long time, and adhered that over the tops of the banner and completely centre. I had a strip of the arrow paper inside my paper pad (I normally pop all the leftovers back into the paper pad never know when you may need something to finish a card off) which I adhered to the centre of the doily.

Next I grabbed the image I had already die cut and used some Tombow Mono Multi Liquid Adhesive to adhere it down to the doily and the strip.

Lastly I found a page in my paper pad with cut sentiments on it so I carefully used my EK Success Cutterbee scissors and fussy cut the "Remember This" sentiment and the "You Make My Heart Sing" Sentiment. I popped the larger sentiment onto some Scotch 3M Foam Mounting Tape and adhered it to the left hand side of my image. The smaller sentiment I just used some of the Tombow Mono Multi Liquid Adhesive to adhere it. I used my Tonic Tim Holts Guillotine to do the cutting of the smaller pieces. I normally switch between my Guillotine and my Cutterpillar Pro depending on what I'm doing.

Once everything was done I applied Scotch ATG to the back and adhered it to a Twiddleybitz Pre-Made card base.


Products Used On This Card

EK Success Cutterbee Scissors
Tombow Mono Multi Liquid Adhesive
Scotch 3m ATG
Scotch 3M Foam Mounting Tape
My Favorite Things Stitched Fishtail Flags Stax
My Favorite Things Stitched Circles
Crate Paper - Love Notes 6x6
Doily - Stash
Twiddleybitz Cardbase
Tim Holtz Tonic Guillotine
Crafter's Companion - Gemini
Cutterpillar Pro


I hope you have enjoyed my post today, if you have any questions feel free to send me a message or contact me via facebook (all links can be found below).


Thanks for stopping by, Deni

You can find my cards for sale here
https://www.facebook.com/angelhandmadepapercraft

My You Tube Here
https://www.youtube.com/user/Denielle1983/

My Blogs Here
Angel Handmade Papercraft http://angelhandmadepapercraft.blogspot.com.au/

Auzz Trinklets N Crafts http://auzztrinkletsnkrafts.blogspot.com.au/

Whimsy Stamps https://whimsystamps.blogspot.com.au/

Wednesday, 6 September 2017

Club La La Land Crafts August 2017

Hope everyone has had an excellent day, tonight I have coloured up an image using Club La La Land Crafts August 2017 Kit.

I even managed a video edit and uploaded all in one night. I think that's a first for me bahah.

Here is the kit, isn't it gorgeous! 


This months Kit is so adorable I couldn't wait to start colouring! I cut the Stamps up and popped them into my Misti Stamoing Tool with stamp mat removed (the mat Cannot be used with red/grey rubber stamps as they are too thick). I have used Mondi Color Copy 250GSM and inked the stamps up using Memento Tuxedo Black. Memento is generally my go to ink when it comes to Copics.


Watch the You Tube Video here


 I coloured the Mermaid princess using Copic Markers which will be listed below. I added details to the images using Uniball Signo white angelic gel pen and lastly added glitter to the crown using Wink Of Stella.

Here is a link to the video of the colouring.


I had a great time colouring these images and can't wait to colour the rest and put them onto cards.

This is actually the first colouring I did.. I wasn't paying attention and was colouring off camera the whole time lol 


EDIT 
I have now added these images onto cards so here is the finished products :-)


I hope you have enjoyed my post today, if you have any questions feel free to send me a message or contact me via facebook (all links can be found below).

Products Used On This Card (Affiliate Links used where possible)


Thanks for stopping by, Deni

CAMERA SET UP
Blue Yeti Microphone
Sony Handycam HDR CX4-05
Tripod – Manfrotto MKCompactaCN-BK


S O C I A L MEDIA
B L O G : http://angelhandmadepapercraft.blogspot.com.au/
I N S T A G R A M : http://instagram.com/angelhandmadepapercraft
F A C E B O O K: http://www.facebook.com/angelhandmadepapercraft
PINTEREST: https://www.pinterest.com.au/angelhandmadepapercraft

***All supply links that are not seen here are on my blog post so please refer back to my personal blog.***

I am an Ambassador for Copic Marker Australia & NZ

BLOG
ANGEL HANDMADE PAPERCRAFT: http://angelhandmadepapercraft.blogspot.com.au/