Monday 30 December 2019

Whimsy Stamps - Snowman Sweeper

Hi Everyone,

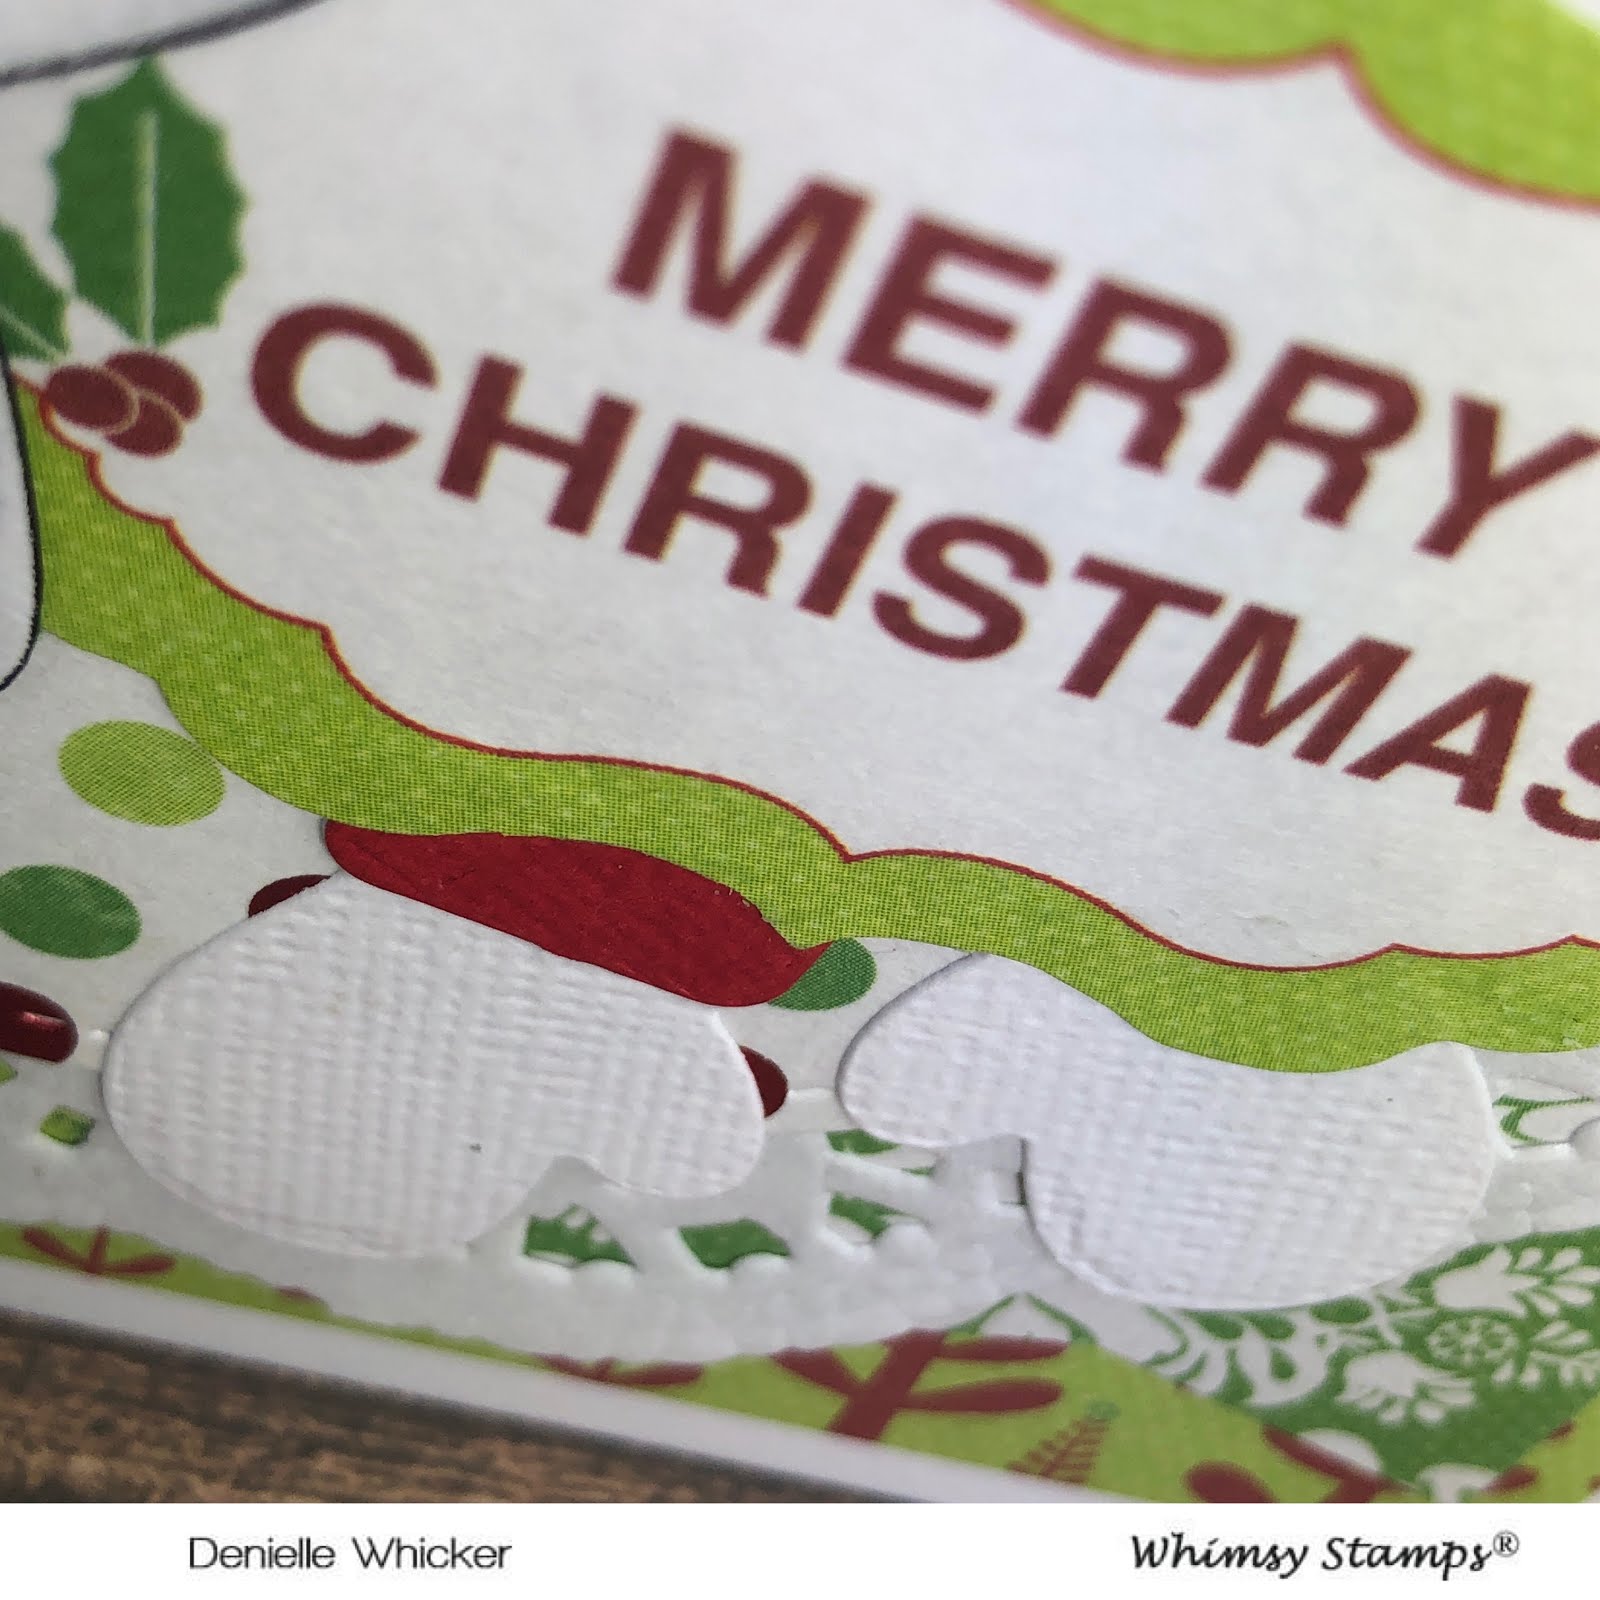
Today I am sharing with you a card I have made for Whimsy Stamps using Snowman Sweeper.


I am really enjoying making Christmas Cards this year although as you all know I have taken a few weeks away from my craft room whilst I am recuperating from my Ankle Reconstruction and Ligament Repair.


I have had a really rough go lately and am still not completely back on track whilst trying to manage my pain, being back at work and still trying to run my household.

The image I have used today is a Digital Stamp so I have printed him out using my Brother Laser Printer onto X-Press It Blending Card and coloured him up using Copic Markers.

After all the Copic Colouring I used my Uni-ball white gel pens in the fine and the broad tips to add details to my image.


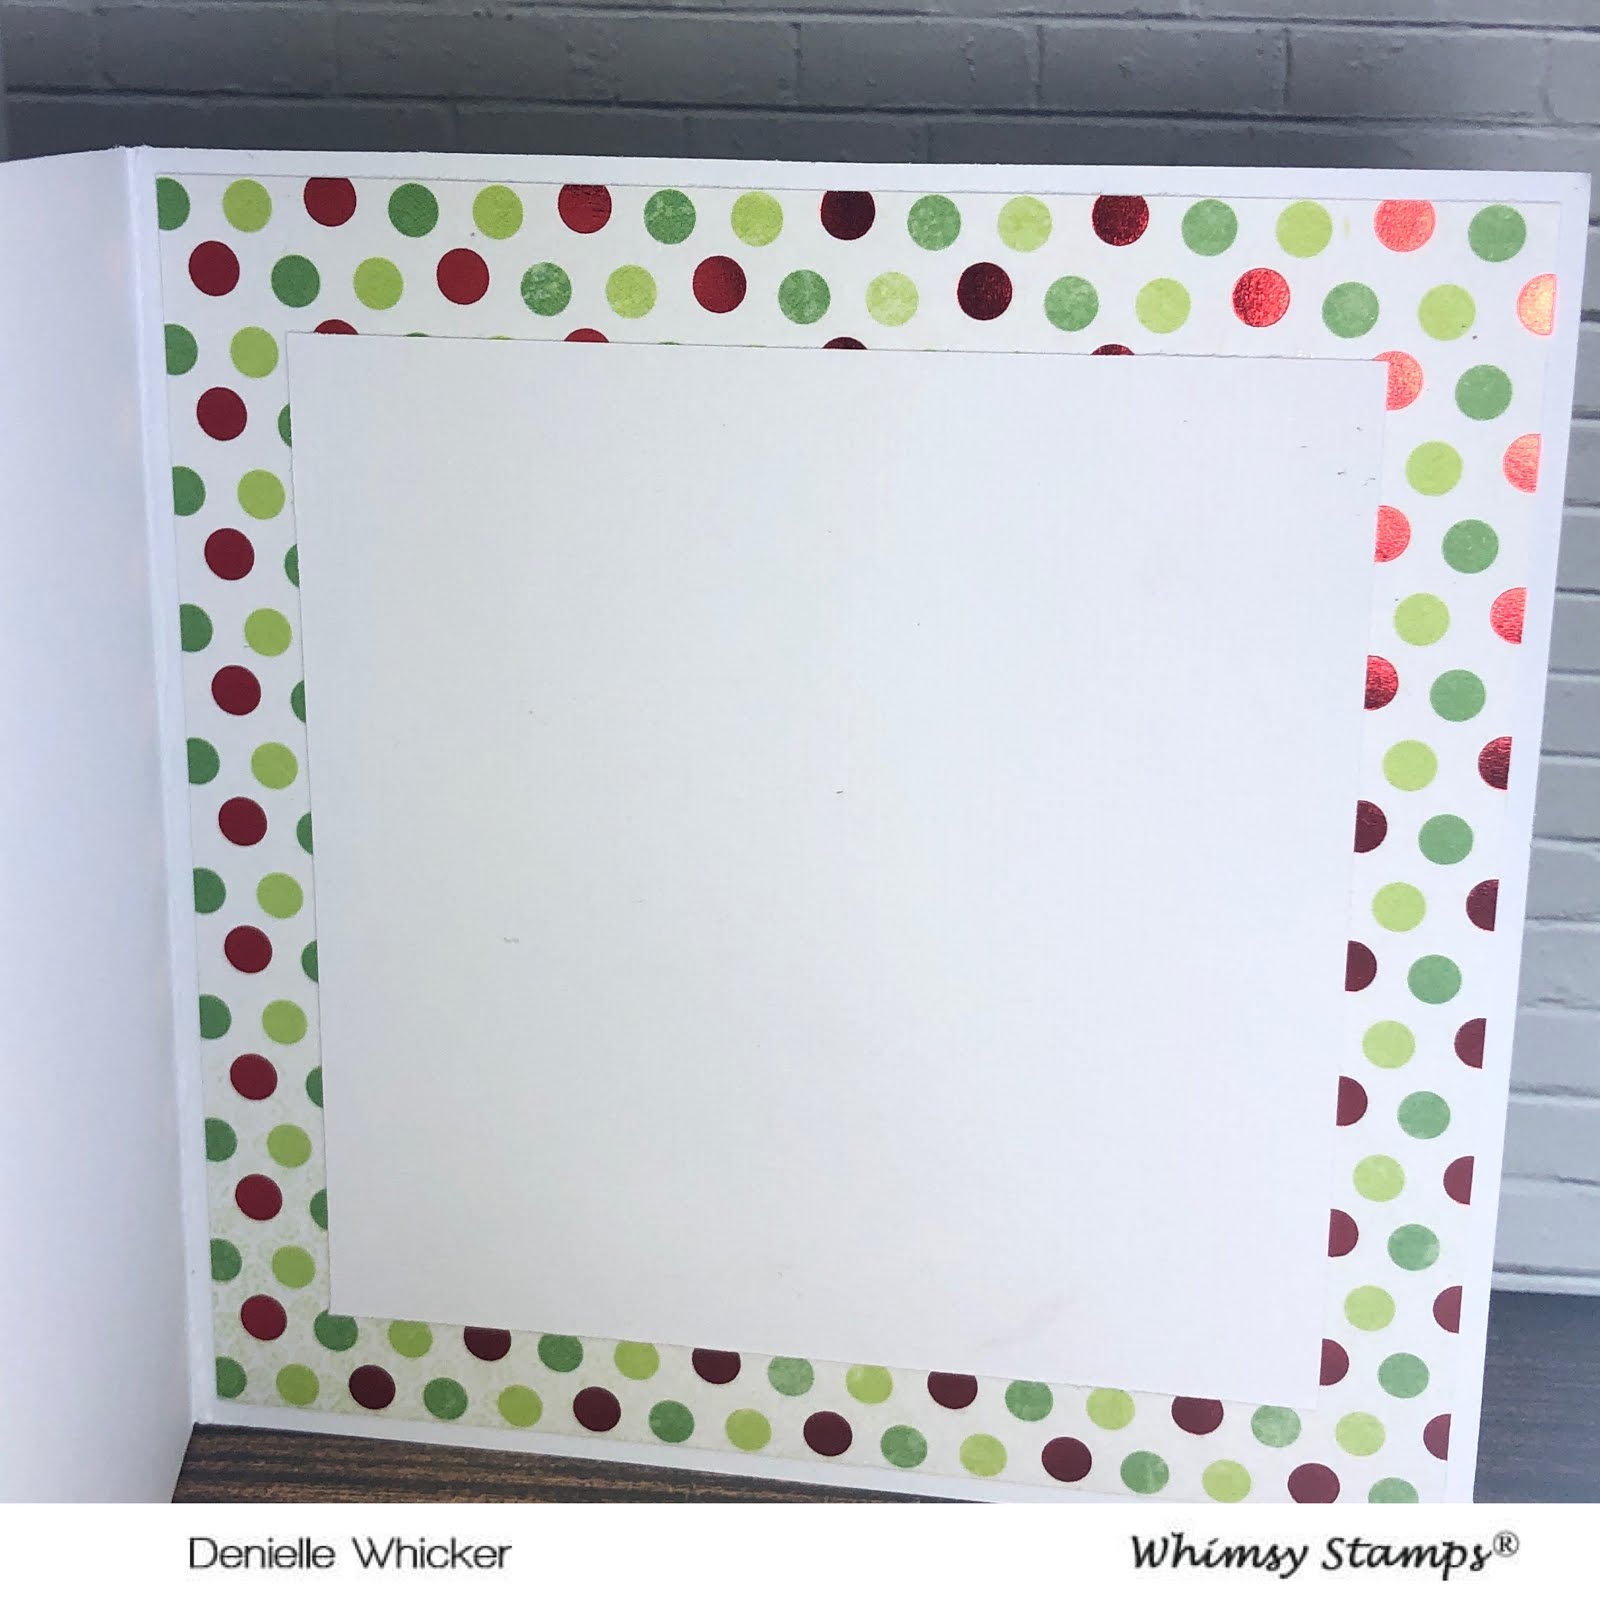
The patterned papers on my card are from Kaisercraft Silly Season 6.5" Paper pad, I love the more traditional green and reds in this paper pad and they matched the way I coloured this image up perfectly.

I cut all my layers down using my Cutterpillar Pro trimmer, this is my go to trimmer. It is large and takes alot of room up on my desk but it is my favourite trimmer of all those I have tried.

I ran the image through my Sizzix Big Shot using a Lawn Fawn Stitched Circles Die.


I used Helmar Acid Free Adhesive to adhere all my layers down and I also used some Helmar Scrap Dots.

I also added a doily from my stash in-between the layers.


Once my card was complete I added Tonic Studios Nuvo Crystal Drops in Oyster Grey and Duck Egg Blue, this finished my card off :-)


I hope you have enjoyed my post today, if you have any questions feel free to send me a message or contact me via facebook (all links can be found below).

Watch the You Tube Video Here


Products Used On My Card (Affiliate Links Used Where Possible)


Copic Markers Used

C1, C2, C5, 0 Colorless Blender
G05, G05, G09
R00
E53, E55, E57
C6, C10
E44, E49
R46, R56, R59

Thanks for stopping by, Deni

CAMERA SET UP - FOR YOU TUBE VIDEOS ONLY
Blue Yeti Microphone
Sony Handycam HDR CX4-05
Tripod – Manfrotto MKCompactaCN-BK

S O C I A L MEDIA 
B L O G : https://ldli.co/e/3xky6x
I N S T A G R A M : https://ldli.co/e/5dn20x
YOU TUBE: https://ldli.co/e/ej5l90 
F A C E B O O K: https://ldli.co/e/mjxn2r
PINTEREST: https://ldli.co/e/2l9zom


I was a 2018 Ambassador for Copic Marker Australia and NZ


Whimsy Stamps - Goodness Snake

Hi Everyone,

Today I am using For Goodness SnakeFor Goodness Snakes from Whimsy Stamps, this image and the matching sentiments are currently available as a Freebie in the Whimsy Stamps shop, they are only available for a limited time so make sure you download them now ;-) (The links are in the picture links at the bottom of this blog post)


I printed the image out onto X-Press It Blending Cardstock using my Brother Laser Printer, I then coloured him up using Copic Markers.


I ran the image through my Sizzix Big Shot using a Lawn Fawn Stitched Circle Die.

I used an old retired die from Kaisercraft called Decorative Trees, I ran them through twice, the second time with just the bottom of the die using brown card stock which I trimmed down to fit the bottom of the trees,

I used patterned papers from Kaisercraft Silly Season 6.5" Paper Pad, putting them down using my Cutterpillar Pro.


I adhered all the layers to a Couture Creations Card Base using Helmar Acid Free liquid Adhesive.

I also added some Wink Of Stella to the image to finish it off.

I hope you have enjoyed my post today, if you have any questions feel free to send me a message or contact me via facebook (all links can be found below).

Watch the You Tube Video Here


Products Used On My Card (Affiliate Links Used Where Possible)


Copic Markers Used

YR21, YR24, YR27
YG07, YG17
C1, C2, C5, 0 Colorless Blender
R46, R56, R59
YG03, YG06, YG09
G05, G09

Thanks for stopping by, Deni

CAMERA SET UP - FOR YOU TUBE VIDEOS ONLY
Blue Yeti Microphone
Sony Handycam HDR CX4-05
Tripod – Manfrotto MKCompactaCN-BK

S O C I A L MEDIA 
B L O G : https://ldli.co/e/3xky6x
I N S T A G R A M : https://ldli.co/e/5dn20x
YOU TUBE: https://ldli.co/e/ej5l90 
F A C E B O O K: https://ldli.co/e/mjxn2r
PINTEREST: https://ldli.co/e/2l9zom


I was a 2018 Ambassador for Copic Marker Australia and NZ


Thursday 26 December 2019

Whimsy Stamps - Winter Friends

Merry Christmas All!

Or Happy Boxing Day? It is Boxing Day here as I am writing this post..

I am finally starting to get back into the craft room, and boy have I missed it :-)

Today I am working with Whimsy Stamps, I have created a card using one of the Digital Images from the Sylvia Zet Collection, this is Winter Friends.

I printed the image onto X-Press It Blending Cardstock using my Brother Laser Printer, I love my laser printer because it is always Copic friendly, no bleeding :-)


I added extra details to the image using a white Uni-Ball Signo Gel Pen and Wink Of Stella in Clear.


For my patterned papers I used Kaisercraft Silly Season 6.5" Pad, I also added a doily from my stash.


The sentiments are also from the same paper pad, there is 2 sheets of Christmas words and I have been cutting them down to use them as sentiments on my cards. I just thought they would be cute to finish the card off.


I adhered all the layers to a Couture Creations Card Base using Helmar Acid Free liquid adhesive - this is my go to liquid glue.

I decorated the inside of the cards using the same patterned papers and added a rectangle of white card stock to finish it off.


I hope you have enjoyed my post today, if you have any questions feel free to send me a message or contact me via facebook (all links can be found below).

Watch the You Tube Video Here


Products Used On My Card (Affiliate Links Used Where Possible)


Copic Markers Used

B95, B97, B99
YR02, YR04
R81, R83, R85
R17, R27, R37
E31, E33, E35
G14, G16, G19
E23, E25, E27, E29
E000, E00, E21, E11, E04, R20
W0, W1, W3
C6, C10
T1, T4, 0 Colorless Blender

Thanks for stopping by, Deni

CAMERA SET UP - FOR YOU TUBE VIDEOS ONLY
Blue Yeti Microphone
Sony Handycam HDR CX4-05
Tripod – Manfrotto MKCompactaCN-BK

S O C I A L MEDIA 
B L O G : https://ldli.co/e/3xky6x
I N S T A G R A M : https://ldli.co/e/5dn20x
YOU TUBE: https://ldli.co/e/ej5l90 
F A C E B O O K: https://ldli.co/e/mjxn2r
PINTEREST: https://ldli.co/e/2l9zom


I was a 2018 Ambassador for Copic Marker Australia and NZ


Friday 20 December 2019

Helmar - Christmas Baubles

Good Morning Everyone,

Today I would like to share a project with you I made for Helmar, I used some of their Acid Free Liquid Adhesive to put all my card together.


I stamped out Ellie's Bauble from Whimsy Stamps onto X-Press It Blending Card Stock using Memento Tuxedo Black. I then coloured him up using Copic Markers.


I then started putting my card together by trimming some layers of patterned papers from Kaisercraft First Noel 6.5" Paper Pad I then cut mat layers for those using American Crafts Cardstock.

Using some of the pop outs from the paper pad, the Merry Christmas, and the striped arrow I trimmed them down using EK Success Cutterbee Scissors. The Merry and Bright sentiment is from one of the patterned paper sheets, I trimmed it out using my Scissors.


I cut two Christmas Trees from Kaisercraft Decorative Die- Christmas Trees using the mat layers I had to cut to save paper - I cut them from the centres as they would be covered up with all the layers anyway.


I punched a Gold Star using Home & Co A4 Metallic Paper and my EK Success Star Confetti punch and adhered it to the top of the Black tree.


I ran the image through my Sizzix Big Shot using Spellbinder's Nestabilities Labels Twenty-Two.


The Nanna name I printed from MS Word onto some white card stock then went over it with Ranger Emboss it pen and added Ranger Princess Gold embossing powder which I melted using my heat tool.


I adhered all my layers together then added them to a Couture Creations card base using Helmar Acid Free adhesive.


I love the way this card turned out.


I hope you have enjoyed my post today, if you have any questions feel free to send me a message or contact me via facebook (all links can be found below).

Watch the You Tube Video Here


Products Used On My Card (Affiliate Links Used Where Possible)


Copic Markers Used

N1, N3, N5
N5, N7
N1, N3, 0
R17, R37, R39
BG02

Thanks for stopping by, Deni

CAMERA SET UP - FOR YOU TUBE VIDEOS ONLY
Blue Yeti Microphone
Sony Handycam HDR CX4-05
Tripod – Manfrotto MKCompactaCN-BK

S O C I A L MEDIA 
B L O G : https://ldli.co/e/3xky6x
I N S T A G R A M : https://ldli.co/e/5dn20x
YOU TUBE: https://ldli.co/e/ej5l90 
F A C E B O O K: https://ldli.co/e/mjxn2r
PINTEREST: https://ldli.co/e/2l9zom


I was a 2018 Ambassador for Copic Marker Australia and NZ


Wednesday 18 December 2019

Art Stash Australia - Dec 2019 Unboxing - Hand Lettering

Hi Everyone,

Sorry I have been away I have barely been into my craft room since I had my surgery 2 weeks ago so I do apologise.

I was very honoured to be invited to try out the "Art Stash" Box, I have received the December Box which is all about Hand Lettering. There is lots of awesome products in this box that I am really excited to try out.


I have done an unboxing video for you, links for this video are below for you to watch, I also tried to link up the products individually so you can see the value for money in ordering these boxes.

I may not have been able to link up all the products however I have done what I can.

If you are interested in Subscribing to these boxes, you can use my code "DENI" on check out to receive 15% Off. Every little bit counts :-) You can purchase each box as you go or you can do a subscription, this is great for those of you who have not had one before.


I hope you have enjoyed my post today, if you have any questions feel free to send me a message or contact me via facebook (all links can be found below).

Watch the You Tube Video Here


Products Used On My Card (Affiliate Links Used Where Possible)


Thanks for stopping by, Deni

CAMERA SET UP - FOR YOU TUBE VIDEOS ONLY
Blue Yeti Microphone
Sony Handycam HDR CX4-05
Tripod – Manfrotto MKCompactaCN-BK

S O C I A L MEDIA 
B L O G : https://ldli.co/e/3xky6x
I N S T A G R A M : https://ldli.co/e/5dn20x
YOU TUBE: https://ldli.co/e/ej5l90 
F A C E B O O K: https://ldli.co/e/mjxn2r
PINTEREST: https://ldli.co/e/2l9zom


I was a 2018 Ambassador for Copic Marker Australia and NZ


Saturday 7 December 2019

Whimsy Stamps PC Frosty

Hi Everyone,

I am back and super excited to be creating again!


Some of you may know I have been away after having ankle surgery done last week, it has been a long road to recovery but I determined to be back on my feet.

I printed the image out onto X-Press It Blending Cardstock using my Brother Laser Printer. I then moved on to colouring the image using Copic Markers.

 
Using a white gel pen I added some details to the little snowman to finish him off.

I used patterned papers from Kaisercraft Silly Season 6.5" Paper Pad, I also used one of the punch outs.


I used Memory Box Precious Mittens die and ran it through my Big Shot twice, first with American Crafts white card and then again using red card.


I used some leftover stars from other projects in the right hand corner to finish my card off. 


I used leftover patterned papers from the front to decorate the inside of the card. 


I used Helmar Acid Free Adhesive to adhere all my layers to my card.


My card is now finished :-)


I hope you have enjoyed my post today, if you have any questions feel free to send me a message or contact me via facebook (all links can be found below).

Watch the You Tube Video Here


Products Used On My Card (Affiliate Links Used Where Possible)


Copic Markers Used

0 Colorless Blender, N1, N3, N4
E000, E00, E21, E11, E04, R20
YR02, YR04, E97
R17, R37, R39
N6, N8, N10
E37, E39

Thanks for stopping by, Deni

CAMERA SET UP - FOR YOU TUBE VIDEOS ONLY
Blue Yeti Microphone
Sony Handycam HDR CX4-05
Tripod – Manfrotto MKCompactaCN-BK

S O C I A L MEDIA 
B L O G : https://ldli.co/e/3xky6x
I N S T A G R A M : https://ldli.co/e/5dn20x
YOU TUBE: https://ldli.co/e/ej5l90 
F A C E B O O K: https://ldli.co/e/mjxn2r
PINTEREST: https://ldli.co/e/2l9zom


I was a 2018 Ambassador for Copic Marker Australia and NZ


Wednesday 27 November 2019

Whimsy Stamp - Snow Much Fun To Be Had

Hi All,

Today I am sharing with you a card I made for Whimsy Stamps using Penguin Snow Fun, this image was part of the November 2019 Digital Release.


I printed the image onto X-Press It Blending Cardstock using X-Press It Blending Cardstock, I then coloured them up using Copic Markers.


Once I had the image coloured up I found some papers to match, I decided to go with the Kaisercraft Silly Season 6.5" Paper Pad, I love all the beautiful Christmas colours and patterns.


I don't have a lot of Christmas dies in my stash so I decided to go through all my other companies to see what I could find. I ended up cutting a few things - I actually ran them all through my Sizzix Big Shot at the same time. I used Memory Box Precious Mittens (these actually didn't end up making it onto my card), I also used a few dies from La La Land Crafts - Candy Canes, Build a Christmas Tree and North Pole. I just used scraps from my bucket that I keep under my desk, no new plain card stocks were harmed in the making of this card lol.


Once I had all my die cuts I started layering everything up.

I decided I want to cut my image out into a circle shape, because the image was so big it was not all going to fit in my circle and the next size up would be too big and look silly, so I decided to use my Mechanical Pencil and trace the die then fussy cut any areas that would be cut off, I could then slide the die underneath this area and I got a perfect cut.


I cut a mat layer from one of the patterned paper sheets and I also cut a mat for this layer using some Silver Glitter card, now to not waste all this beautiful glitter I decided to run through Lawn Fawn Stitched Snowflakes through using that same sheet, I just made sure that I did not get too close to the edge because I needed it all covered up by the patterned paper.


I now used Helmar Acid Free Adhesive to start putting all my layers together, and finally I cut a sentiment from one of the patterned paper sheets and adhered it using some Foam Tape.


I decorated the inside of the card off screen and my card was complete. You can watch my process video my clicking the You Tube Box link below.


I hope you have enjoyed my post today, if you have any questions feel free to send me a message or contact me via facebook (all links can be found below).

Watch the You Tube Video Here


Products Used On My Card (Affiliate Links Used Where Possible)


Copic Markers Used

N1, N3, 0 Colorless Blender
N6, N8, N10
W1, W3, W5, R20
YR01, YR04, E97
R17, R37, R39
YG05, YG09
BG02

Thanks for stopping by, Deni

CAMERA SET UP - FOR YOU TUBE VIDEOS ONLY
Blue Yeti Microphone
Sony Handycam HDR CX4-05
Tripod – Manfrotto MKCompactaCN-BK

S O C I A L MEDIA 
B L O G : https://ldli.co/e/3xky6x
I N S T A G R A M : https://ldli.co/e/5dn20x
YOU TUBE: https://ldli.co/e/ej5l90 
F A C E B O O K: https://ldli.co/e/mjxn2r
PINTEREST: https://ldli.co/e/2l9zom


I was a 2018 Ambassador for Copic Marker Australia and NZ