Showing posts with label Paper Smooches. Show all posts

Tuesday, 20 August 2019

Art Impressions - Girlfriends Celebrate with Giant Cake

I've been a busy little bee pumping out cards lately, which is fantastic, I love these kind of crafty weeks.

For my card today I am using Art Impressions Girlfriends Series - Giant Cake, I love this stamp - I remember when Amy Rysavy used it in one of her videos and I had to have it - then I hoarded it til now hahah.


I stamped the image using my Misti Stamping Tool (with the black foam mat removed) and some Memento Tuxedo Black ink onto X-Press It Blending Card - this is my go to card stock for Copic Markers.

I coloured the image in then cut it down to size using my Cutterpillar Pro.

The patterned papers are from Hampton Art Celebrate 6x6 Paper Pad I cut them down to size and used adhered them all to a Couture Creations Card Base using Scotch ATG.

I added a doily on top then layered the image over that just using the ATG again. Once I was done I added some Wink Of Stella to the candles and my card was complete.


I hope you have enjoyed my post today, if you have any questions feel free to send me a message or contact me via facebook (all links can be found below).

Watch the You Tube Video Here

no video for this one sorry

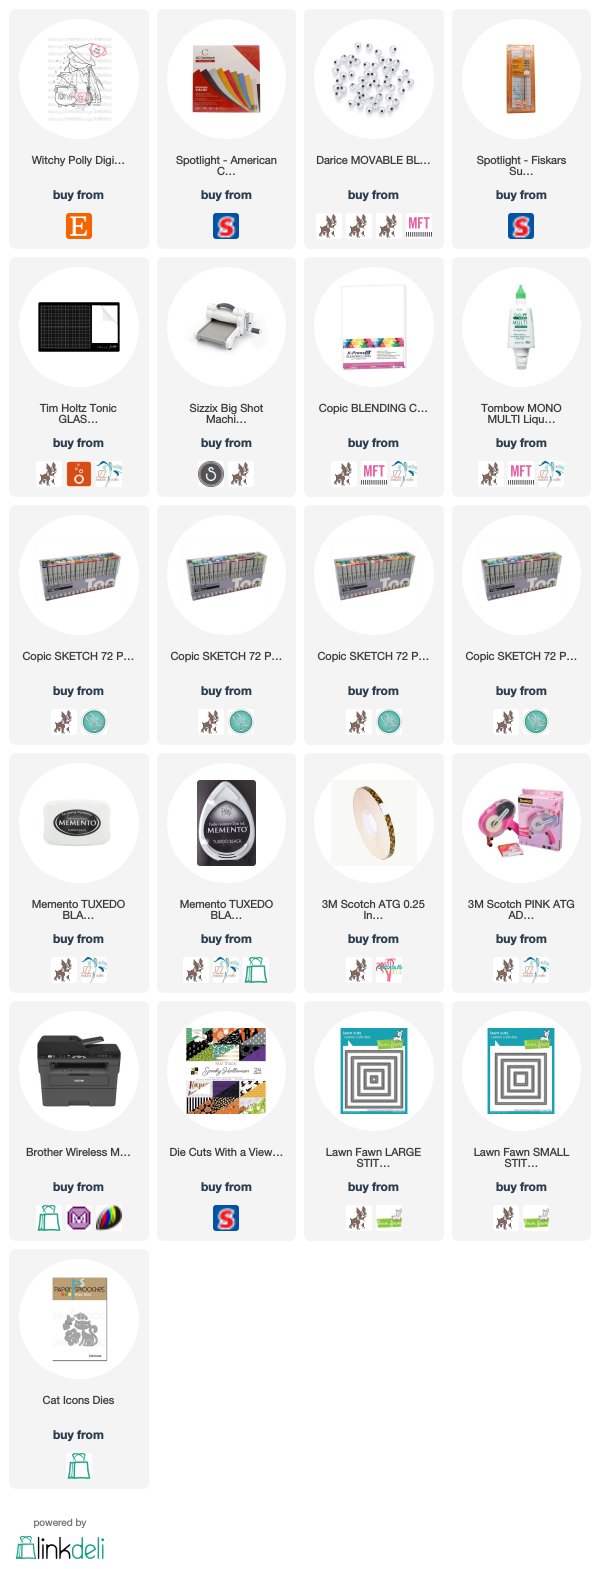
Products Used On My Card (Affiliate Links Used Where Possible)


Copic Markers Used

E000, E00, E21, E11, E04, R20
T6, T8, T10
B93, B95, B97
Y11, Y13
Y13, Y38
V04, V06, V09
R81, R83, R85
T2, T4, 0
E74, E77

Thanks for stopping by, Deni

CAMERA SET UP - FOR YOU TUBE VIDEOS ONLY
Blue Yeti Microphone
Sony Handycam HDR CX4-05
Tripod – Manfrotto MKCompactaCN-BK

S O C I A L MEDIA 
B L O G : http://angelhandmadepapercraft.blogspot.com.au/
I N S T A G R A M : http://instagram.com/angelhandmadepapercraft
YOU TUBE: http://www.youtube.com/c/AngelHandmadePapercraft
F A C E B O O K: http://www.facebook.com/angelhandmadepapercraft
PINTEREST: https://www.pinterest.com.au/angelhandmadepapercraft


I was a 2018 Ambassador for Copic Marker Australia and NZ


Monday, 1 October 2018

Witchy Polly - Time For Tea Designs

A new month begins, that means October is here and Halloween is not far away. I am not a Halloween Celebrater but absolutely love making Halloween Cards.


Watch The You Tube Video Here


It is also a new Challenge Month and the theme is ANYTHING GOES, as long as you have used an image from Time For Tea Designs. Pop over to the Facebook page or you can enter on the blog. Don't forget to share with us in the Community Page all your awesome creations.


I used a Stamp called Witchy Polly from Time For Tea Designs, she is super sweet and spooky.


I printed the image onto X-Press It Blending Cardstock using my Brother Laser Printer, I had so much fun colouring this image up with Copic Markers that I coloured a second one at the same time ready for another card this month.


I hope you have enjoyed my post today, if you have any questions feel free to send me a message or contact me via facebook (all links can be found below).


Products Used On My Card (Affiliate Links Used Where Possible)

**Witchy Polly link is currently broken, I am in process of having it fixed, please use this link to purchase the image https://www.etsy.com/au/listing/161361505/witchy-polly-digital-stamp?ga_search_query=witchy&ref=shop_items_search_2


Copic Markers Used

E000, E00, E21, E11, E04, R20
YR20, YR21, YR24, YR27, E09
E30, E35, E37, E39
V12, V15, V17
W00, W1, W4
B0000, N0
C6, C8, C10

Thanks for stopping by, Deni

You can find my cards for sale here
https://www.facebook.com/angelhandmadepapercraft

My You Tube Here
https://www.youtube.com/c/AngelHandmadePapercraft/

Instagram Here
http://instagram/angelhandmadepapercraft

Pinterest Here
https://www.pinterest.com.au/DeniAngelHandmade/

Saturday, 28 April 2018

Whimsy Stamps - Make A Wish

Hey all

Today I am inspiring you all with a card created for Whimsy Stamps Using Make A Wish. I coloured the image up using Copic Markers.


Make a Wish


Patterned papers are from a 6x6 Paper Pad from Hampton Art- Ki Memories (Janet Dunn) called Celebrate. Plain card stock is from Kmart or American Crafts. Everything was cut on my Cutterpillar Pro and adhered using Scotch ATG.

I printed the images onto Mondi Color Copy 250GSM using my Brother Laser Printer.


I also cut some stars from the same plain card stock using Paper Smooches Teeny Stars Dies. I then adhered these to my card using Tombow Mono Multi Liquid Adhesive.

All the layers were adhered using Scotch ATG, I then popped all the layers onto a Twiddleybitz Card Base.

Lastly I added some Nuvo Crystal Drops in Ebony Black. I then left these overnight to dry (I have a habit of messing them up while they are still wet lol).

You Tube Video of the Project being put together can be watched here.

I hope you have enjoyed my post today, if you have any questions feel free to send me a message or contact me via facebook (all links can be found below).

Products Used On This Card

Scotch 3M ATG
Twiddleybitz Card Base
Nuvo Crystal Drops- Ebony Black
Mondi Color Copy 250 GSM
Hampton Art - Ki Memories (Janet Dunn) - Celebrate Paper Pad
Cutterpillar Pro
Scotch ATG
American Crafts Cardstock
Paper Smooches Wise Dies - Teeny Stars
Copic Markers


Thanks for stopping by, Deni

You can find my cards for sale here
https://www.facebook.com/angelhandmadepapercraft

My You Tube Here
https://www.youtube.com/user/Denielle1983/

My Blogs Here
Angel Handmade Papercraft http://angelhandmadepapercraft.blogspot.com.au/

Auzz Trinklets N Crafts http://auzztrinkletsnkrafts.blogspot.com.au/

Whimsy Stamps https://whimsystamps.blogspot.com.au/

Saturday, 30 December 2017

Whimsy Stamps Week 5 - Penguin Three Kings

Hello and welcome to my blog,

A few new followers this week which is fantastic! Thank you and i'm so happy to have you here.

Today I am sharing a Whimsy Stamps - Digital Design Team card. I have used a Digital Stamp called Penguin Three Kings which is available on the Whimsy Stamps Website - If you click the name of the stamp set above it will take you directly to the item.

I really enjoyed colouring up this image, I don't think i've ever used so much "Gold" colouring on a card before, I really love it.


I printed the image on Mondi Color Copy 250GSM using my Brother Laser Printer which is Copic friendly. I coloured the image up using Copic Markers which will be listed below.

I decided not to add a sentiment to my card today as I thought it looked finished enough already without overdoing it, and the image is quite large on the card.


Copic Markers Used

C6, C8 C10
N1, N3, 0, R20
R24, R46
R56, R59
G03, G07, G28
YR21, YR24, YR27, E99
B04, B06
YR02, YR04, YR09

Products Used On This Card

Uni-ball Signo White Angelic Gel Pen
Nuvo Crystal Drops - Morning Dew & Bright Gold
Scotch ATG
Tombow Mono Multi Liquid Adhesive
American Crafts Cardstock
Kaisercraft - Cherry 12x12cm
Twiddeybitz Card Base
Lawn Fawn - Stitched Rectangles
Paper Smooches - Merry Christmas Die (inside card)
American Crafts - Happy Hollyday 6x6inch pad

I hope you have enjoyed my post today, if you have any questions feel free to send me a message or contact me via facebook (all links can be found below).


Thanks for stopping by, Deni

You Can find my cards for sale here https://www.facebook.com/angelhandmadepapercraft
My You Tube Here https://www.youtube.com/user/Denielle1983
My Blogs

http://angelhandmadepapercraft.blogspot.com.au/

http://auzztrinkletsnkrafts.blogspot.com.au/

Thursday, 4 December 2014

Make It A Card Thursday - Auzz Trinklets N Krafts

Hi Everyone,

Today I am here with you with my Make It With Scraps post for Auzz Trinklets N Krafts.

For this card I have used an image from Digi Stamp Boutique called Ballerina Isla.

I have coloured the image using Copic Markers.


Products Used On This Card
I have used the Heart Banner Die from La La Land Crafts - available for order from Auzz Trinklets N Krafts Online Store.

Papers are from Kaisercraft Hey Birdie Collection

Sentiment is from Paper Smooches Sentiment Sampler

Sentiment is stamped using My Favorite Things Hybrid Ink Black Licorice


Copic Markers Used

Sorry I did not keep a list of these on this card


Thanks for stopping by,

Glitter Text @ Glitterfy.com

Tuesday, 2 December 2014

Make It A Card Tuesday - Auzz Trinklets N Krafts

Hi Everyone,

I am here today with Make it a card Tuesday for Auzz Trinklets N Krafts.


Today I have made a card using an image from Some Odd Girl Called Puppy Tobie.


I have used papers from Kaisercrafts Little Toot Collection. The sentiment is from Paper Smooches Sentiment Sampler which Auzz Trinklets may be able to order in for you if not in stock.


I have cut the Sentiment using a banner die from My Favorite Things Blueprints 2.


I stamped the sentiment using Versamark Watermark ink and added Wow! Metallic Copper Embossing Powder which I set using my heat gun.


The image was coloured using Copic Markers.


Products used on this card


My Favorite Things Stitched Circle Stax
Paper Smooches Sentiment Sampler
My Favorite Things Die namics Blueprints 2
Impression Obsession Die 156-H
Lawn Fawn Woodgrain Backdrops
Wow! Metallic Copper Embossing Powder
Versamark Watermark Ink
Twiddleybitz Card Base


Copic Markers Used


Skin E000, E00, E21, E11, R20
Hair E33, E35, E37
Jacket W00, W1, W3, W5
Nose & Tongue R20, R21, R22
Eyes E23
Jeans B91, B93, B95, B97
T Shirt B32, B34
Shoes R05, R17

Glitter Text @ Glitterfy.com

Friday, 7 November 2014

Make It With Scraps Friday - Auzz Trinklets N Krafts

Hi Everyone, sorry once again for the late posting today.

Ive been under the weather and also had a job interview today so its been hectic. Life always seems to get in the way of the fun stuff lol.

Anyway, a friend asked me to make him a Frankenstein Christmas Card.. I was so nervous with this one as I had no idea once the image was coloured what to do with it.

I managed to find some leftovers in my stash so I could combine it with my post for today.

The image has been coloured using Copic Markers.


Thanks for stopping by,


Glitter Text @ Glitterfy.com

Friday, 14 February 2014

Fitztown GD Post


Hello :-) GD Deni here stopping by the Fitztown Blog with a nice long post.

Today I have decided to do a quick tutorial on how I make my Christmas Tags. I don't have a you tube channel so I am doing it by pictures, any questions please ask :-)

First I have chosen an image from Fitztown's 2013 Winter Collection. He is one of the snowmen from Winter 1. You can find them here 

Ok, firstly I have resized my image to approximately 5cm wide, so that he will fit in my tag die. I have then printed 2 (just incase haha) on x-press it blending Cardstock. I purchased this from Forever Markers  (only available from here in Australia).


Please remember to make sure u clean off your craft mat before u start crafting so you don't leave any ink residue or any leftovers from your last project. I use baby wipes, I find they are quick and easy and readily available as I use them to clean my rubber stamps. 

I will be working with Copic Markers today but u can use whatever medium you are comfortable with. 

Next I start laying down my colours, I am working on the candy came first as sometimes red bleeds and I don't want to ruin my whole image if this happens, if I do it first and it bleeds I can start over. 

I have chosen to colour my candy cane using R24, R27, R29. Due to this being a small image there won't be as much blending required as what I would normally be doing. 

So first I lay down my R24 on every second stripe, then I use my R27 to come in from the edges and lay down a bit more colour but leaving a stripe down the middle, I then do the same thing with my R29 but not going to the end of the R27, so some R27 is still showing. 


Now I normally work light to dark and then work my way back, but due to this being a smaller image I will be skipping the R27 in the blending back and using my R24 to blend the R29-R27 back into the R24. You will notice you will still be left with the stripe down the middle. If you re using a larger image them feel free to use all the colours when blending back to lightest. 
Please leave your markers (or other medium( out as we will be using them again later. 


Candy cane is now complete let's move onto something else :-)

Let's work on his hat. Another red section so I will be using the same colours again, R24, R27, R29.

So same process as before, lay down your base colour (lightest colour) R24. Next start putting in your shadows with R27, come out a little bit as you will need to add darker colour closer to the edge.  (don't quote me on these shadows as I'm not the best at them hehe). Next do the same with your R29, not quite coming out as far as your R27.


Next we are going back in with our R24 (no blending with R27 as it's a small image).


Next we will do his nose, this won't take much as it's so small. I will be using YR04, YR07.


I didn't do any blending at all on the nose, I just layed down the base colour YR04, and did a quick shadow with YR07.

Next I will be doing the scarf I'm thinking a nice blue. B93, B95, B97

I layed down my base colour of B93, added some shadow with B95 and then B97. I then went back with my B93 ( I skipped my middle colour again as it wasn't required on such a small image) and blended them out. 


Next is the buttons, I think I may just use some browns on those :-) E53, E55. 

Firstly lay down base layer of E53, now some shadow with E55, then back to E53 to blend out the E55. I found this lightened the shadows too much so I have had to go back I with my E55 and add the shadows again without blending out this time. 

Next I am just going to add some shadows into the snow. I am going to use c1, c3 and my 0 blender, 
Firstly lay down a small shadow using your c1 then go back and add the c3 in the same places but closer to the edge leaving some c1 showing. 


Next, using your c3 blender, blend your shadows back into the snowman, using a short flicking motion over the top of your c1 and c3 towards the centre of the image. 


I won't be adding any shadows to the hat white areas as I will be covering this with glitter and in such a small area you won't see them. 

Next I am going to turn the image into a tag. 

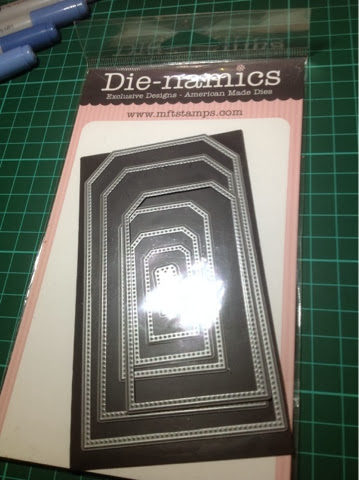
I will be using my MFT Die-namics Pierced Traditional Tag Stax, if u have another tag die use that. If your do not have any tag dies, just cut a rectangle and cut the top corners off. 


I will be using the 3rd largest die for my tags, next place the die over your image, I like to use a small piece of tape to hold the die in place over my image so it doesn't move when I run it through my Cricut Cuttlebug (again if you have a different cutting machine this will work the same)


I have now run the image with the die through my Cuttlebug and popped it put of the die. Looking good so far, nearly finished :-) 

Now, because I have used Copic Markers, u can see where they have saturated  through the back of the tag, so I will cut another tag on white Cardstock and stick it to the back, I used my Towmbow Multi Mono Liquid Glue.

I will now use a small hole punch/Cropodile to pop a hole in the top, then pop some ribbon through and using some twine or skinny ribbon I will tie a bow around the ribbon. 


On the back of the tag, I have used my Merry a motifs stamps from Paper Dmooches to stamp to and from. I have used Versafine Onyx Black to stamp and I have used my stamp press from Fiskars to correctly place the sentiments. 


Lucky last, now that I am finished everything is to go back to the image and add glitter to the hat so it will have time to dry :-) I will be using Derivan Kindyglitz Crystalina, you can use whatever glitter product you choose. 


Hopefully you enjoyed my tutorial please leave some love here and on my personal blog 

These tags will be for sale on my facebook page, you can find the link on my blog. 

Thanks for stopping by Fitztown, and why not try out making some tags for your Christmas presents yourself, so much fun and a lot more personal then shop bought ones :-)

Deni x


Sunday, 15 December 2013

Snow Joy christmas card

Another busy day today, gotta love this time of year.

Today I have been working on another teacher Christmas card, for this one I have used another CC Design stamp. 

Snow Joy is another of my new stamps, and it is so adorable! It is also available in digital form and rubber. 


For this card I have used

American Crafts Cardstock
Kaisercrafts Santa's list 6.5" paper pad
Twine is from my stash
American Crafts Cardstock
Paper Smooches Merry Motifs
Me not Tuxedo Black
versafine Onyx Black
Carl snowflake punch
Derivan Kindyglitz
Memento Bamboo Leaves

Image was colourd using Copic Markers purchased from Craft-a-Lot and Forever Markers.

Copic Markers Used

R24,R27,R29
YR14, YR16
C1, 0
E11, E13
G05, G17

Thanks for stopping by, please remember to hit follow and why not stop by my Facebook page :-)

Deni


Saturday, 14 December 2013

Tree trimmer Christmas card

Hello!

Today I have been a very busy bee, making a few cards for Fitztown GD, you won't get to see these straight away though.

The image I have used today is from CC Designs, it is from a set called Tree Trimmers, I absolutely love this stamp set, I received it a couple of days ago :-)


Image on this card was coloured using Copic Markers purchased from Craft-a-Lot and Forever Markers. 

What I have used on this card

American Crafts Cardstock
Kaisercraft Santa's List
Sentiments from Paper Smooches - Merry Motifs
Memento Bamboo Leaves
Memento Tuxedo black
Versafine Onyx black 
Twine from Whimsy Farm Twine - Rosalie
Derivan Kindyglitz - Crystalina
Spellbinders Standard Circles
CC Designs - Amy R Happy Christmas

Copic Markers Used

Skin E000, E00, E21, R20
Hair E11, E13
Clothes and Bauble R24, R27, R29, YG21, YG23
Pants G05, G07
Teeth W1, 0
Wings C1

Thanks for stopping by :-)

Deni x


Sunday, 27 October 2013

You are awesome Paper Smooches


So excited today I was able to use my new stamps from Paper Smooches yay!

For my first card I have used the Cutasaurus stamps and the Dino 1 dies.

It is so much easier to die cut my stamps rather than having to fussy cut them.


For this card I have used

Kmart Cardstock
Xpress it Blending Card
Paper Shapers Corner Punch
Scallop Circle Punch from Ek Success
Kaisercraft La Di Da Paper Collection
Memento London Fog
Spellbinders Circle Dies
Ribbon is from my stash

Image was coloured using Copic Markers Purchased from Craft-a-Lot and Forever Markers

Copic Markers Used

Trees E33, E35
         G05, G17
Dinosaur V22, V28

Hope u like my card

Deni

Paper Smooches haul

I have been watching Prairie Paper and Ink on You Tube for a while now and have been hunting down a stamp brand she has used a few times. The brand is called Paper Smooches.

Last week sometime I noticed a scrapbook shop that i have been wanting to go to called Alice in Paperland had used some on a card, hubby came home early from work one day last week so he took me down to have a look.

I purchased a couple of new stamp sets

Cutasaurus and the matching dies Dino 1
Chubby Chums and the matching dies Chums
Zoo Crew (there is no dies made for this set)

I was so excited, even though these were not the particular ones I was after, I also picked up a Copic Ciao marker i had run out of.