Saturday, 26 December 2020

Whimsy Stamps - Penguin Candy Cane + Erin Condren Vertical Planner Layout

Hi Everyone, 

Hope everyone has had a lovely Christmas!

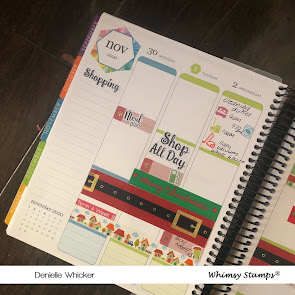
Today I am sharing with you a planner layout I created in my Erin Condren Vertical Planner using Whimsy Stamps Penguin Candy Cane (I used the Digital however you can use the rubber if you prefer). 


I printed the stamp out with my printer directly onto PPS Sticker Paper after I resized it on my computer to fit my layout (OK.. so I may have totally winged it and not planned the size haha). 


Using Prismacolor Pencils, a blending stump and blending solution I coloured the image up, I filed the colour off my blending stump in between each colour to prevent any bleeding or carrying over of colour. 


I trimmed the image down using my EK Success Cutterbee Scissors, grabbed my Erin Condren Vertical Planner and adhered the image to the left side. I laid out the rest of my planner layout around the image using some EC Stickers and some from my stash. I also used a few washi tapes I had laying around. 


I am very late in doing the voice over of this video and editing ready for upload as it has been a crazy couple of weeks for us.

I hope you have enjoyed my post today, if you have any questions feel free to send me a message or contact me via facebook (all links can be found below).

Watch the You Tube Video Here


Products Used On My Card (Affiliate Links Used Where Possible)


Prismacolor Pencils Used

PC1083, PC1054
PC1058, PC935
PC923, PC924, PC925
PC1013
PC1033, PC921

Thanks for stopping by, Deni

CAMERA SET UP - FOR YOU TUBE VIDEOS ONLY
Blue Yeti Microphone
Sony Handycam HDR CX4-05
Tripod – Manfrotto MKCompactaCN-BK

S O C I A L MEDIA 
B L O G : https://ldli.co/e/3xky6x 
I N S T A G R A M : https://ldli.co/e/5dn20x
YOU TUBE: https://ldli.co/e/ej5l90 
F A C E B O O K: https://ldli.co/e/mjxn2r
PINTEREST: https://ldli.co/e/2l9zom


I was a 2018 Ambassador for Copic Marker Australia and NZ


Saturday, 19 December 2020

Time For Tea Designs Tennis Fun

Hi Everyone,

Sorry I haven't been around much lately.. needed some me time.

The Mum of a friend of mine asked me to make a friend of hers (did u get all that haha) a Tennis Birthday Card. I love this image from Time For Tea Designs, unfortunately this image is an old retired stamp so you won't be able to purchase it but it is definitely one of my favourites. 


I printed the image onto X-Press It Blending Cardstock using my Brother Laser Printer, I then ran the image through Sizzix Big Shot using a Lawn Fawn Stitched Circle Die. 


Using my Copic Markers I coloured the image up, I will have a full list of Copic Markers Used at the bottom of my blog post if you are looking for them. 

The Gold patterned cardstock is actually from my Erin Condren Planner bands packaging, I packed them all away and thought I would be able to use the packaging.. and I did :-)

I cut down some American Crafts Black Cardstock and some Kaisercraft Red Cardstock to create my matte layers. I adhered the patterned paper and the matte layers using my Scotch ATG. 


I ran some red scraps through my Big Shot using Kaisercraft alphabet lowercase (I can't find any links for these but will try and link up some other alphabet dies), I also used some black scraps to cut MFT Stamps Big Numbers. I adhered the alphas to my card using American Tombow Mono Multi. 


Using Lawn Fawn Wavy Sayings stamp set I stamped out the Happy Birthday using Ink on 3 Embossing Ink and Wow Embossing Powder Fine in Primary Apple Red. I had some vellum scraps in my bucket which I had prepped using EK Success Powder Tool ( I will link up a few different ones). I heated the embossing powder up and melted it using my Heat Tool. Finally I trimmed the sentiment down using my EK Success Cutterbee Scissors then gently added a very small amount of American Tombow Mono Multi to the back of each letter.


I used more of the matte layers to decorate the inside of my card. 


I hope you have enjoyed my post today, if you have any questions feel free to send me a message or contact me via facebook (all links can be found below).

Watch the You Tube Video Here


Products Used On My Card (Affiliate Links Used Where Possible)


Copic Markers Used 

W1, 0
C3, 0
E51, E53, E55, R20
Y21, Y23, E31
Y02, Y08
R27, R39


Thanks for stopping by, Deni

CAMERA SET UP - FOR YOU TUBE VIDEOS ONLY
Blue Yeti Microphone
Sony Handycam HDR CX4-05
Tripod – Manfrotto MKCompactaCN-BK

S O C I A L MEDIA 
B L O G : https://ldli.co/e/3xky6x 
I N S T A G R A M : https://ldli.co/e/5dn20x
YOU TUBE: https://ldli.co/e/ej5l90 
F A C E B O O K: https://ldli.co/e/mjxn2r
PINTEREST: https://ldli.co/e/2l9zom


I was a 2018 Ambassador for Copic Marker Australia and NZ


Sunday, 6 December 2020

Whimsy Stamps - It's A little Snowy

Hi Everyone,

Today I would like to share a card I made using an image from Whimsy Stamps Pollycraft collection called Snowy, she is a digital stamp that I have printed out onto X-Press It Blending Cardstock using my Brother Laser Printer.


Once I had her printed up I coloured her using Copic Markers, then ran the image through my Sizzix Big Shot using MFT Stamps Cross-Stitch Circle Stax.


Unfortunately this die is no longer for sale but this is what the dies looked like that I used. 


Using the leftover cardstock from my die cutting I used a EK Success Star Confetti Punch to punch out some stars. 


I printed some Digital Papers from Whimsy Stamps Winter's Magic Blue Paper Collection, I love Digital Papers because you can print them to the size you need, limit the hoarding of endless paper supplies and only print the amount that you actually need. 


I did follow a sketch for this card, my mind has been struggling with card layouts lately so these always help.  I used Sweet Sunday sketch Challenge 186.


I cut a matte layer from some coloured cardstock that I had in my stash, then cut a smaller size strip and bannered it up using my EK Success Cutterbee Scissors. I cut another matte layer this time using some American Crafts white cardstock and layered it on top of the aqua/mint cardstock. 


Using my Cutterpillar Trimmer I trimmed down the patterned papers so I could layer them leaving a small white gap between the two of them. I had this Christmas Tag on my desk leftover from another project so I added it to the top right corner.


I adhered all the layers alternating between Scotch ATG and Helmar Acid Free liquid adhesive for the small sections. I then adhered the layers to a Couture Creations Card Base.

Once I had all my stars adhered I used some Derivan Kindyglitz to coat them and make them all sparkly and glittery :-) I also added the glitter to the snow beneath her feet. I left the card over night to completely dry before putting it into the packaging. 


I hope you have enjoyed my post today, if you have any questions feel free to send me a message or contact me via facebook (all links can be found below).

Watch the You Tube Video Here


Products Used On My Card (Affiliate Links Used Where Possible)


Copic Markers Used

E44, E47, E49
C1, 0 Colorless Blender
RV63, RV66
E33, E39
BG10, BG13, BG15
C4, C6, C8

Thanks for stopping by, Deni

CAMERA SET UP - FOR YOU TUBE VIDEOS ONLY
Blue Yeti Microphone
Sony Handycam HDR CX4-05
Tripod – Manfrotto MKCompactaCN-BK

S O C I A L MEDIA 
B L O G : https://ldli.co/e/3xky6x 
I N S T A G R A M : https://ldli.co/e/5dn20x
YOU TUBE: https://ldli.co/e/ej5l90 
F A C E B O O K: https://ldli.co/e/mjxn2r
PINTEREST: https://ldli.co/e/2l9zom


I was a 2018 Ambassador for Copic Marker Australia and NZ


Wednesday, 2 December 2020

MFT Stamps - Yetti Tags

Hi Everyone,

Today I am sharing with you some Christmas Tags I created using Beast Friends from MFT Stamps.


I don't have any colouring videos to show you today as I coloured these images up quite a while ago, but you can watch the process of putting the tags together below. 

I started by stamping the images out using my Misti Stamping Tool and Memento Tuxedo Black.

Using my EK Success Cutterbee Scissors I cut the images down leaving a small border on all except the scarf and Santa hat as these needed to be adhered directly to the images. 

The Tags are cut from white scrap pieces of cardstock using MFT Stamps Tag Builder Blueprints 4 dies using my Sizzix Big Shot. 

I also pulled out my Crafter's Choice Christmas Dreams Die Cut Pack, I used a few bits and pieces from the pack to finish off my tags. The sentiments I bannered up using my EK Success Scissors.


I adhered the tags together using Helmar Acid Free liquid adhesive.


I ran the the die for the Tag hole through my Big Shot using some scraps of red and green cardstock and adhered those to the die cuts. 


Using 4 different ribbons from my stash I cut down approx 15cm lengths to use for the tie ups, I folded these in half and threaded them through the top of the tags. 


My tags are now complete and look awesome :-)


I hope you have enjoyed my post today, if you have any questions feel free to send me a message or contact me via facebook (all links can be found below).

Watch the You Tube Video Here


Products Used On My Card (Affiliate Links Used Where Possible)


Copic Markers Used

Sorry I dont have a Copic List today.
Thanks for stopping by, Deni

CAMERA SET UP - FOR YOU TUBE VIDEOS ONLY
Blue Yeti Microphone
Sony Handycam HDR CX4-05
Tripod – Manfrotto MKCompactaCN-BK

S O C I A L MEDIA 
B L O G : https://ldli.co/e/3xky6x 
I N S T A G R A M : https://ldli.co/e/5dn20x
YOU TUBE: https://ldli.co/e/ej5l90 
F A C E B O O K: https://ldli.co/e/mjxn2r
PINTEREST: https://ldli.co/e/2l9zom


I was a 2018 Ambassador for Copic Marker Australia and NZ


Tuesday, 1 December 2020

Whimsy Stamps - Reindeer Training Time

Hi Everyone,

I cannot believe we are in December already, this year has to be one of the craziest and quickest years we have had, weather wise we have had floods, hail, bushfires and COVID 19. 

A sneak peak of my post before I chat more...


We have had some of the hottest days we have ever had - including one a few days ago with 45 degrees celsius, the SAT Nav in my car even said it was too hot and I had to wait for it to cool down hahah. It went up to 45 just after I started driving so I didn't get a photo.. 


Anyway, today I am sharing with you one of the new images in the Whimsy Stamps December 2020 Digital Release. This gorgeous image is Reindeer Training from Crissy Armstrong.


I printed the image onto PPS Sticker Paper (you can probably use any sticker paper however this is the only one I can buy in my local stationary shop) using my Brother Laser Printer.


I coloured the image using my Prismacolor Pencils, using a paper stump and blending solution to blend the colours out, you can find a list of all the pencil colours I have used below the Product list at the end of my post. 


 I then fussy cut him using EK Success Cutterbee Scissors. These are my go to scissors when it comes to fussy cutting. 

I pulled out my Erin Condren Vertical Life Planner and started working on my Planner Layout. 


I used a few different washi tapes from my stash (sorry I do not have any links as I have had these for a very long time). I used stickers from many different shops that I will not try and link as they have been in my stash for quite a while. I haven't decorated my planner in so long but am so happy to be pulling everything out again. 


If you are interested in purchasing an Erin Condren Life Planner or any of their other products I would really appreciate you using my referral link here, this link will give us both a $10 credit on our EC Accounts.


If you haven't already checked out the Whimsy Stamps New Release go and do so, there are so many gorgeous new images for you to play with :-)


I hope you have enjoyed my post today, if you have any questions feel free to send me a message or contact me via facebook (all links can be found below).

Watch the You Tube Video Here


Products Used On My Card (Affiliate Links Used Where Possible)


Prismacolor Pencils Used

PC 916, PC950
PC 1054
PC 1033, PC 1082, PC 1013
PC 937, PC1082
PC 923, PC 925
PC 912, PC 907

Thanks for stopping by, Deni

CAMERA SET UP - FOR YOU TUBE VIDEOS ONLY
Blue Yeti Microphone
Sony Handycam HDR CX4-05
Tripod – Manfrotto MKCompactaCN-BK

S O C I A L MEDIA 
B L O G : https://ldli.co/e/3xky6x 
I N S T A G R A M : https://ldli.co/e/5dn20x
YOU TUBE: https://ldli.co/e/ej5l90 
F A C E B O O K: https://ldli.co/e/mjxn2r
PINTEREST: https://ldli.co/e/2l9zom


I was a 2018 Ambassador for Copic Marker Australia and NZ