I'm a little late in Easter Cards but i'm super early for next year :-)
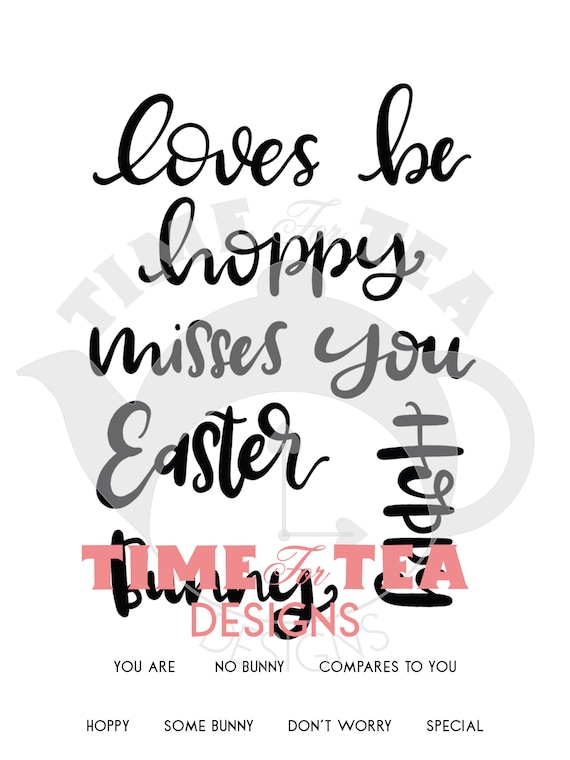
I created this card for Time For Tea Designs using Some Bunny Misses You - one of the new Easter Release Images. You can check out all the New Releases at the Etsy Shop.
The Word Easter is also from the new releases, I added the word Surprise and merged them all together using MS Word.
I printed the images onto Mondi Color Copy 250GSM Card Stock with My Brother Laser Printer.
I used patterned papers from Kaisercraft 6x6 Paper Pad Called Cock-a-doodle-doo. Plain card stocks are from American Crafts and everything was cut using Cutterpillar Pro and attached using Scotch ATG. I also used some Multi Medium Matte on the little tag.
You can watch the You Tube Video of the colouring and Card process here.
Copic Markers Used
YR65, YR04, YR24
W1, W3
G12, YG17, YG67
E13, E97, E08
C00, C2, C4
Products Used
Cutterpillar Pro
Ranger Multi Medium matte
Kaisercraft Cock-a-doodle-doo 6x6
Mondi Color Copy 250GSM
Lawn Fawn Stitched Circle Dies
Twiddleybitz Card Base
American Crafts Cardstock
Scotch ATG
Copic Markers
I used a Stitched Circle die from Lawn Fawn to cut the image out on my Sizzix Big Shot.
I hope you have enjoyed my post today, if you have any questions feel free to send me a message or contact me via facebook (all links can be found below).
Thanks for stopping by, Deni
You can find my cards for sale here
https://www.facebook.com/angelhandmadepapercraft
My You Tube Here
https://www.youtube.com/user/Denielle1983/
My Blogs Here
Angel Handmade Papercraft http://angelhandmadepapercraft.blogspot.com.au/
Auzz Trinklets N Crafts http://auzztrinkletsnkrafts.blogspot.com.au/
Whimsy Stamps https://whimsystamps.blogspot.com.au/
Sunday, 29 April 2018
Saturday, 28 April 2018
Whimsy Stamps - Make A Wish
Hey all
Today I am inspiring you all with a card created for Whimsy Stamps Using Make A Wish. I coloured the image up using Copic Markers.
Patterned papers are from a 6x6 Paper Pad from Hampton Art- Ki Memories (Janet Dunn) called Celebrate. Plain card stock is from Kmart or American Crafts. Everything was cut on my Cutterpillar Pro and adhered using Scotch ATG.
I printed the images onto Mondi Color Copy 250GSM using my Brother Laser Printer.
I also cut some stars from the same plain card stock using Paper Smooches Teeny Stars Dies. I then adhered these to my card using Tombow Mono Multi Liquid Adhesive.
All the layers were adhered using Scotch ATG, I then popped all the layers onto a Twiddleybitz Card Base.
Lastly I added some Nuvo Crystal Drops in Ebony Black. I then left these overnight to dry (I have a habit of messing them up while they are still wet lol).
You Tube Video of the Project being put together can be watched here.
I hope you have enjoyed my post today, if you have any questions feel free to send me a message or contact me via facebook (all links can be found below).
Products Used On This Card
Scotch 3M ATG
Twiddleybitz Card Base
Nuvo Crystal Drops- Ebony Black
Mondi Color Copy 250 GSM
Hampton Art - Ki Memories (Janet Dunn) - Celebrate Paper Pad
Cutterpillar Pro
Scotch ATG
American Crafts Cardstock
Paper Smooches Wise Dies - Teeny Stars
Copic Markers
Thanks for stopping by, Deni
You can find my cards for sale here
https://www.facebook.com/angelhandmadepapercraft
My You Tube Here
https://www.youtube.com/user/Denielle1983/
My Blogs Here
Angel Handmade Papercraft http://angelhandmadepapercraft.blogspot.com.au/
Auzz Trinklets N Crafts http://auzztrinkletsnkrafts.blogspot.com.au/
Whimsy Stamps https://whimsystamps.blogspot.com.au/
Thursday, 26 April 2018
Time For Tea Designs Fluffy Kitty
Currently there is a freebie on offer over at Time For Tea Designs
Here is the post made by the Owner / Designer Joanna Davies as to the background of the images.
I have 3 really exciting bits of news for you guys so brace yourselves!! One is a freebie so keep reading!!!
First of all we have a mini release. This release was inspired by really sad news with the recent passing of my mum and dad’s kitty Buster. I really wanted to send them something that would say how sorry I was and with an image that would look like their boy Buster. Buster was a big fluff ball and so I really wanted a fluffy kitty to colour.
See what I came up with below.
The larger sentiment is an extract from The Rainbow Bridge poem which I think is so beautiful. A friend sent it to me when my own kitties passed away and it really did help a lot. I had to include a short haired kitty in the collection as I wanted to represent all the kitties. These guys can be coloured anyway you like to reflect the kitties you know and love.
To go with the launch I have released my very first YouTube video. Eeeeek!! I really hope you like it. I’m hoping there will be more to follow if time allows.
I really enjoyed the process but was very nervous adding my own voice to the pictures!!! No one likes the sound of their own voice do they?? I certainly don’t!
The video link is here:
https://youtu.be/zNy6oMIenUA.
Please like and subscribe so you will be notified of more videos as they come available.
Finally I have a little freebie to you all to say thank you for all your support. the Rainbow Kitty Collection will be available for free for the next 24 hours!
All you have to do us send your details via the contact page here on the T4T Blog and I will email you your freebie.
I would love it if you also requested to be added to our Newsletter mailer when you request your digi. The Newsletters should begin in the Summer time should you want to be the first to hear all the news about T4Ts latest releases, exclusive freebies and competitions.
So get your request in quick – your 24 hours starts now! Emails received after Midnight onthe 26th April will not be included in the Freebie offer.
And Now here is my You Tube Colouring and Process Video using Fluffy Kitty. Come and Check them both out.
Deni
Saturday, 21 April 2018
Whimsy Stamps Friendship & Love
Today is my inspiration day at Whimsy Stamps, I ordered this stamp while we were away on our honeymoon and just had a chance to play with it. It is called Friendship Bunny and Chick designed by Krista Heij-Barber.
I cut the stamp using my Tim Holtz Red Scissors, not forgetting to remove the backing first as it makes it a lot easier to cut the stamp. Always make sure when cutting red rubber stamps to use straight cuts, and make sure you keep the scissors straight so as to not cutting the stamp unevenly.
I then attached the stamp to my Misti Stamping Tool, I inked it up using Memento Tuxedo Black and stamped it onto Mondi Color Copy 250GSM Cardstock.
I coloured the image using Copic Markers, you can watch a video here of the colouring and the card process.
Copic Markers Used
R35, R37, R39
C1, C3, C5, 0
Y13, Y15, Y38
YG13, YG17
R20
Once I finished colouring the image up I looked through my stash of dies as I was originally going to cut the image using a die but couldn't find the size I needed so I just used my Cutterpillar Pro to cut it into a nice border around the image.
I decided I wanted to make the card into a lovey dovey type card.. not sure exactly what but that's what I was going for. I grabbed a 6x6 Patterned Paper Pad from my stash called Crate Paper Love Notes. I cut the arrows from a full sheet, the others were all leftovers from previous projects made using this patterned paper pad. I always pop in the leftovers inside the pad so I can use them later on. I know some people pop them into zippy bags but mine are in my Raskog trolley so i'm not worried about it too much.
I cut 2 mat's for under the patterned papers, one black and one white - both from American Crafts 12x12 sheets.
I then adhered all the layers together using Scotch ATG, lastly I popped everything onto a Twiddleybitz Card Base using the same adhesive.
I hope you have enjoyed my post today, if you have any questions feel free to send me a message or contact me via facebook (all links can be found below).
Thanks for stopping by, Deni
You can find my cards for sale here
My You Tube Here
My Blogs Here
Angel Handmade Papercraft http://angelhandmadepapercraft.blogspot.com.au/
Auzz Trinklets N Crafts http://auzztrinkletsnkrafts.blogspot.com.au/
Whimsy Stamps https://whimsystamps.blogspot.com.au/
Labels:
American Crafts,
Copic Markers,
Crate Paper,
Cutterpillar Pro,
ek success,
Krista Heij-Barber,
Memento,
Misti,
Mondi,
Scotch,
Twiddleybitz,
Whimsy Stamps DT,
You Tube
Monday, 16 April 2018
Blooming Lovely @ Time For Tea Designs
This month is the release of the Blooming Lovely Collection at Time For Tea Designs, I am unfortunately behind on all my Design Team work and trying to catch up so i'm a little behind in sharing my card.
I have used Gardening Girl from the collection, I coloured her up using Copic Markers.
I mainly used my favourite Copic Combos on this one, I didn't take note of them because I go into my own little world sometimes when I create. But more than likely I have used R81, R83, R85 for the pink areas and B91,B93, B95 then E31,E33, E35 for the brown areas.
Papers were all from my stash and they were adhered to a pre made card base from Twiddleybitz.
I used Scotch ATG for most of my adhesive and Multi Medium Matte for the smaller areas.
I have used Wow embossing powder for the pink stars.
I hope you have enjoyed my post today, if you have any questions feel free to send me a message or contact me via facebook (all links can be found below).
Thanks for stopping by, Deni
You can find my cards for sale here
https://www.facebook.com/angelhandmadepapercraft
My You Tube Here
https://www.youtube.com/user/Denielle1983/
My Blogs Here
Angel Handmade Papercraft http://angelhandmadepapercraft.blogspot.com.au/
Auzz Trinklets N Crafts http://auzztrinkletsnkrafts.blogspot.com.au/
Whimsy Stamps https://whimsystamps.blogspot.com.au/
Whimsy Stamps - For my Teacher
A Brand New Challenge has begun over at Whimsy Stamps Blog, I have joined in on the fun creating a card using Penguin Teacher.
I have coloured up the image using Copic Markers, I then cut it into the circle shape using My Favorite Things Wonky Stitched Circle dies. Papers are all from my stash and the card base is a pre-made base from Twiddleybitz.
This image makes me smile every time I see it, Teachers do so much for our kids and I love giving them little gifts every now and then.
I hope you have enjoyed my post today, if you have any questions feel free to send me a message or contact me via facebook (all links can be found below).
Thanks for stopping by, Deni
You can find my cards for sale here
https://www.facebook.com/angelhandmadepapercraft
My You Tube Here
https://www.youtube.com/user/Denielle1983/
My Blogs Here
Angel Handmade Papercraft http://angelhandmadepapercraft.blogspot.com.au/
Auzz Trinklets N Crafts http://auzztrinkletsnkrafts.blogspot.com.au/
Whimsy Stamps https://whimsystamps.blogspot.com.au/
Saturday, 14 April 2018
Whimsy Stamps - As You Wish
I am loving the Whimsy Stamps release this month, we have so many gorgeous projects shared from the Design Team. I fell in love with the Unicorn from the "Fairy and Unicorn Greetings" Stamp Set. You can see all the stamps and images they have to offer at the shop here.
I stamped it onto Mondi Color Copy 250GSM Card stock using Misti Stamping Tool and Memento Tuxedo Black.
I have coloured up the image using Copic Markers, I tried to stick to soft blends as that's the magical type look that I had going on in my head. I also added some dotted detail to the stars using Uniball Signo White Angelic Gel Pen.
This card turned out the exact way I had picture, It had the magic glow and softness all in one that I was going for, totally happy with the finished product.
Papers I used are from a 12x12 Paper Pad that I have been hanging onto for many many years.. yes I am totally an enabler when it comes to paper pads. Paper Collection is Crafter's Choice Princess Paper Pack.
Everything was adhered using Scotch ATG.
Copic Markers Used
Y02, Y15
R81, R83, R85
RV55, RV66
E51, E31
V01, V12, V15
I hope you have enjoyed my post today, if you have any questions feel free to send me a message or contact me via facebook (all links can be found below).
Thanks for stopping by, Deni
You can find my cards for sale here
https://www.facebook.com/angelhandmadepapercraft
My You Tube Here
https://www.youtube.com/user/Denielle1983/
My Blogs Here
Angel Handmade Papercraft http://angelhandmadepapercraft.blogspot.com.au/
Auzz Trinklets N Crafts http://auzztrinkletsnkrafts.blogspot.com.au/
Whimsy Stamps https://whimsystamps.blogspot.com.au/
Saturday, 7 April 2018
Whimsy Stamps DT - Best Bunny Friend
Good Morning Everyone,
I haven't been around much lately as I got Married last weekend, so had to schedule my blog posts.
We just got back today from a lovely week away just the two of us, unfortunately the weather at our holiday destination wasn't very nice to us, we were actually on cyclone watch. The managers of the place we were staying even came around with Cyclone packs, and to move all our outdoor furniture inside for that just incase situation. We are very glad we did not need to use them.
We had a lot of wind and rain, all the roads in and out of the destination were closed off, airport was cancelling or rescheduling flights and the marina/port/harbour whatever you want to call it was closed, so nobody could leave or come in. We were basically stuck in our room watching movies (thankfully we grabbed some on our way back from breakfast that morning). Yes I know we were on our honeymoon but we can't be stuck in our room all day that'd drive us insane lol.
Anyway, back to my design team card sharing. Before I left I created a few cards to get me through until we got back. This is the last one I created but I didn't get a chance to pre- blog this post.
On my card today I have used two stamp sets from Whimsy Stamps - Elegant Labels from the April 2018 Release and Spring Fairy by Marina Fedotova.
Unfortunately at the time of this Blog Post Spring Fairy is out of stock, but when you go the link for the item there is an option to insert your email address so you can be notified when she comes back into stock.
I printed the sentiments onto Mondi Color Copy 250GSM Card Stock, this is the same Card Stock I stamped the image onto, this is Copic safe Card Stock and it's my go to.
I stamped the image using Memento Tuxedo Black (copic safe) using Misti Stamping Tool, I switch between the Misti and acrylic blocks just depending on size of what I am stamping and I guess whatever is on my desk at the time of creating.
I used EK Success Cutterbee Scissors to fussy cut the sentiment out, a My Favorite Things Stitched Circle Stax die to cut the image (I ran this through my Sizzix Big Shot using the magnetic platform).
Papers are from Fancy Pants - Hopscotch Collection, I cut them to six using Cutterpillar Pro.
I adhered all the layers together using Scotch ATG, then adhered them to a pre-made Card base from Twiddleybitz (no longer available to purchase).
I added some Wink Of Stella Clear to the wings, although you cannot see this in the pictures it is there.
Copic Markers Used On This Card
E000, E00, E21, E11, E04, R20
E95, E97, E17
BV01, BV11, BV08
RV52, RV55,RV66
Y15
R20, R21, R22
YR02, YR04
C4, C6, R30, T0
W5, W3
Well I think that's about it from me today guys, please pop on over to the Whimsy Stamps Blog to join in on our current challenge and to check out what the rest of the team has been creating.
I hope you have enjoyed my post today, if you have any questions feel free to send me a message or contact me via facebook (all links can be found below).
Thanks for stopping by, Deni
You can find my cards for sale here
https://www.facebook.com/angelhandmadepapercraft
My You Tube Here
https://www.youtube.com/user/Denielle1983/
My Blogs Here
Angel Handmade Papercraft http://angelhandmadepapercraft.blogspot.com.au/
Auzz Trinklets N Crafts http://auzztrinkletsnkrafts.blogspot.com.au/
Whimsy Stamps https://whimsystamps.blogspot.com.au/
I haven't been around much lately as I got Married last weekend, so had to schedule my blog posts.
We just got back today from a lovely week away just the two of us, unfortunately the weather at our holiday destination wasn't very nice to us, we were actually on cyclone watch. The managers of the place we were staying even came around with Cyclone packs, and to move all our outdoor furniture inside for that just incase situation. We are very glad we did not need to use them.
We had a lot of wind and rain, all the roads in and out of the destination were closed off, airport was cancelling or rescheduling flights and the marina/port/harbour whatever you want to call it was closed, so nobody could leave or come in. We were basically stuck in our room watching movies (thankfully we grabbed some on our way back from breakfast that morning). Yes I know we were on our honeymoon but we can't be stuck in our room all day that'd drive us insane lol.
Anyway, back to my design team card sharing. Before I left I created a few cards to get me through until we got back. This is the last one I created but I didn't get a chance to pre- blog this post.
On my card today I have used two stamp sets from Whimsy Stamps - Elegant Labels from the April 2018 Release and Spring Fairy by Marina Fedotova.
Unfortunately at the time of this Blog Post Spring Fairy is out of stock, but when you go the link for the item there is an option to insert your email address so you can be notified when she comes back into stock.
I printed the sentiments onto Mondi Color Copy 250GSM Card Stock, this is the same Card Stock I stamped the image onto, this is Copic safe Card Stock and it's my go to.
I stamped the image using Memento Tuxedo Black (copic safe) using Misti Stamping Tool, I switch between the Misti and acrylic blocks just depending on size of what I am stamping and I guess whatever is on my desk at the time of creating.
I used EK Success Cutterbee Scissors to fussy cut the sentiment out, a My Favorite Things Stitched Circle Stax die to cut the image (I ran this through my Sizzix Big Shot using the magnetic platform).
Papers are from Fancy Pants - Hopscotch Collection, I cut them to six using Cutterpillar Pro.
I adhered all the layers together using Scotch ATG, then adhered them to a pre-made Card base from Twiddleybitz (no longer available to purchase).
I added some Wink Of Stella Clear to the wings, although you cannot see this in the pictures it is there.
Copic Markers Used On This Card
E000, E00, E21, E11, E04, R20
E95, E97, E17
BV01, BV11, BV08
RV52, RV55,RV66
Y15
R20, R21, R22
YR02, YR04
C4, C6, R30, T0
W5, W3
Well I think that's about it from me today guys, please pop on over to the Whimsy Stamps Blog to join in on our current challenge and to check out what the rest of the team has been creating.
I hope you have enjoyed my post today, if you have any questions feel free to send me a message or contact me via facebook (all links can be found below).
Thanks for stopping by, Deni
You can find my cards for sale here
https://www.facebook.com/angelhandmadepapercraft
My You Tube Here
https://www.youtube.com/user/Denielle1983/
My Blogs Here
Angel Handmade Papercraft http://angelhandmadepapercraft.blogspot.com.au/
Auzz Trinklets N Crafts http://auzztrinkletsnkrafts.blogspot.com.au/
Whimsy Stamps https://whimsystamps.blogspot.com.au/
Tuesday, 3 April 2018
You Deserve To Be Congratulated - Whimsy Stamps Digi DT
I'm back with you today to introduce a new digital sentiment set for Whimsy Stamps called Big Wishes Sentiments.
This sentiment set is so versatile and can be used for many different occasions so i'm personally loving it.
I printed it out on my Brother Laser Printer using Mondi Color Copy 250GSM.
I cut the image out using Spellbinders Lables Eighteen on my Sizzix Big Shot.
Patterned Papers are from Fancy Pants Hopscotch 6x6 Paper Pad, which were all cut using Cutterpillar Pro and adhered together onto a Twiddleybitz card base using Scotch ATG.
I added a doily from my stash onto the patterned papers using Tombow Mono Multi Liquid Adhesive. I added a strip of patterned paper which I cut using EK Success Cutterbee Scissors. I popped the die cut image on top using Scotch ATG.
Finally I cut the sentiment using My Favorite Things Stitched Fishtail Flag Dies on my Sizzix Big Shot and then adhered it onto the die cut image using Tombow Mono Multi Liquid Adhesive.
Lastly I finished the card off using Nuvo Crystal Drops in Mountain Dew.
I hope you have enjoyed my post today, if you have any questions feel free to send me a message or contact me via facebook (all links can be found below).
Thanks for stopping by, Deni
You can find my cards for sale here
https://www.facebook.com/angelhandmadepapercraft
My You Tube Here
https://www.youtube.com/user/Denielle1983/
My Blogs Here
Angel Handmade Papercraft http://angelhandmadepapercraft.blogspot.com.au/
Auzz Trinklets N Crafts http://auzztrinkletsnkrafts.blogspot.com.au/
Whimsy Stamps https://whimsystamps.blogspot.com.au/
Monday, 2 April 2018
Let's Create - Whimsy Stamps Digi DT New Release Week
Good Morning All,
Today I am here to share a little inspiration with the April Release of Digi Stamps from Whimsy Stamps. For my card I have used Penguin Teacher by Crissy Armstrong.
I printed the image using my Brother Laser Printer onto Mondi Color Copy 250GSM.
The image was coloured using Copic Markers which you will find listed below.
I decided I want to make the chalkboard look realising, so I used my Copic Markers to colour the chalkboard and then the Uni-Ball Signo White Angelic Gel Pen to go over the text. First time i've done something like this and was quite happy with the way that it turned out.
I used a My Favorite Things Inside/Out Stitched Rounded Rectangle die and ran it through my Sizzix Big Shot to cut the image out.
My card base is a pre-made base from Twiddleybitz (no longer available for purchase), The mat layers are American Crafts Cardstock, patterned papers are from my leftovers box.
I used some Crayola Die Cut Shapes that I had been hoarding from my scrapbooking days, and some Kaisercraft Class Act Collection Collectables to finished the card off.
Everything was adhered using Scotch ATG.
Copic Markers Used On This Card
C1, C3, C5 0
C6, C8, C10
C5, C6, C7
W1, W3, W6
E53, E55
YR14, YR68
R14, R29, R59
B34, B37
Y13, Y15
I hope you have enjoyed my post today, if you have any questions feel free to send me a message or contact me via facebook (all links can be found below).
Thanks for stopping by, Deni
You can find my cards for sale here
https://www.facebook.com/angelhandmadepapercraft
My You Tube Here
https://www.youtube.com/user/Denielle1983/
My Blogs Here
Angel Handmade Papercraft http://angelhandmadepapercraft.blogspot.com.au/
Auzz Trinklets N Crafts http://auzztrinkletsnkrafts.blogspot.com.au/
Whimsy Stamps https://whimsystamps.blogspot.com.au/
Subscribe to:
Posts (Atom)