Monday 27 August 2018

Kitty says Hooray - Whimsy Stamps

I have an extra Inspiration Post for you for Whimsy Stamps today.

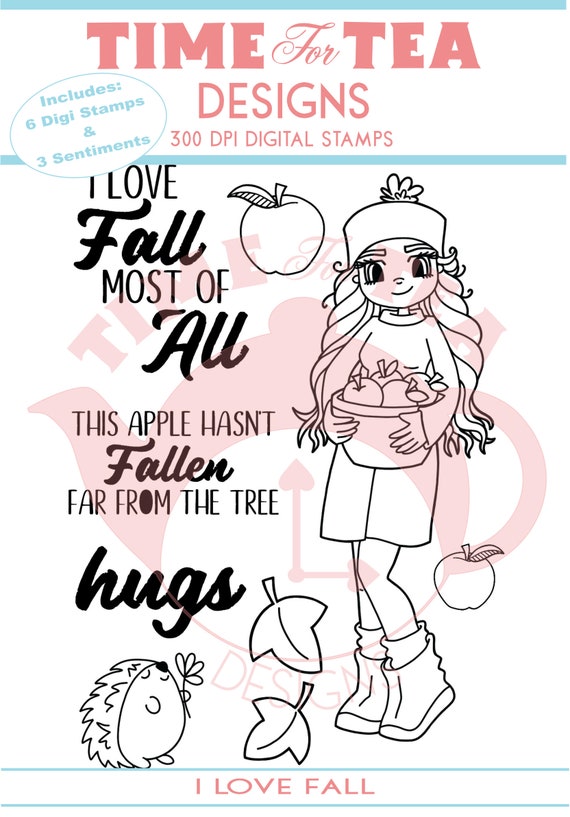
I am using a Stamp set called "A Girl's Best Friend" which I got my hands on recently.


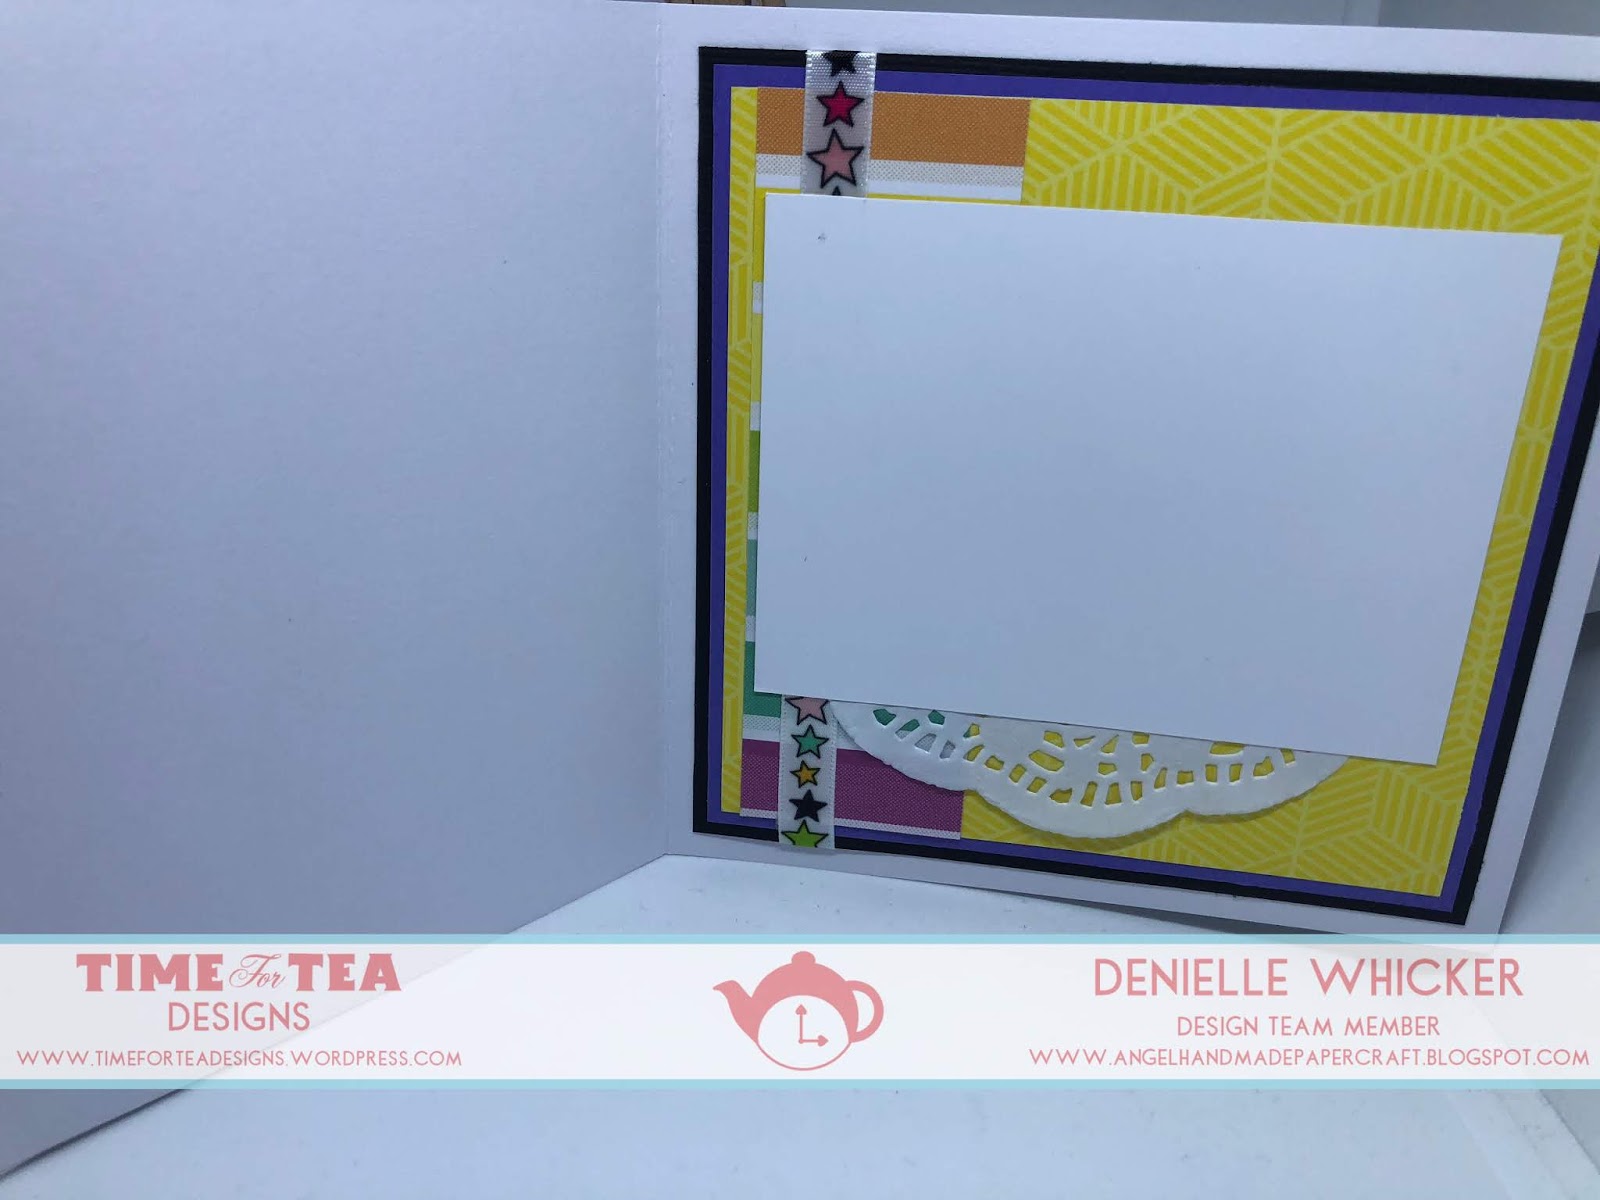
I wanted to try and work with black cardstock and white embossing powder, so I grabbed a piece of American Crafts Cardstock and cut it to size using Cutterpillar Pro. I then turned it over so I was using the Reverse side without the pattern on it as I needed a flat smooth surface to work with.


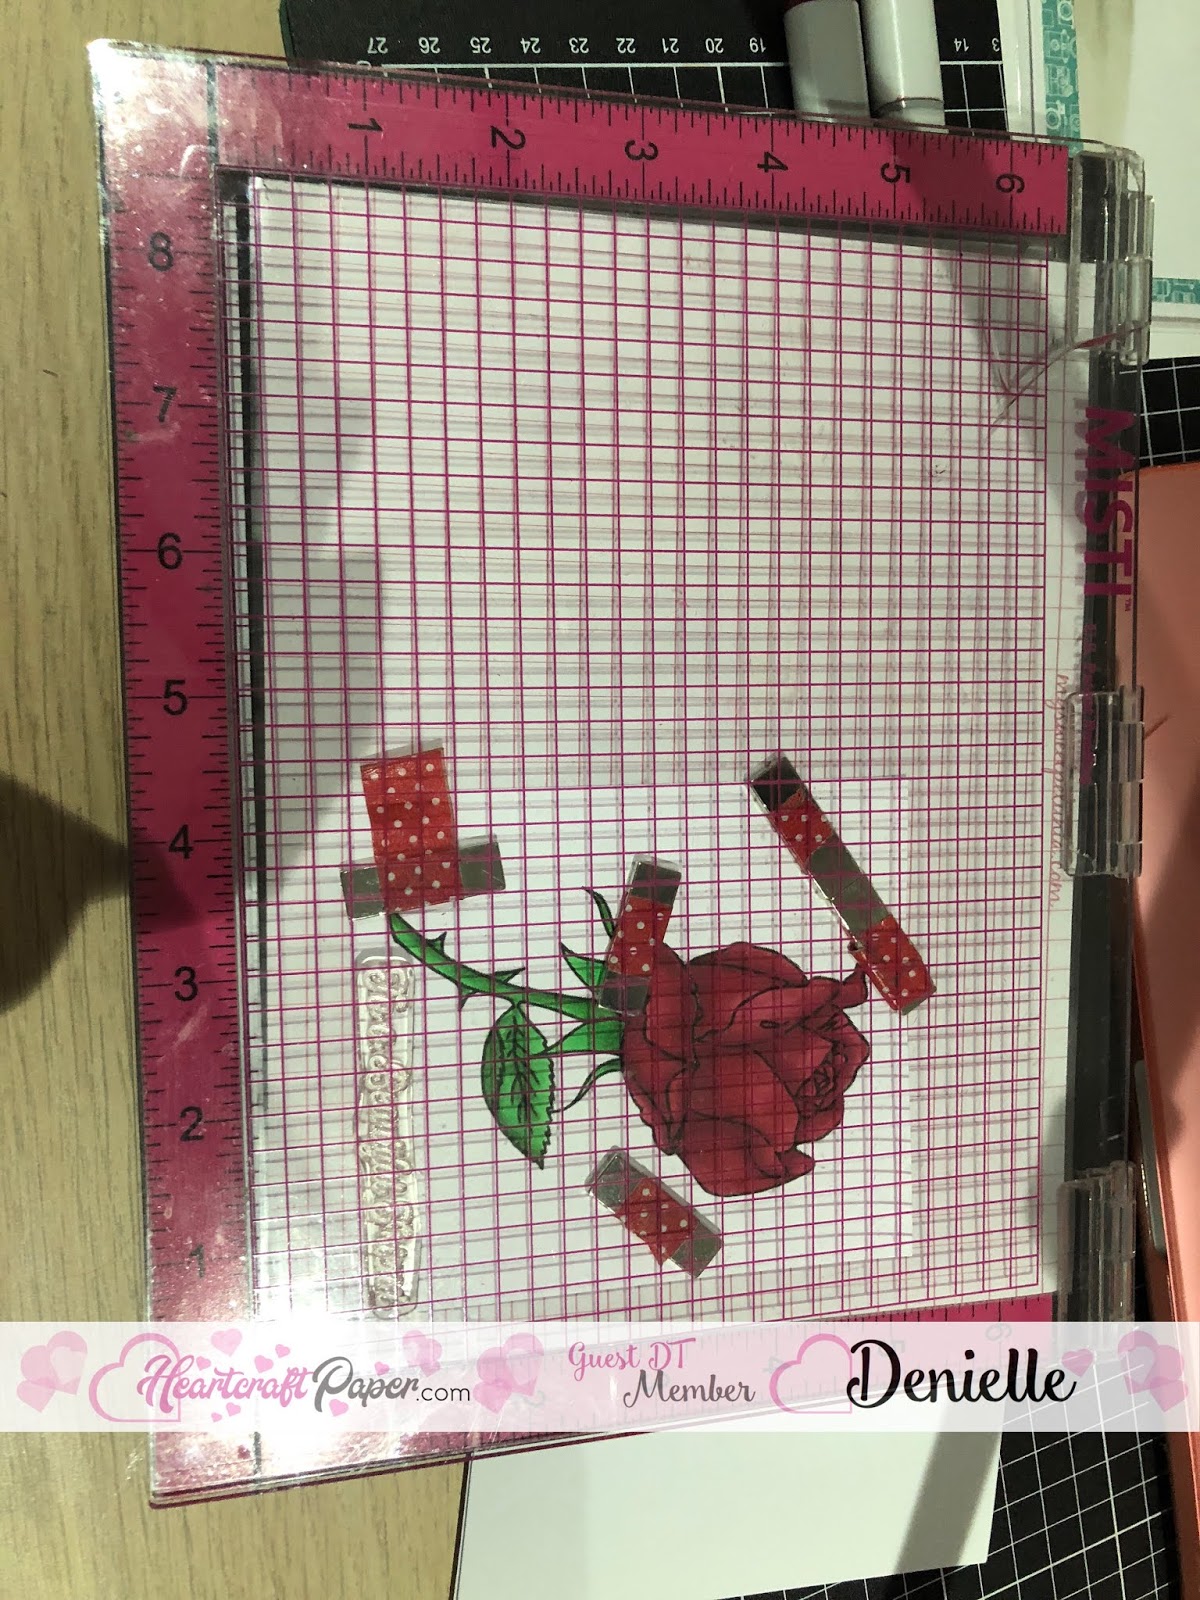
I prepped the area using EK Success Powder Tool. I grabbed the images I wanted to use and popped them onto Lawn Fawn Acrylic Blocks. I inked them up using Versamark Watermark Stamp Pad and stamped each of the images onto my card, I could see what I was doing so I didn't bother to put Embossing Powder on until the end.


Once I had all the images stamped down I grabbed my Ranger Super Fine White Embossing Powder and added it all over my cardstock then tapped off the excess. I then used my Crafter's Companion Heat Tool to melt it all.

                                                   A Girl's Best Friend Clear Stamps

I used some Red Lawn Fawn Ink to add the little foot prints into the areas that were not stamped on. This didn't show up so much on the photos you will see on my post today. I added everything to a pre-made card base from Lawn Fawn and then I was done.


I hope you have enjoyed my post today, if you have any questions feel free to send me a message or contact me via facebook (all links can be found below).

Whimsy Stamps "A Girl's Best Friend"
Mondi Color Copy 250GSM
American Crafts Cardstock
Cutterpillar Pro
Scotch ATG
Scotch ATG Refill Club
American Tombow Mono Multi Liquid Adhesive
Twiddleybitz Card Base

Sizzix Big Shot
EK Success Powder Tool
Ek Success Cutterbee Scissors
Versamark Watermark Pad
Ranger Super Fine Embossing Powder  - White
Lawn Fawn Acrylic Block
Fiskars Surecut Trimmer
American Crafts #summer 6x6
Prismacolor Pencils
Lawn Fawn Ink - Lobster Ink Pad
Universal Crafts - Heat Gun Tool


Thanks for stopping by, Deni

You can find my cards for sale here
https://www.facebook.com/angelhandmadepapercraft

My You Tube Here
https://www.youtube.com/user/Denielle1983/

Instagram Here
http://instagram/angelhandmadepapercraft

Pinterest Here
https://www.pinterest.com.au/DeniAngelHandmade/

Sunday 26 August 2018

Time For Tea Designs - Fall'n Free

Enjoying the latest release from Time For Tea Designs this month, today I am sharing with you this little cutie from the "I love Fall" Full Collection, this is a digital set of gorgeous images and sentiments.


I resized the little guy in MS Word then printed him onto Mondi Color Copy 250GSM using my Brother laser printer, then coloured him up using Copic Markers.


I used some leftover card stocks that were on my desk, I think most of them are American Crafts Cardstock. I cut them up to make Mat layers (using my Fiskars Sure Cut Trimmer) then inked the edges using Ranger Distress Ink in Vintage Photo, I used a Ranger Mini Ink Blending Tool to do that. I also cut a patterned paper layer and inked that up. I then put all the layers together using Scotch ATG.


I grabbed a doily from my stash (unknown brand) and layered that on top of the patterned paper. I ran Lawn Fawn Spring Showers dies through my Sizzix Big Shot with some scraps of card stock.
I ran the image through also using Lawn Fawn Stitched Circles die to give it the faux stitching effect. I then played around with the image and the little die cuts til I was happy with the placement then adhered them using American Tombow Mono Multi Liquid Adhesive.


I stamped some little bees out using Lawn Fawn Hello Sunshine stamp set and Memento Tuxedo Black using Misti Stamping Tool, I ran them through my Sizzix Big Shot using the Hello Sunshine Die Cuts. I applied them to my card using American Tombow Mono Multi Liquid Adhesive.

I thought my card was finished here but it needed more, It didn't feel complete. I decided to add some grass using Lawn Fawn Grassy Border, and some hills using Lawn Fawn Stitched Hillside Borders. I just grabbed some leftover bits from my box for these bits. I used EK Success Cutterbee Scissors to cut the excess pieces off. I stamped a sentiment from the Lawn Fawn Hello Sunshine set.


I hope you have enjoyed my post today, if you have any questions feel free to send me a message or contact me via facebook (all links can be found below).

Products Used On This Card

Time For Tea Designs I Love Fall Full Collection
Fiskars Surecut Trimmer
Mondi Color Copy 250GSM
Brother Laser Printer
Memento Tuxedo Black
Misti Stamping Tool
Lawn Fawn Stitched Circle Dies
Lawn Fawn Acrylic Block
Scotch ATG
Scotch ATG refill Club
EK Success - Cutterbee Scissors
Ranger Mini Distress Ink Blending Tool
Ranger Distress Ink - Vintage Photo
American Tombow Mono Multi Liquid Adhesive
Twiddleybitz Card Base
Lawn Fawn Grassy Hill Border
Lawn Fawn Hello Sunshine
Lawn Fawn Stitched Hillside Borders
Lawn Fawn Spring Showers
Sizzix Big Shot
Kaisercraft Tangerine Card Stock
American Crafts Cardstock


Thanks for stopping by, Deni

You can find my cards for sale here
https://www.facebook.com/angelhandmadepapercraft

My You Tube Here
https://www.youtube.com/user/Denielle1983/

Instagram Here
http://instagram/angelhandmadepapercraft

Pinterest Here
https://www.pinterest.com.au/DeniAngelHandmade/

Saturday 25 August 2018

A Birthday Basket - Whimsy Stamps

Whimsy Stamps Inspiration Day Woohoo!

Today I am sharing with you "Pups In A Basket", one of the August 2018 New Release Digital Images. I thought it would make a cute Congrats Card. You can purchase the image here and check out the rest of the shop here.


I started by sizing my image in MS Word (no fancy programs here) then I printed it onto Mondi Color Copy using my Brother Laser Printer.


Then I coloured it up using Copic Markers, I don't have a list to share of the colours that I used as I have had a few days lately of just sitting on the lounge colouring whilst watching TV with my family. I just pack up my Copics and my tray of uncoloured images and colour them all up.


I grabbed a paper pad from Doodlebug Designs "day to day" paper pad and cut some banner pieces using my EK Success Cutterbee Scissors, I had some small leftover pieces in the pad from other projects so they were mostly the right size I needed.
                                               
I used a MFT Stamps Dienamics Pierced Square Stax to cut the image out, I ran it through my Sizzix Big Shot.

I cut a piece of red cardstock from American Crafts for the bottom mat layer, I used this same piece to cut the red MFT Stitched Square Scallop edge frame. I actually used both the inside and the outside of the cut. The inside was just the right size for the mat of the image and then I layed the outside scallop piece underneath. Everything was adhered using Scotch ATG.


I cut a white mat layer to go on top of the bottom red then started layering up from there. I used the MFT Stamps Congratulations Circle Frame, I ran it through with the red cardstock first but it was too much on the red background so I cut another one using some leftover grey card stock. I ended up cutting one more so I could have the white inside to layer.

I added a doily layer and added some foam tape underneath so it stood up off the card. I was so happy with the way it turned out.

Products Used On This Card

Whimsy Stamps - Pups In A Basket
Copic Markers
Mondi Color Copy 250GSM
American Crafts Cardstock
Cutterpillar Pro
Scotch ATG
Scotch ATG Refill Club
American Tombow Mono Multi Liquid Adhesive
Doodlebug Design 6x6 "day to day" Paper Pad
Twiddleybitz Card Base
MFT Stitched Square Scallop Edge Frame
MFT Congratulations Circle Frame
Sizzix Big Shot
Doily - stash
Xyron Create A Sticker Max
MFT Dienamics Pierced Square Stax
Ek Success Cutterbee Scissors

I hope you have enjoyed my post today, if you have any questions feel free to send me a message or contact me via facebook (all links can be found below).


Thanks for stopping by, Deni

You can find my cards for sale here
https://www.facebook.com/angelhandmadepapercraft

My You Tube Here
https://www.youtube.com/user/Denielle1983/

Instagram Here
http://instagram/angelhandmadepapercraft

Pinterest Here
https://www.pinterest.com.au/DeniAngelHandmade/

Wednesday 22 August 2018

All Dressed Up Stamps - Mirror Mirror

Hope everyone has had an awesome day,

Today I created this card using an All Dressed up Stamps Image called "Mirror Mirror". You can also see more of the images available for sale on their etsy shop here.

I love this image but haven't used it for a while so was so happy to get it out and create this Sweet 16 card for Charlotte.


I started my bringing the image into MS Word, I don't have any fancy programs and I needed to put Charlotte's name onto the dresser to personalise it that little bit more for her. So I created a text box and manoeuvred it into the right spot on the front of the dresser. I then printed it onto Mondi Color Copy 250GSM Card using my Brother Laser Printer.


I coloured the image up using Copic Markers which I will have listed below, I also have a you tube video to go along with my post today, if you would like to watch click on the below :-)


Copic Markers Used

E000, E00, E21, E11, E04, R20
B00, B01, B02
Y21, Y23, Y26
E40, E42, E44
R81, R83
C00, C1, C4
W0, W3
YR20, YR24, YR27
B93, B95, B97, B99


Products Used On The Card

at you spica - clear
Twiddleybitz Card Base
Kaisercraft Decoratie Die- Nesting Square
The Craft Stall - Mini Stack - Kmart
Home and Co A4 Metallic Paper


I hope you have enjoyed my post today, if you have any questions feel free to send me a message or contact me via facebook (all links can be found below).


Thanks for stopping by, Deni

You can find my cards for sale here
https://www.facebook.com/angelhandmadepapercraft

My You Tube Here
https://www.youtube.com/user/Denielle1983/

Instagram Here
http://instagram/angelhandmadepapercraft

Pinterest Here
https://www.pinterest.com.au/DeniAngelHandmade/

Sunday 19 August 2018

Shop Til You Drop with Time For Tea Designs


Good Morning Everyone,

It's Time For Tea Designs Inspiration day, so today I am sharing with you a card I made using "Shop Til You Drop".

I printed the image onto Mondi Color Copy 250GSM using my Brother Laser Printer and coloured her up using Copic Markers. I actually coloured her up a while ago and had her waiting in my tray to be made onto a card so I don't have a colour list for you today.

She was already die cut also, It looks to me like I had used a Lawn Fawn Stitched Rectangle Die.


I started by cutting my bottom layer piece, I cut this using American Crafts Black Cardstock, I then cut another piece slightly smaller also using AC Card. I used a patterned paper pad from American Crafts called #summer. I cut a few pieces from different pages using Fiskars Surecut Trimmer and also cut some small banner pieces using EK Success Cutterbee scissors.

                                              Time For Tea Designs  - Shop Til You Drop

I added a doily from my stash which I had cut in half so I could use the other half on another project since you weren't going to see it anyway.

I added some star ribbon to the left hand side of the image just using Scotch ATG and then wrapped it around the back and adhered it. I grabbed some star die cuts that I had sitting out on my desk leftover from some other projects.


I prepped a piece of black American Crafts Cardstock using EK Success Powder Tool and using my Versamark Watermark Ink Pad and an acrylic block from Lawn Fawn I stamped a sentiment from an unknown stamp set. I then added some Ranger Super Fine White Embossing Powder and heated it using Crafter's Companion Heat gun until it was all melted. The Hello word die was also leftover from another project.


Products Used On My Card Today

Time For Tea Designs - Shop Til You Drop
Lawn Fawn Acrylic Block
Copic Markers
Versamark Watermark Stamp Pad
Ranger Super Fine Embossing Powder
Mondi Color Copy 250GSM
American Crafts #summer
Cutterpillar Pro
Universal Crafts Heat Tool 
Fiskars Surecut Trimmer
American Crafts Cardstock
EK Success Cutterbee Scissors
Scotch ATG
Scotch ATG Refill Club
American Tombow Mono Multi Liquid Adhesive
Sizzix Big Shot

I hope you have enjoyed my post today, if you have any questions feel free to send me a message or contact me via facebook (all links can be found below).


Thanks for stopping by, Deni

You can find my cards for sale here
https://www.facebook.com/angelhandmadepapercraft

My You Tube Here
https://www.youtube.com/user/Denielle1983/

Instagram Here
http://instagram/angelhandmadepapercraft

Pinterest Here
https://www.pinterest.com.au/DeniAngelHandmade/

Saturday 18 August 2018

Ballerina Magic - Whimsy Stamps

We are already halfway through August, this is crazy.

Today I am sharing with you some Ballerina Magic with "Penguin Ballerina" from Whimsy Stamps.

I printed the image onto Mondi Color Copy 250GSM using my Brother Laser Printer and then coloured the gorgeous little penguin up using Copic Markers.


I prepared a leftover piece of American Crafts Cardstock using EK Success powder tool so that I was able to heat emboss a sentiment. I stamped the a sentiment from MFT Stamps Pure Innocence Tutu Cute "You are Tutu Sweet" I used Versamark Watermark stamp pad and an acrylic block from Lawn Fawn. I then added Ranger Superfine White Embossing Powder and used my heat tool to melt the embossing powder.

                                                     Penguin Prima Ballerina Bella Set - Digital Stamp
I then started to prepare my card, I cut some mat pieces from American Crafts Cardstock in Light Blue and White using Fiskars Surecut Trimmer. I cut some patterned papers from The Craft Stall Mini Stack and layered them onto the mat pieces. I cut some leftover pieces from the same paper pad and cut banners into them using EK Success Cutterbee Scissors. I love how sharp and pointy they are, it allows me to make a beautiful cut. I used Scotch ATG to add all the large areas.


I layered a doily over the top using American Tombow Mono Multi Liquid Adhesive. I fussy cut the image out using my Cutterbee Scissors and layered it over the sentiment, I then using my liquid adhesive to adhere them to the doily. I added everything onto a Twiddleybitz Card Base using Scotch ATG then decorated the inside.

This completed my card, I loved the simplicity so decided not to add anything else.

Products Used On My Card

Whimsy Stamps Penguin Ballerina
Copic Markers
Mondi Color Copy 250GSM
Universal Crafts Heat Tool 
MFT Stamps Pure Innocence Tutu Cute
Twiddleybitz Card Base
American Tombow Mono Multi Liquid Adhesive
Scotch ATG
Scotch ATG Refill Club
EK Success Powder Tool
American Crafts Card Stock
The Craft Stall Mini Stack
Doily - stash
EK Success - Cutterbee Scissors
Versamark - Watermark Stamp Pad
Ranger Super Fine Embossing Powder - White
Lawn Fawn Acrylic Block
Fiskars Surecut Trimmer

Copic Markers

C0, C2, C4, R20, 0
C6, C8, C10
B12, B14, B16
B01, B12
YR15, YR68, YR27
Y11, Y13, Y15
E40, E42, E44

I hope you have enjoyed my post today, if you have any questions feel free to send me a message or contact me via facebook (all links can be found below).


Thanks for stopping by, Deni

You can find my cards for sale here
https://www.facebook.com/angelhandmadepapercraft

My You Tube Here
https://www.youtube.com/user/Denielle1983/

Instagram Here
http://instagram/angelhandmadepapercraft

Pinterest Here
https://www.pinterest.com.au/DeniAngelHandmade/

Monday 13 August 2018

A Rose Between Pages - Heartcraft Paper

Hi Everyone,

This week has been a rough one for me (no dirty laundry sharing), when I am at worst I create my best so today I am sharing with you this gorgeous rose bookmark I created for Heartcraft Paper.
You can check out the current HCP Challenge on the Blog Here.

I purchased these Disney Beauty and The Beast Sentiment Stamps about two weeks ago and today I had this bright idea to use them in conjunction with the gorgeous Rose digital stamp from Heartcraft Paper.

Can I just say how much I love this Rose image, it is one of the most stunning ones I have seen in a while, in the shop there is also some beautiful other flowers so please go and check them out.

Anyway, onto my bookmark, I imported the image in to MS Word (no fancy programs here), I then resized the image to the size I would need to fit the bookmark dies I had chosen. I decided to use the My Favorite Things Tall Tag Duo Bookmark dies as I love the faux stitching.

Once I had the images resized I layed them out onto my page so I was able to cut a second one from the same page. I printed the images using my Brother Laser Printer and Mondi Color Copy 250GSM Cardstock.


The images were printed and ready to cut, I adhered the dies over my image using Washi Tape just incase they moved. I ran them through my Crafter's Companion Gemini Machine so I could run them through in one run instead of having to cut them into small sections.

You can watch the colouring and making process video here


After they were die cut I used My Favorite Things Hybrid Ink in Black Licorice and Lawn Fawn Acrylic Blocks and the sentiments and the stars came from a Disney stamp set called Belle, I then grabbed the Copic Markers I wanted to use and got to work.


I coloured the images up using the following markers

Copic Markers Used

G40, G43, G99
E42, E47
Y21
E35
R35, R37, R39


Once I had coloured the image up I added Uni-ball Signo to the rose and at you Spica in Gold to the bow just to give them some definition and some sparkle and shine .


Colouring is now finished, I cut another bookmark piece to use as a backing to cover the bleeding of the Copic Markers, I adhered it using American Tombow Mono Multi Liquid Adhesive and used red Ribbon from Krafty Savers and on the second bookmark I added Whimsy Farm Twine in Rosalie.


After the bookmarks were finished I kept looking at them and decided to add some Nuvo Crystal Drops in Autumn Red.


Products Used On This Card

My Favorite Things - Tall Tag Duo
Lawn Fawn Acrylic Block
My Favorite Things Hybrid Ink - Black Licorice
Mondi Color Copy 250GSM
Copic Markers
EK Success Cutterbee Scissors
Krafty Savers Red Ribbon
Crafters Companion Gemini
American Tombow Mono Multi
Whimsy Farm Twine - Rosalie
at you spica - Gold
Uni-ball Signo White Gel Pen
Disney - Belle Stamp Set
Brother Laser Printer
Nuvo Crystal Drops - Autumn Red

Copic Markers Used

G40, G43, G99
E42, E47
Y21
E35
R35, R37, R39

I hope you have enjoyed my post today, if you have any questions feel free to send me a message or contact me via facebook (all links can be found below).


Thanks for stopping by, Deni

You can find my cards for sale here
https://www.facebook.com/angelhandmadepapercraft


You Tube Here
https://www.youtube.com/user/Denielle1983/
Instagram Here
http://instagram/angelhandmadepapercraft

Pinterest Here
https://www.pinterest.com.au/DeniAngelHandmade/

Sunday 12 August 2018

Time For Tea Designs - Hi Sunshine

Hello Everyone!

I thought i'd share some sunshine and happiness with you all as we move our way through August we begin to realise how fast this year is going and how quickly we are moving through all the seasons. It is currently winter, I think we are just about finished now as the days are beginning to warm up a little.

I coloured up this gorgeous Sunflower Girl from Time For Tea Designs, she is a little cutie that I have had in my digital stash for a little while and came across her again today in my pre- coloured images (this is a tray i keep next to my desk of images I have coloured up and not used or sometimes I just have bulk colouring days and colour up a storm ready for projects).

The image was orgiginally released as Digital File - Sneaky info here - She will be getting released as a rubber woohoo :-) But shhh you didn't hear that from me :-0


Don't forget to check out our current challenge on the Time For Tea Blog here and you can check out the blog here.

She is coloured with Copic Markers however I do not have listed colours to share with you on her.

I started out by hunting down in my stash a patterned paper pad that would match the colours I had used on this image. I ended up going with American Crafts #Summer, it matched perfectly like I had done my image to match the papers haha.

I then began to cut all my mat layers from American Crafts/ Kaisercraft Cardstocks using my Cutterpillar Pro. I then layered them all using Scotch ATG.

Next I moved onto cutting patterned papers to add to the mat layers, I wrapped some Whimsy Farm Twine in Bella around the centre section. I added a doily using American Tombow Mono Multi.

I then added my image which had already previously been die cut on to the doily layer using X-Press It Mounting Tape and Scotch ATG. I also cut the sentiment from the same patterned paper pad and added the mat layers.

I then grabbed Lawn Fawn Spring Showers dies and ran them through my Crafters Companion Gemini using leftover bits of Cardstock, then adhered them using American Tombow Mono Multi.

Next I added all the layers onto a Pre-made Twiddleybitz Card Base using Scotch ATG. I also made extra layers for the inside of the card.


Lastly I added some Tonic Studios Nuvo Crystal Drops in Dandelion Yellow to finish off my project.

I hope you have enjoyed my post today, if you have any questions feel free to send me a message or contact me via facebook (all links can be found below).

Products Used On This Card

American Crafts Cardstock
Kaisercraft Cardstock
Tonic Studios Nuvo Crystal Drops
EK Success Cutterbee Scissors
Cutterpillar Pro
Crafters Companion Gemini
Scotch ATG
Lawn Fawn - Spring Showers
Doily - Stash
Mondi Color Copy 250GSM
Whimsy Farm Twine - Bella
American Tombow Mono Multi
Copic Markers
Twiddleybitz Card Base


Thanks for stopping by, Deni

You can find my cards for sale here
https://www.facebook.com/angelhandmadepapercraft

My You Tube Here
https://www.youtube.com/user/Denielle1983/

Instagram Here
http://instagram/angelhandmadepapercraft

Pinterest Here
https://www.pinterest.com.au/DeniAngelHandmade/

Saturday 11 August 2018

Easter in August? Whimsy Stamps

As the year fly's bye so quickly at this time of the year I didn't expect to be working on Easter Cards, but when inspiration comes inspiration comes.. what can you do.

I had all these images coloured up (using Copic Markers) in my tray, sometimes I print or stamp lots of images at once ready for extra cards. Today I found these and I was inspired with bright colours and of course doilies.. I love doilies on my cards :-) I ended up making 3 cards in the set, I had so much fun making them :-)


I used the last bits of my Doodlebug Spring Time 6x6 Paper Pad, yes I finally reached the end.. it was definitely a tough moment lol. Now if anyone has some de-stash you know where to find me.

Onto my card, I used the gorgeous Penguin Easter Bunny from Whimsy Stamps, I printed them onto Mondi Color Copy 250 GSM using my Brother Laser Printer.

                                                         Penguin Easter Bunny - Digital Stamp
I fussy cut the images out using EK Success Cutterbee Scissors, I added sentiments that were leftovers from other projects. I cut different sizes of pieces of patterned paper from the Doodlebug Paper Pad, and some Plain coloured Cardstock from American Crafts and Canson Paper.

https://www.createbymestudio.com/atgtapeclub


Everything was adhered using either Scotch 3M ATG or American Tombow Mono Multi Liquid adhesive. I then adhered the doilies and the images and sentiments. (One of the sentiments had been stamped using Versamark Watermark Embossing Pad and Ranger Super Fine Embossing Powder, I also did prep the card stock using a EK Success Powder Tool) Once I had all those layers together I added them onto a Twiddleybitz Card Base.

As a final touch I added Tonic Studios Nuvo Crystal Drops in Sweet Lilac, Dandelion Yellow, Duck Egg Blue.


Products Used On This Card

Doodlebug Spring Time 6x6 Paper Pad
Twiddleybitz Card Base
American Tombow Mono Multi
Lawn Fawn Stitched Circles
Lawn Fawn Acrylic Block
EK Success Cutterbee Scissors
Scotch 3M ATG
American Crafts Card Stock
Mondi Color Copy 250GSM
Doily - Stash
Tonic Studios Nuvo Crystal Drops - Sweet Lilac, Dandelion Yellow, Duck Egg Blue
Sizzix Big Shot
Sizzix Big Shot - Australian Seller
Versamark - Watermark Ink Pad
Ranger Super Fine White Embossing Powder

I hope you have enjoyed my post today, if you have any questions feel free to send me a message or contact me via facebook (all links can be found below).


Thanks for stopping by, Deni

You can find my cards for sale here
https://www.facebook.com/angelhandmadepapercraft

My You Tube Here
https://www.youtube.com/user/Denielle1983/

Instagram Here
http://instagram/angelhandmadepapercraft

Pinterest Here
https://www.pinterest.com.au/DeniAngelHandmade/

Sunday 5 August 2018

Time For Tea Designs - You're Awesome

Hi Everyone,

Today I am sharing some Inspiration with you for Time For Tea Designs.

I am using one of the clear stamps "You're A Star" I love this boy image, it is perfect for teenage boy cards in my eyes, and they are very difficult to make sometimes.. I should know I have one of my own lol.


I stamped the images out on to Mondi Color Copy 250GSM Card using Memento Tuxedo Black.


I coloured the image up using Copic Markers, I think it turned out really great, I am so so happy with it. You can watch my colouring and process video on You Tube. Link will be below.


Once I coloured the image up I started working on the card layout. It was a pretty simple layout today for me as I find that is the best way for me to do teenage boy cards.

I used papers from Doodlebug Design Inc - Day to Day 6x6 Paper Pad, I have been using this paper pad for what seems like ages, I love my Doodlebug Papers because they are great patterns on both sides of the papers. Sometimes this makes it difficult to choose a side but most of the time it allows me to make the most out of my paper pads. I can use pretty much every last bit including all my off cuts hahah. Some people may think i'm tight (that's the word we use in Australia anyway) but I just like to make the most out of them.

I cut banners out of some of the smaller pieces using Cutterpillar Pro Scissors, some I had to cut smaller to get the most out of them (using my Cutterpillar Pro).

I cut stars from MFT Stamps Star Stax dies, using some paper from the Doodlebug Paper Pad and some cut offs of American Crafts Cardstock, I ran the dies through my Sizzix Big Shot.

I used Scotch 3M ATG and American Tombow Mono Multi to do my adhering depending on the area I was working on.


Products Used On This Card

Doodlebug Design Inc 6x6 Paper Pad - Day To Day
Twiddleybitz Card Base
Mondi Color Copy 250GSM
American Crafts Cardstock
American Tombow Mono Multi
Scotch 3M ATG
Cutterpillar Pro
EK Success Cutterbee Scissors
MFT Stamps Star Stax


Copic Markers Used

E000, E00, E21, E11, E04, R20
C6, C8, C10, T0
T0, T2, T4
R37, R39, R89
B93, B95, B97
G03, G07
E55, E57
W1, W4

I hope you have enjoyed my post today, if you have any questions feel free to send me a message or contact me via facebook (all links can be found below).


Thanks for stopping by, Deni

You can find my cards for sale here
https://www.facebook.com/angelhandmadepapercraft

My You Tube Here
https://www.youtube.com/user/Denielle1983/

Instagram Here
http://instagram/angelhandmadepapercraft

Pinterest Here
https://www.pinterest.com.au/DeniAngelHandmade/

Saturday 4 August 2018

Whimsy Stamps - Bubbles and Bubbly

It's been a week of New Releases for Whimsy Stamps Digi Team, we are loving all the new designs and have been having a great time sharing them with you.

This is my third card for release week and I am using Penguin Bubble Bath.


I printed my image using my Brother Laser Printer onto Mondi Color Copy 250GSM Cardstock, this is my go to for Copic Markers at the moment.

I coloured her up using Copic Markers which I will have listed below my card walk through. Once she was coloured up I ran her through my Sizzix Big Shot with a Lawn Fawn Stitched Circle die.


Using a 6x6 Paper Pad from Kaisercraft I cut a mat layer and a few smaller pieces for banners and grabbed a leftover strip from another project. Using the pieces I had ready for banners I cut the banner ends into them using EK Success Cutterbee Scissors.

All the larger layers were adhered using Scotch 3M ATG and the smaller pieces I used American Tombow Mono Multi Liquid Adhesive.

 Create By Me Studio - ATG Club


I cut a base layer using American Crafts black card stock, and used a Twiddleybitz Card Base to adhere all my bits and pieces to.

I then used Tonic Studios Nuvo Crystal Drops to add three different size drop to the right hand side of the image.

Copic Markers Used

T3, 0, R20
R56
C7, C8, C10
E07, YR27, E97
YR04, YR09, YR27
BG00, BG01, 0
BG15, BG09
R30, R32
W1, W4

Products Used On This Card

Mondi Color Copy 250GSM
Scotch 3M ATG
Ek Success Cuterbee Scissors
Lawn Fawn Acrylic Block
Memento Tuxedo Black
Tonic Studios Nuvo Crystal Drops - Ebony Black
Lawn Fawn Stitched Circles
My Favorite Things - All About Mom
Kasiercraft Miss Match 6x6 Paper Pad
Twiddleybitz Card base
Copic Markers


I hope you have enjoyed my post today, if you have any questions feel free to send me a message or contact me via facebook (all links can be found below).


Thanks for stopping by, Deni

You can find my cards for sale here
https://www.facebook.com/angelhandmadepapercraft

My You Tube Here
https://www.youtube.com/user/Denielle1983/

You Tube Here
https://www.youtube.com/user/Denielle1983/
Instagram Here
http://instagram/angelhandmadepapercraft

Pinterest Here
https://www.pinterest.com.au/DeniAngelHandmade/

Stunning Rose for a stunning friend

Hi Everyone,

Deni here today sharing a card for Heartcraft Paper, I am using the gorgeous Rose image.


I coloured the image up using Copic Markers, I used R35, R37, R89 on the red section, and G03, G07 and G28 on the green. It was such a stunning image to colour up.

I cut the image out on my Cutterpillar Pro, popped it into my Misti and stamped The "To A Beautiful Friend" sentiment using my Misti Stamping Tool and Memento Tuxedo Black.

I cut a piece of silver Polka dot paper leftover from a Love From Lizi Kit, and layered that onto a piece of American Crafts Black cardstock.


Such an elegant but simple design, I was super happy with the way that it turned out.


I hope you have enjoyed my post today, if you have any questions feel free to send me a message or contact me via facebook (all links can be found below).


Thanks for stopping by, Deni

You can find my cards for sale here
https://www.facebook.com/angelhandmadepapercraft

My You Tube Here
https://www.youtube.com/user/Denielle1983/

You Tube Here
https://www.youtube.com/user/Denielle1983/
Instagram Here
http://instagram/angelhandmadepapercraft

Pinterest Here
https://www.pinterest.com.au/DeniAngelHandmade/