Showing posts with label Zing. Show all posts

Saturday, 28 September 2019

Whimsy Stamps - There's A Penguin in The Pumpkin Patch

Hi Everyone!

Today I have a super cute Whimsy Stamps card to share with you using Penguin Pumpkin Patch, one of the more recent Digital Release images.


I printed the image onto X-Press It Blending Cardstock using my Brother Laser Printer, then proceeded to colour the image up using Copic Markers.


I added some leftover orange cardstock behind the image, trimming it down so you could only see the top and bottom of the orange.


I cut a black and a white mat layer from American Crafts Cardstock and a Kraft Layer using Francheville Cardstock. The patterned papers are from Kaisercraft Miss Match Collection. I layered them up using Scotch ATG. I also cut some leftover pieces down to create banners.


I added a doily from my stash using American Tombow Mono Multi Liquid adhesive.I then layer down the image over the top.


I cut down a strip of vellum, using a sentiment from MFT Stamps Kind Thanks sentiment set, some Zing Embossing Powder in Metallic Finish, Versamark Watermark Ink Pad and a Lawn Fawn Acrylic Block, I then used my heat tool to melt the embossing powder. I wrapped the vellum around my card and carefully used a small dab of liquid adhesive under the ends to adhere it to my card.


I ran Lawn Fawn Stitched Leaves through my Sizzix Big Shot using some leftover brown cardstock and some vellum and layered them up and adhered them using American Tombow Mono Multi Liquid adhesive. I finally adhered all the layers to a a Couture Creations Card base.


I decorated the inside using leftovers of the patterned papers.


I hope you have enjoyed my post today, if you have any questions feel free to send me a message or contact me via facebook (all links can be found below).

Watch the You Tube Video Here


Products Used On My Card (Affiliate Links Used Where Possible)



Copic Markers Used

W0, W4, 0
T2, T4, 0, R20
T6, T8, T10
YR12, YR14, YR18, E09, E23
YR12, YR14, YR16
E13, E97, E25, G94
G94, BG96, G99

Thanks for stopping by, Deni

CAMERA SET UP - FOR YOU TUBE VIDEOS ONLY
Blue Yeti Microphone
Sony Handycam HDR CX4-05
Tripod – Manfrotto MKCompactaCN-BK

S O C I A L MEDIA 
B L O G : https://ldli.co/e/3xky6x
I N S T A G R A M : https://ldli.co/e/5dn20x
YOU TUBE: https://ldli.co/e/ej5l90 
F A C E B O O K: https://ldli.co/e/mjxn2r
PINTEREST: https://ldli.co/e/2l9zom


I was a 2018 Ambassador for Copic Marker Australia and NZ


Friday, 7 June 2019

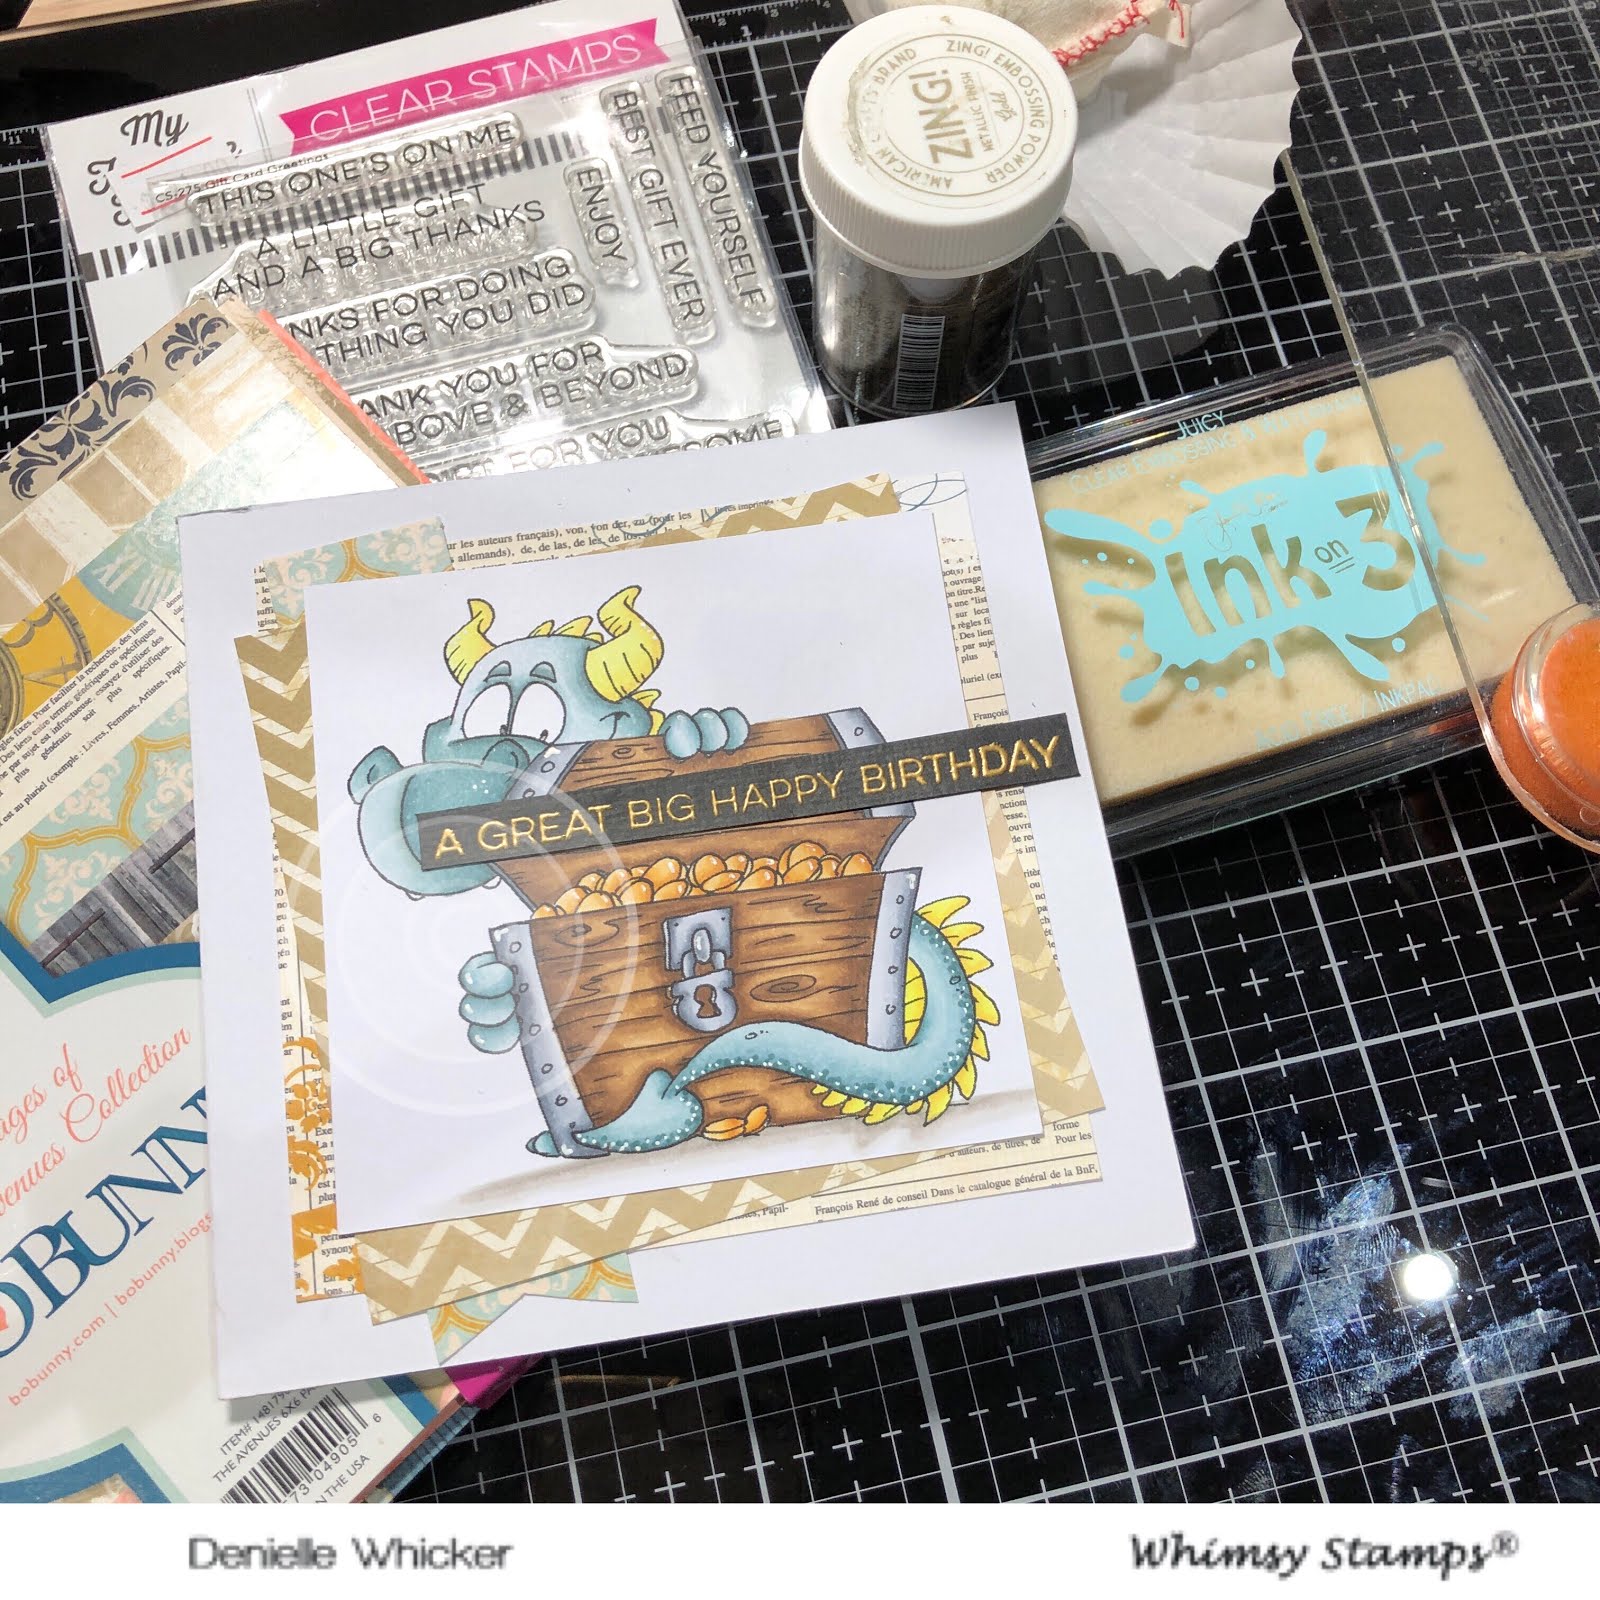
Whimsy Stamps - Peeking Dragon

Good Morning,

Today I am working with a Whimsy Stamps Rubber Stamp called Peeking Dragon, such an adorable image to work with.


I stamped the image onto X-Press It Blending Cardstock using Memento Tuxedo Black and a Fiskars Stamping Press.

I used my Copic Markers to colour the image up, I will have all these listed below including picture links to purchase.


Once I had the image coloured up I used my Uni-Ball Signo White Gel Pen to add details to the image.


I cut the image down on my Tim Holtz Tonic Studios Guillotine.


I used a leftover strip of American Crafts Black Cardstock, and stamped out a sentiment from MFT Stamps Gift Card Greetings Stamp Set, I used Ink On 3 Embossing Ink and some Zing! Embossing Powder in Gold and my heat gun to melt the embossing powder.


I used patterned papers from Bo Bunny The Avenues Collection 6x6 Paper Pad and cut some pieces down on my Guillotine, I adhered all the layers to a Couture Creations Card Base using Scotch ATG.


I hope you have enjoyed my post today, if you have any questions feel free to send me a message or contact me via facebook (all links can be found below).

Watch the You Tube Video Here


Products Used On My Card (Affiliate Links Used Where Possible)


Copic Markers Used

C2, C3, C5, C7
E55, E57, E59
W1, W5
Y04, Y13, Y35
YR21, YR24, YR27
BG70, BG72, BG75, BG78, 0 Colorless Blender

Thanks for stopping by, Deni

CAMERA SET UP - FOR YOU TUBE VIDEOS ONLY
Blue Yeti Microphone
Sony Handycam HDR CX4-05
Tripod – Manfrotto MKCompactaCN-BK

S O C I A L MEDIA 
B L O G : http://angelhandmadepapercraft.blogspot.com.au/
I N S T A G R A M : http://instagram.com/angelhandmadepapercraft
YOU TUBE: http://www.youtube.com/c/AngelHandmadePapercraft
F A C E B O O K: http://www.facebook.com/angelhandmadepapercraft
PINTEREST: https://www.pinterest.com.au/angelhandmadepapercraft


I was a 2018 Ambassador for Copic Marker Australia and NZ


Monday, 3 October 2016

Time For Tea Blog Hop - Christmas Come Early

It's Blog Hop time over at Time For Tea Designs, the theme is Christmas Come Early. We encourage you all to come and join in as there is some great prizes on offer.. and seriously who doesn't love Christmas cards! :-)

Here is the Blog Hop Run incase you get lost

Start on the Time For Tea Blog http://timeforteadesigns.blogspot.com.au
Hop to Melanie http://melscraftroom.blogspot.co.uk
Hop to Nicole http://Sweetdesignzz.blogspot.com
Hop to Lynda http://positive-force.blogspot.com
Hop to me (Deni) http://angelhandmadepapercraft.blogspot.com.au
Hop to Grace http://sugarcards.blogspot.ca

Then back to the Time For Tea Blog http://timeforteadesigns.blogspot.com.au


I have used two of the New Release Images for my cards today.


Products Used

Memory Box Precious Stars Dies
Zing Embossing Powder - Metallic Finish
Versamark - Watermark Ink Pad
Lawn Fawn Acrylic Blocks
Kaiserrafts Cardstocks
Sizzix Big Shot
Tombow Mono Multi Liquid Adhesive
Lawn Fawn Stitched Rectangles
Mondi Color Copy
Uniball Signo White Gel Pen
Scotch ATG
Kaisercraft Silver Bells 6 1/2" Paper Pad
Fiskars Scissors
Copic Markers

Most of These Products were purchased from Auzz Trinklets N Krafts.

I hope you have enjoyed my post today, if you have any questions feel free to send me a message or contact me via facebook (all links can be found below).


Thanks for stopping by,

Glitter Text @ Glitterfy.com

You Can find my cards for sale here https://www.facebook.com/angelhandmadepapercraft

My Blogs

http://angelhandmadepapercraft.blogspot.com.au/

http://auzztrinkletsnkrafts.blogspot.com.au/

Saturday, 6 September 2014

Wedding in Style

Hi everyone,

Today I have a quick wedding card for you. I have actually made two but will post the second one for you tomorrow.

A friend asked me to make a wedding card for one of her daughters teachers who just got married. This card thankfully managed to come together. Well actually tomorrows card did. I used an image I had already coloured and for some reason didn't even think to ask friend about hair colours so the hair colours ended up being wrong. But I managed to make another card the same but with different papers out of the collection.. and that is where todays card came from :-)

So without blabbing on too much which I seem to be doing a lot lately here is my first card.

The image is coloured using Copic Markers purchased from Craft-a-Lot and Craft Online.

The Image is Wedding Couple from Time for Tea Designs, you can find the image here on etsy.


What I have used on this card

Bella! Wedding Smitten
Bella! Wedding Tokens
Bella! Wedding Divine
Bella! Wedding Two Hearts
X-Press it Blending Cardstock
Zing! Embossing Powder Metallic Finish - Silver
Tombow Mono Multi Liquid Glue
My Favorite Things Dimensional Banners
X-Press it Double Sided Tape
Netting - Stash
Versamark - Watermark Stamp Pad
My Favorite Things Hybrid Ink - Black Licorice
Twiddleybitz Card Base
My Favorite Things Dienamics Keys and Locks
CC Designs Amy R Stamps Congrats Sentiments


Copic Markers Used

Sorry guys this one is an image I coloured a while ago so I do not have a colour list.

Thanks for stopping by, and hope to see you around again tomorrow for the second wedding card.


Glitter Text @ Glitterfy.com

Thursday, 9 January 2014

Sister card

Hello all :-)

Just a quick card post for today, no colouring involved in this card which is great.
 
A repeat customer asked me to make her a card for her sister's 40th birthday, I seen a similar design to this on Pinterest a while back and wanted to try it out. 

Th client specifically asked for a sister stamp on there, thankfully and perfect timing I had just ordered a stamp set from cc designs called Brothers & Sisters. It was such a perfect stamp set.

I have embossed the Sister sentiment on the card in Silver Zing Embossing Powder. The number 40 is from a sticker set in my stash, which I have then coated in Kindyglitz. I have added some Kaisercraft Bling to the scallop circle from Spellbinders and stamped birthday wishes (cant find the stamp set to tell you where that's from right now) with Memento rose bud ink.

The paper is from Kaisercraft, a few leftovers in my stash. I have added the dash lines using my uniball white pen.


Thanks for stopping by,

Deni x


Saturday, 16 November 2013

A very sad card :-(

Approximately 6 weeks ago, our neighbour (and also one of my sons preschool teachers), her husband was diagnosed with cancer, it was a very aggressive cancer, and unfortunately even though he gave a hell of a fight.. he lost his life on Tuesday night :-(

I made a card to give to his family, a beautiful lady, and 2 young daughters in their early 20s.. such a hard card to make, even worse when you know the people you are making it for :-(


For this card I have used

Hampton Art Friends Clear Stamps
Sullivans Clear stamps Item No. 45809
Tim Holtz Embosiing Ink Pad
Embossing buddy
Zing - Silver emobossing powder
X-press it blending cardstock
x-press it double sided tape
Cherry Ribbon - double face French satin 10mm
Whimsy Farm Twine - Bella
Fiskars Scissors
Kmart Cardstock
Kaisercraft Cardstock- Ballet
Kaisercraft Cardstock - White

For the flowers I have coloured them using Copic Markers purchased from Craft-a-lot and Forever Markers

Copic Markers Used

R81, R83, R85, BG10