Today I am working with Helmar Worldwide and I will be doing a How To Video For You.
We are going to be learning how to make a Rosette without using any dies, just using what's on hand.

What will you need?
-Helmar Quick Dry 450
-Bone Folder
-Circle Punch or die
-Trimmer / Score Board/ Ruler
-Scrap card stock - preferable 30cmx2.5cm

First things first cut down a piece of scrap cardstock to a strip of approx 30cmx2.5cm in size.
I am using my Fiskars Trimmer which has an indent where the blade goes through (alternatively you can use a ruler or scoring board if you have one), I scored at 1 inch to begin with but then went back and scored every half inch (or every 1.5cm) using my bone folder.

Once you strip is scored you can add Helmar Quick Dry 450 to the end and adhere it to the other end creating a circle.

Leave that to dry for a moment, whilst waiting punch out a small circle (or die cut one if you don't have a punch) this is going to create a backing piece to hold your rosette together.
Now your strip should be dry carefully use the palm of your hand to push down on the rosette, you will put Helmar 450 Quick Dry covering the circle you punched out, then add the rosette on top and carefully hold it down until it is dry, I usually wait a few seconds then turn it over and carefully centre your circle.
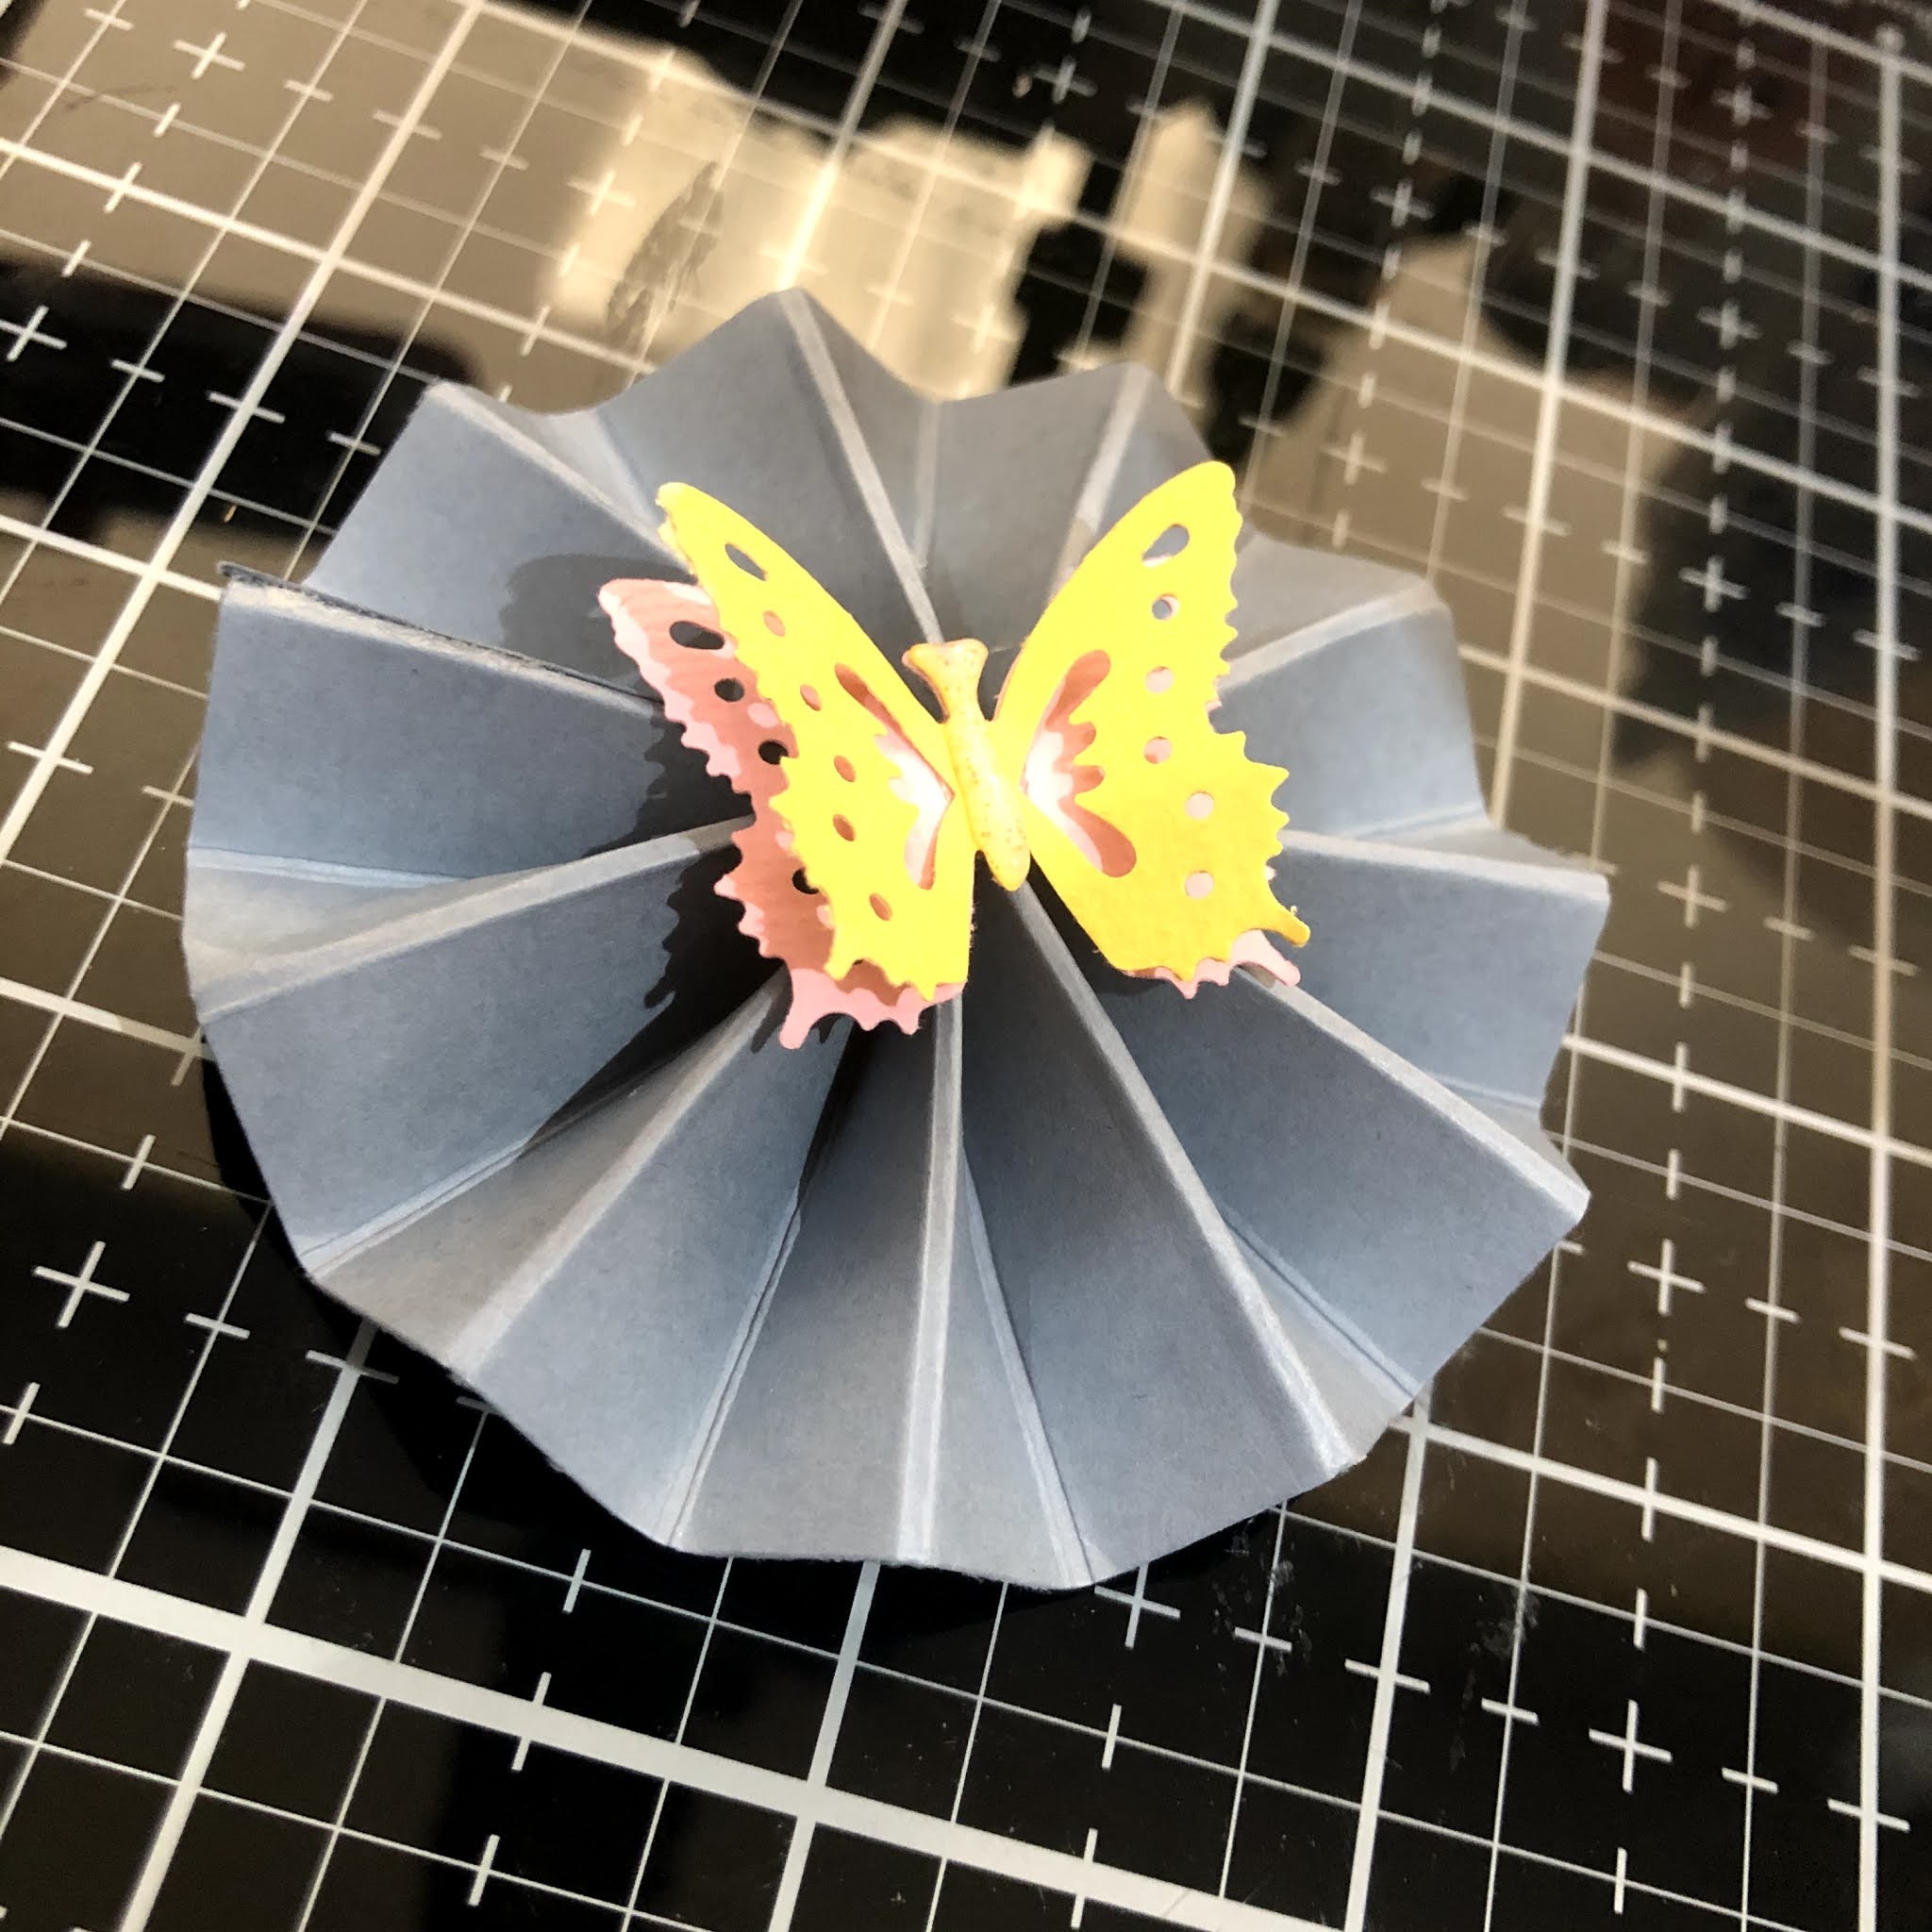
Once your Rosette is dry you can add a button or something decorative to the centre to finish it off.

I used an EK Success Butterfly punch and layered it up, then brushed Wink Of Stella to the wings and some Tonic Studios Nuvo Crystal Drops in Glitter Drops- Summer Sunrise.

Your Rosette is now complete, you can add it to your project using more of the 450 Helmar Quick Dry.
I hope you have enjoyed my post today, if you have any questions feel free to send me a message or contact me via facebook (all links can be found below).
Watch the You Tube Video Here
Products Used On My Card (Affiliate Links Used Where Possible)
Thanks for stopping by, Deni
CAMERA SET UP - FOR YOU TUBE VIDEOS ONLY
Blue Yeti Microphone
Sony Handycam HDR CX4-05
Tripod – Manfrotto MKCompactaCN-BK
S O C I A L MEDIA
B L O G : https://ldli.co/e/3xky6x
I N S T A G R A M : https://ldli.co/e/5dn20x
YOU TUBE: https://ldli.co/e/ej5l90
F A C E B O O K: https://ldli.co/e/mjxn2r
PINTEREST: https://ldli.co/e/2l9zom
I was a 2018 Ambassador for Copic Marker Australia and NZ