Thursday 31 December 2020

Gerda Steiner - Deck The Halls Meowy Christmas

Hi Everyone,

Today I am sharing another Christmas Card with you using Deck The Halls from Gerda Steiner Designs, I love this stamp so much.


I coloured the image up quite a while ago so I don't have any Copic Markers lists for this card. I stamped the image onto X-Press It Blending Card using Memento Tuxedo Black and my Misti Stamping Tool. Copic Markers were used to colour the image up.

I cut down American Crafts Christmas Card and patterned papers from Kaisercraft Mistletoe 6.5" Paper Pad. 

I followed a sketch from Mojo Monday #499.


Sometimes you just need a little help with layout and these sketches are awesome to get your creativeness going. I haven't used any for a while and this is my second one now in a week of creative slump.

I decided to go through my container of images that I have coloured up previously and start getting them onto cards. 

I began by die cutting the image using Lawn Fawn Stitched Oval die which I ran through my Sizzix Big Shot. I did carefully cut the tail so that it didn't get cut off (if you slide the die underneath that part won't be cut.)


I trimmed the patterned paper down and layered them on top of American Crafts cardstock, finally adhering to a Couture Creations Card Base. 


The last step is to add Glitter glue to the bauble and the lights, I used Derivan Kindy Glitz however I could not find any links to this so have linked up a few other similar products. 


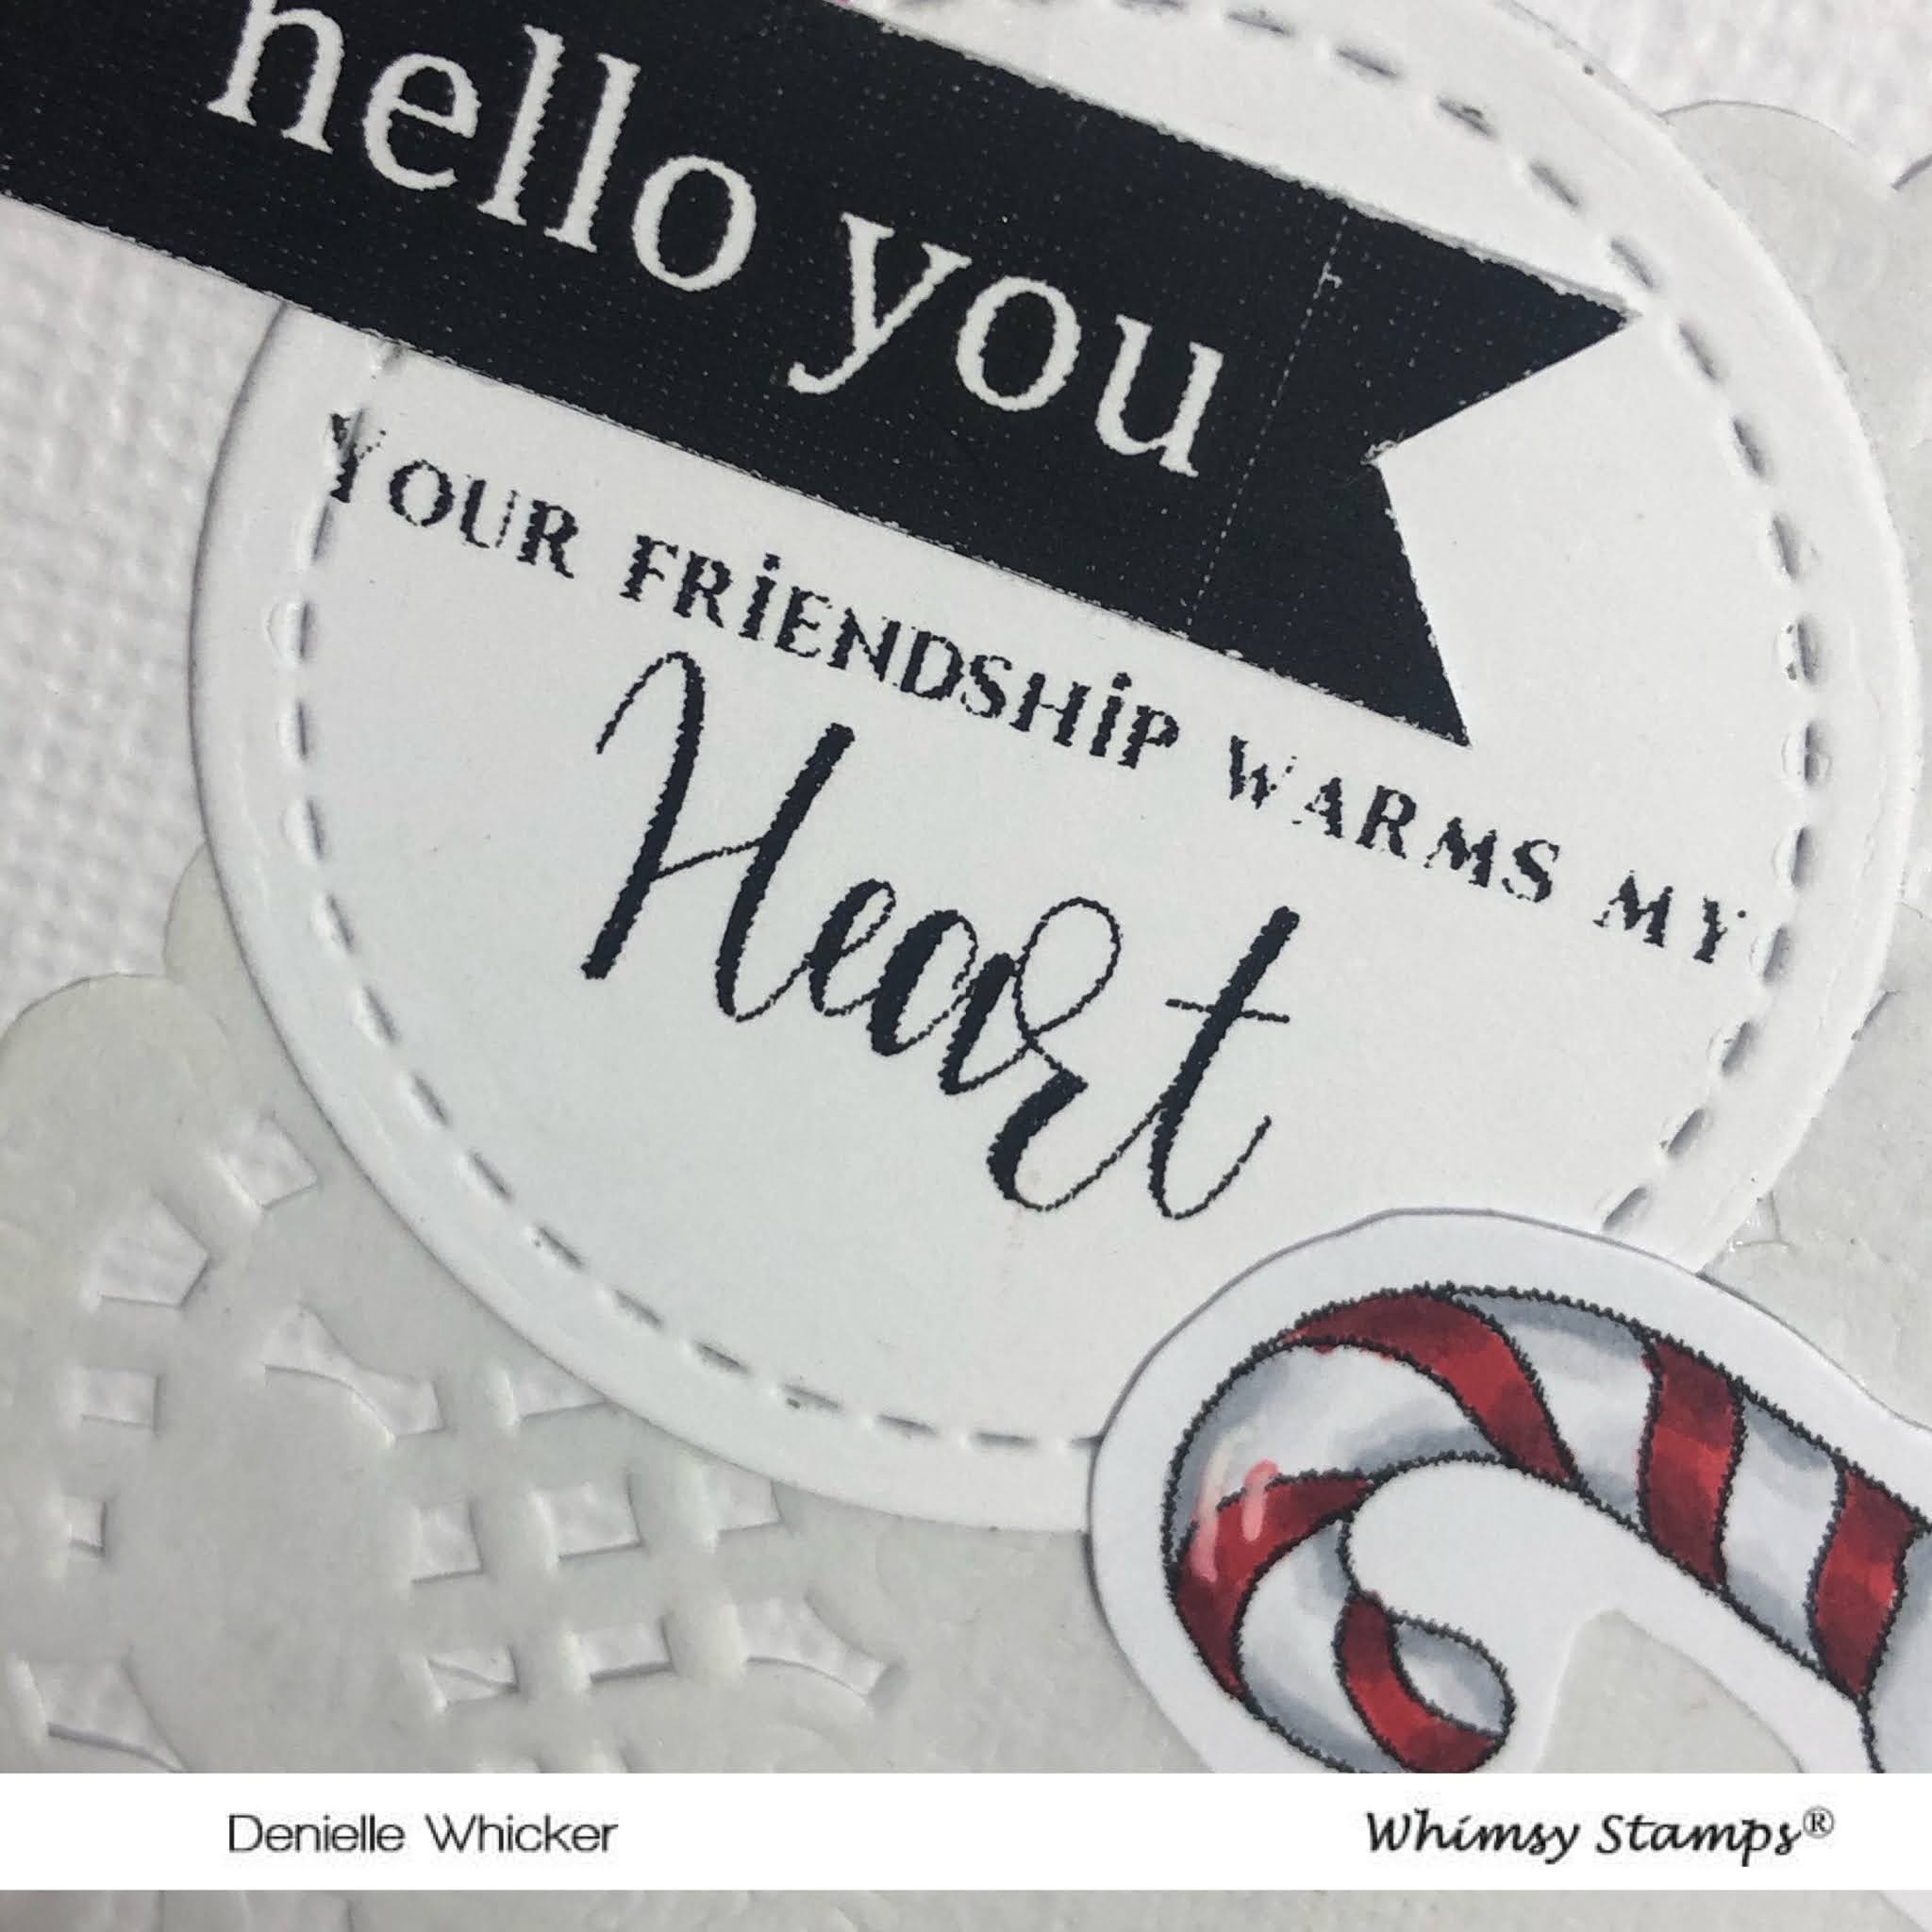
I stamped a sentiment from the same stamp set using a Lawn Fawn Acrylic Block and Memento Tuxedo Black Ink.


I decorated the inside of the card to match the front just using a few leftovers from the same paper pad.


I hope you have enjoyed my post today, if you have any questions feel free to send me a message or contact me via facebook (all links can be found below).

Watch the You Tube Video Here


Products Used On My Card (Affiliate Links Used Where Possible)


Copic Markers Used

Sorry no list today
Thanks for stopping by, Deni

CAMERA SET UP - FOR YOU TUBE VIDEOS ONLY
Blue Yeti Microphone
Sony Handycam HDR CX4-05
Tripod – Manfrotto MKCompactaCN-BK

S O C I A L MEDIA 
B L O G : https://ldli.co/e/3xky6x 
I N S T A G R A M : https://ldli.co/e/5dn20x
YOU TUBE: https://ldli.co/e/ej5l90 
F A C E B O O K: https://ldli.co/e/mjxn2r
PINTEREST: https://ldli.co/e/2l9zom


I was a 2018 Ambassador for Copic Marker Australia and NZ


Deck The Halls - Gerda Steiner

Hi Everyone, 

Can you believe it's only 3 weeks til Christmas, this year has gone way too fast for my liking. 

Today I have put together a Christmas Card from an image I coloured up a while ago from the Gerda Steiner Deck The Halls Clear  3x4" stamp set. 


I stamped the images onto X-Press It Blending Cardstock using my Misti Stamping Tool and Memento Tuxedo Black Ink.

I ran the image through my Sizzix Big Shot using a Lawn Fawn Stitched Circle Die, these are my favourite circle dies if you haven't noticed :-)

Once I had the image die cut I decided to have a look for a sketch - my brain just wasn't working properly today haha. I went to pinterest and found this sketch from Mojo Monday #385


I am using papers from an old Kaisercraft Paper Pad - Mistletoe 6.5"x6.5" Paper Pad and cardstocks from American Crafts Christmas Cardstock Pack. 


The sentiment is also from the same Kaisercraft Paper Pad, I cut all the words out separately so I could split them across my card. 


I used my EK Success Star Confetti Punch to punch out some stars from the leftover white cardstock from the image. I adhered the stars to my card using Helmar Acid Free liquid adhesive, then using Derivan Kindyglitz to sparkle them up, I couldn't find links for it but have linked up some other glitter glues.


I also added the glitter glue to the lights and the baubles, you can see how sparkly they are in this picture.


I also added a doily in behind some of the patterned papers.


Everything was adhered to my card today using Helmar Acid Free liquid adhesive, this is my go to for liquid adhesives. 


I hope you have enjoyed my post today, if you have any questions feel free to send me a message or contact me via facebook (all links can be found below).

Watch the You Tube Video Here


Products Used On My Card (Affiliate Links Used Where Possible)


Copic Markers Used

sorry, no list for you today. 


Thanks for stopping by, Deni

CAMERA SET UP - FOR YOU TUBE VIDEOS ONLY
Blue Yeti Microphone
Sony Handycam HDR CX4-05
Tripod – Manfrotto MKCompactaCN-BK

S O C I A L MEDIA 
B L O G : https://ldli.co/e/3xky6x 
I N S T A G R A M : https://ldli.co/e/5dn20x
YOU TUBE: https://ldli.co/e/ej5l90 
F A C E B O O K: https://ldli.co/e/mjxn2r
PINTEREST: https://ldli.co/e/2l9zom


I was a 2018 Ambassador for Copic Marker Australia and NZ


Whimsy Stamps - A Christmas Unicorn

Hi Everyone :-)

Today I am sharing with you a Christmas Card I created using A Christmas Unicorn from Whimsy Stamps, isn't she just beautiful :-)


I love this image so much :-)


I printed the image onto X-Press It Blending Cardstock using my Brother Laser Printer, then fussy cut her down using my EK Success Cutterbee Scissors. 


I wanted to try and do a white on white background with American Crafts white cardstock and a doily but it needed a pop of red so I added a layer of red American Crafts Cardstock.


I printed some sentiments from Whimsy Stamps digital sentiment sets - Big Wishes and Everyday Banner.


I really love how the card turned out, sometimes simple is better. I added lots of glitter to the image, used some leftover card stock for the inside of the card and it was complete.


I hope you have enjoyed my post today, if you have any questions feel free to send me a message or contact me via facebook (all links can be found below).

Watch the You Tube Video Here


Products Used On My Card (Affiliate Links Used Where Possible)


Copic Markers Used

RV000, RV10, RV11
Y26, YR27
Y02, Y08
BG000, BG02, BG07
C0, C1, C4, C6
0 Colorless Blender
G14, G03, G09
R27, R39, R59

Thanks for stopping by, Deni

CAMERA SET UP - FOR YOU TUBE VIDEOS ONLY
Blue Yeti Microphone
Sony Handycam HDR CX4-05
Tripod – Manfrotto MKCompactaCN-BK

S O C I A L MEDIA 
B L O G : https://ldli.co/e/3xky6x 
I N S T A G R A M : https://ldli.co/e/5dn20x
YOU TUBE: https://ldli.co/e/ej5l90 
F A C E B O O K: https://ldli.co/e/mjxn2r
PINTEREST: https://ldli.co/e/2l9zom


I was a 2018 Ambassador for Copic Marker Australia and NZ


Saturday 26 December 2020

Whimsy Stamps - Dragon Delivery

Hi Everyone :-)

It is Boxing Day here in Australia and I am so behind on all my posting, last week I was off work so so sick and on Monday afternoon my youngest had a fall on the trampoline and broke his arm and fractured his wrist (yep all this a week before Christmas). I will post pics at the end of my blog post so y'all can see. 


Anyway, Today I am here to share with you a planner layout I created using Whimsy Stamps Dragon Delivery, this is a Digital Stamp from the Dustin Pike Collection. 


I printed the image onto PPS Sticker Paper using my Brother Laser Printer. 


I coloured the image using Prismacolor Pencils, Paper Stumps and blending solution. 


I am using my Erin Condren Vertical Planner for my layout today.

I adhered some road washi tape to the right side of my layout and adhered the trimmed down image.


On the left hand side I decorated with stickers from my stash.


As I mentioned earlier here is a pic of poor little boys arm


You can see the huge break and how it is causing the other bone to bow, he also has a fracture in his wrist :-( We are off to see the surgeon and get new X-rays this week after he had it manipulated last week.

I hope you have enjoyed my post today, if you have any questions feel free to send me a message or contact me via facebook (all links can be found below).

Watch the You Tube Video Here


Products Used On My Card (Affiliate Links Used Where Possible)


Prismacolor Pencils Used 

PC912, PC909, PC907
PC923, PC925, 
PC1009, PC995
PC1054, PC1058
PC1058, PC935

Thanks for stopping by, Deni

CAMERA SET UP - FOR YOU TUBE VIDEOS ONLY
Blue Yeti Microphone
Sony Handycam HDR CX4-05
Tripod – Manfrotto MKCompactaCN-BK

S O C I A L MEDIA 
B L O G : https://ldli.co/e/3xky6x 
I N S T A G R A M : https://ldli.co/e/5dn20x
YOU TUBE: https://ldli.co/e/ej5l90 
F A C E B O O K: https://ldli.co/e/mjxn2r
PINTEREST: https://ldli.co/e/2l9zom


I was a 2018 Ambassador for Copic Marker Australia and NZ


Whimsy Stamps - Penguin Candy Cane + Erin Condren Vertical Planner Layout

Hi Everyone, 

Hope everyone has had a lovely Christmas!

Today I am sharing with you a planner layout I created in my Erin Condren Vertical Planner using Whimsy Stamps Penguin Candy Cane (I used the Digital however you can use the rubber if you prefer). 


I printed the stamp out with my printer directly onto PPS Sticker Paper after I resized it on my computer to fit my layout (OK.. so I may have totally winged it and not planned the size haha). 


Using Prismacolor Pencils, a blending stump and blending solution I coloured the image up, I filed the colour off my blending stump in between each colour to prevent any bleeding or carrying over of colour. 


I trimmed the image down using my EK Success Cutterbee Scissors, grabbed my Erin Condren Vertical Planner and adhered the image to the left side. I laid out the rest of my planner layout around the image using some EC Stickers and some from my stash. I also used a few washi tapes I had laying around. 


I am very late in doing the voice over of this video and editing ready for upload as it has been a crazy couple of weeks for us.

I hope you have enjoyed my post today, if you have any questions feel free to send me a message or contact me via facebook (all links can be found below).

Watch the You Tube Video Here


Products Used On My Card (Affiliate Links Used Where Possible)


Prismacolor Pencils Used

PC1083, PC1054
PC1058, PC935
PC923, PC924, PC925
PC1013
PC1033, PC921

Thanks for stopping by, Deni

CAMERA SET UP - FOR YOU TUBE VIDEOS ONLY
Blue Yeti Microphone
Sony Handycam HDR CX4-05
Tripod – Manfrotto MKCompactaCN-BK

S O C I A L MEDIA 
B L O G : https://ldli.co/e/3xky6x 
I N S T A G R A M : https://ldli.co/e/5dn20x
YOU TUBE: https://ldli.co/e/ej5l90 
F A C E B O O K: https://ldli.co/e/mjxn2r
PINTEREST: https://ldli.co/e/2l9zom


I was a 2018 Ambassador for Copic Marker Australia and NZ


Saturday 19 December 2020

Time For Tea Designs Tennis Fun

Hi Everyone,

Sorry I haven't been around much lately.. needed some me time.

The Mum of a friend of mine asked me to make a friend of hers (did u get all that haha) a Tennis Birthday Card. I love this image from Time For Tea Designs, unfortunately this image is an old retired stamp so you won't be able to purchase it but it is definitely one of my favourites. 


I printed the image onto X-Press It Blending Cardstock using my Brother Laser Printer, I then ran the image through Sizzix Big Shot using a Lawn Fawn Stitched Circle Die. 


Using my Copic Markers I coloured the image up, I will have a full list of Copic Markers Used at the bottom of my blog post if you are looking for them. 

The Gold patterned cardstock is actually from my Erin Condren Planner bands packaging, I packed them all away and thought I would be able to use the packaging.. and I did :-)

I cut down some American Crafts Black Cardstock and some Kaisercraft Red Cardstock to create my matte layers. I adhered the patterned paper and the matte layers using my Scotch ATG. 


I ran some red scraps through my Big Shot using Kaisercraft alphabet lowercase (I can't find any links for these but will try and link up some other alphabet dies), I also used some black scraps to cut MFT Stamps Big Numbers. I adhered the alphas to my card using American Tombow Mono Multi. 


Using Lawn Fawn Wavy Sayings stamp set I stamped out the Happy Birthday using Ink on 3 Embossing Ink and Wow Embossing Powder Fine in Primary Apple Red. I had some vellum scraps in my bucket which I had prepped using EK Success Powder Tool ( I will link up a few different ones). I heated the embossing powder up and melted it using my Heat Tool. Finally I trimmed the sentiment down using my EK Success Cutterbee Scissors then gently added a very small amount of American Tombow Mono Multi to the back of each letter.


I used more of the matte layers to decorate the inside of my card. 


I hope you have enjoyed my post today, if you have any questions feel free to send me a message or contact me via facebook (all links can be found below).

Watch the You Tube Video Here


Products Used On My Card (Affiliate Links Used Where Possible)


Copic Markers Used 

W1, 0
C3, 0
E51, E53, E55, R20
Y21, Y23, E31
Y02, Y08
R27, R39


Thanks for stopping by, Deni

CAMERA SET UP - FOR YOU TUBE VIDEOS ONLY
Blue Yeti Microphone
Sony Handycam HDR CX4-05
Tripod – Manfrotto MKCompactaCN-BK

S O C I A L MEDIA 
B L O G : https://ldli.co/e/3xky6x 
I N S T A G R A M : https://ldli.co/e/5dn20x
YOU TUBE: https://ldli.co/e/ej5l90 
F A C E B O O K: https://ldli.co/e/mjxn2r
PINTEREST: https://ldli.co/e/2l9zom


I was a 2018 Ambassador for Copic Marker Australia and NZ