Saturday, 29 January 2022

Paper Nest Dolls - Emma with Starfish (Water Colouring Only)

Hi Everyone, 

Today I am here to share with you a colour along video for Paper Nest Dolls. I am a recent addition to their team and am super excited to get life back on track and lots of sharing with you guys. 
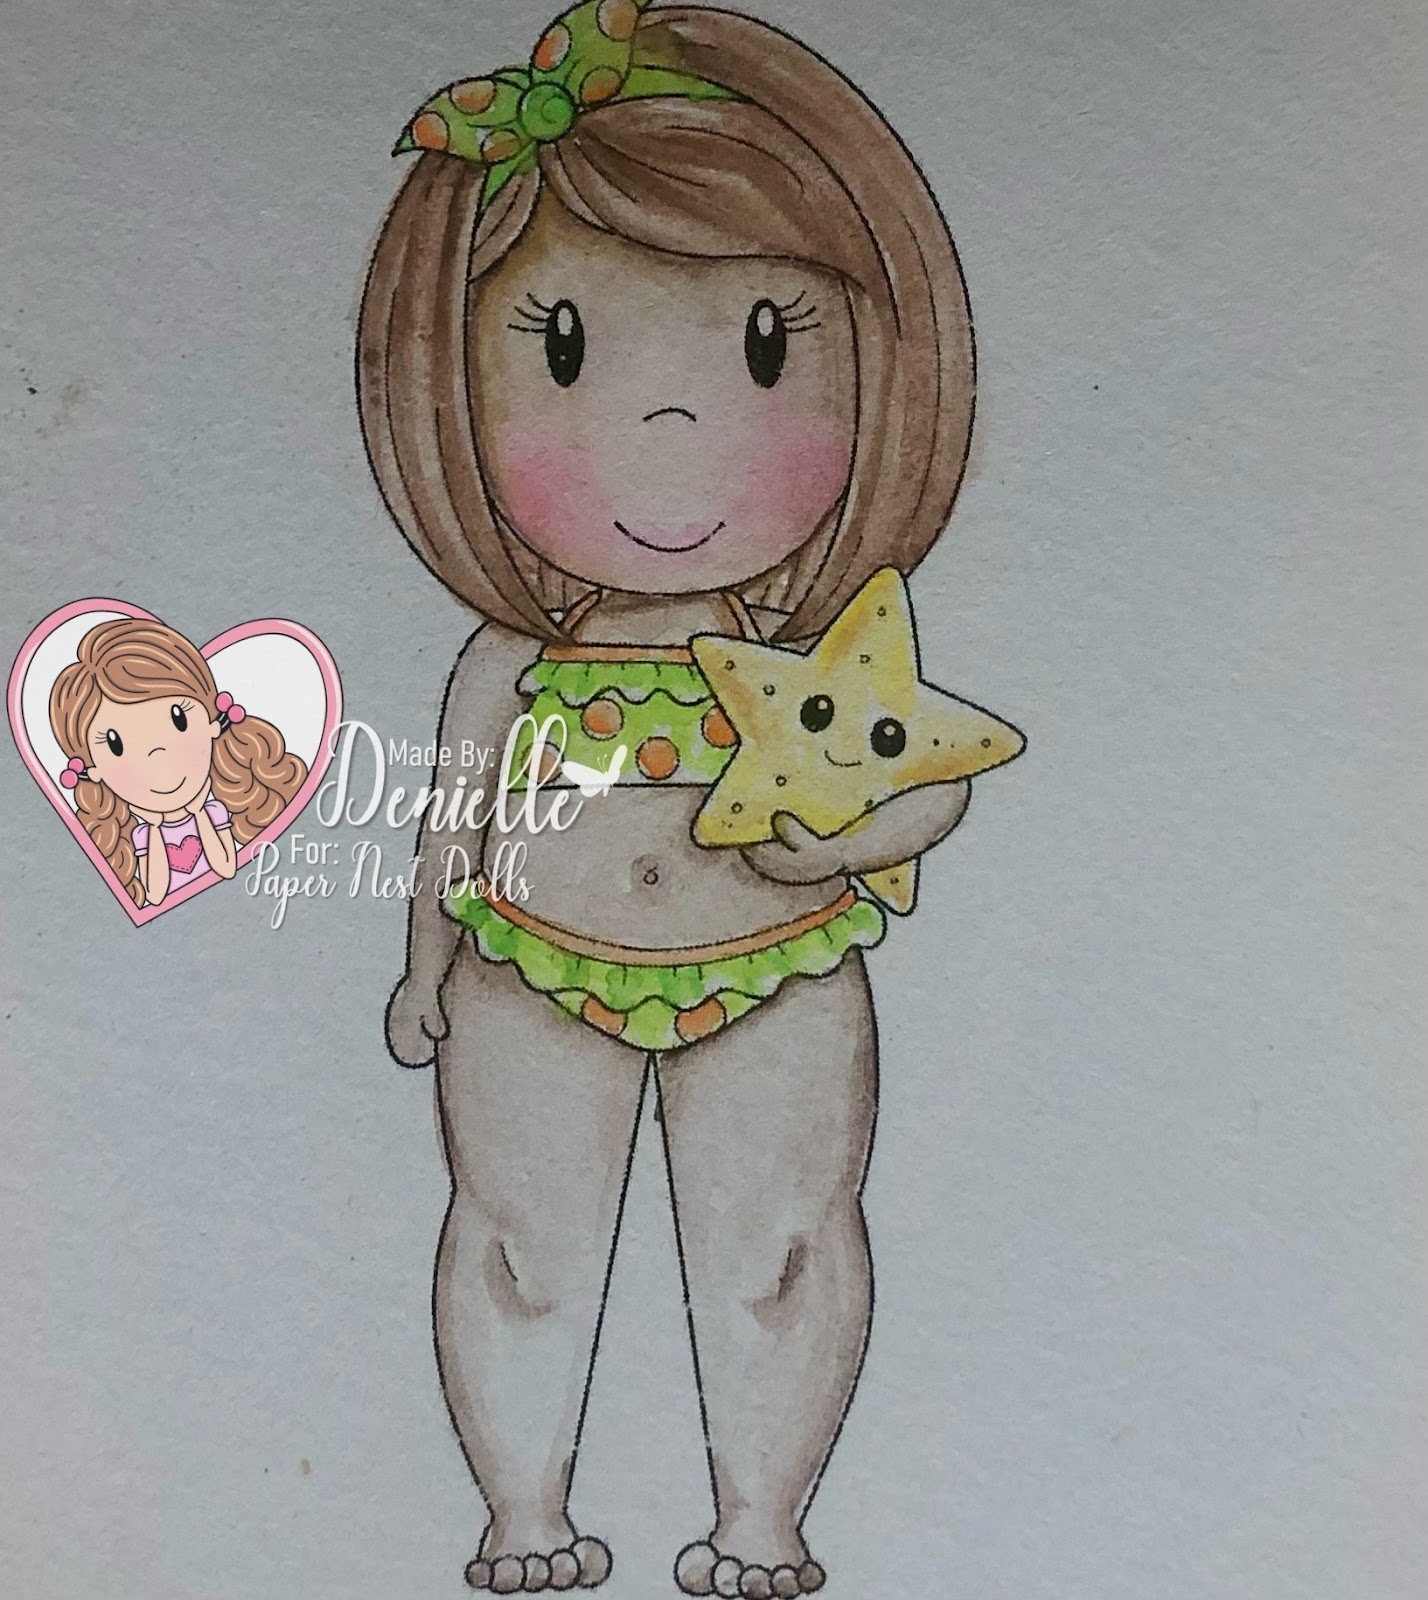

For my project today I am using a Digital Image called Emma with Starfish, we are super lucky because this image is also available as a Rubber Stamp.


I printed the image onto some Watercolour paper from Kmart, silly me this is the first time I've printed onto this type of paper and I put it into the printed back to front so I watercoloured onto the reverse side hehe. 

I got some watercolours from of our cheaper shops recently, they are Mont Marte brand, there is quite a few colours in there including 3 shades of each of the colours. I've not used these before and I am actually quite happy with the way that they turned out, 


The brushes I used are also from Kmart, they are the rounded brushes, I have linked up a few options for you in the picture links below. 


I ordered some new water cups which are not here yet, the one I am currently using is one from a local cheap shop, I really love the idea of these Faber Castell ones that I have ordered as they are collapsable which means they can pack away easily, see how they go when they arrive I will give you an update on my thoughts, 


I hope you have enjoyed my post today, if you have any questions feel free to send me a message or contact me via facebook (all links can be found below).

Watch the You Tube Video Here


Products Used On My Card (Affiliate Links Used Where Possible)


Thanks for stopping by, Deni

CAMERA SET UP - FOR YOU TUBE VIDEOS ONLY
Blue Yeti Microphone
iPad Air
Tripod – Kmart, iPad attachment eBay

S O C I A L MEDIA 
B L O G : https://ldli.co/e/3xky6x 
I N S T A G R A M : https://ldli.co/e/5dn20x
YOU TUBE: https://ldli.co/e/ej5l90 
F A C E B O O K: https://ldli.co/e/mjxn2r
PINTEREST: https://ldli.co/e/2l9zom


I was a 2018 Ambassador for Copic Marker Australia and NZ


Tuesday, 25 January 2022

La La Land Crafts Diabetes Awareness

Good Morning Everyone 


Today I have a card to share with you that I created in honour of a little girl with Type 2 Diabetes. 

I have used a stamp from Club La La Land Crafts December 2019 Kit, this stamp is now available to purchase on it's own and Digital Version so I will link those up for you.

I actually used the Digital Version only because I had some already printed out (there was a manufacturing fault in my original rubber so I purchased the Digital whilst I was waiting for my replacement stamp to be sent out). I now own the rubber version also. 


The image was printed onto X-Press It Blending Cardstock using my Brother Laser Printer, I use a laser printer as I know that I will never have an issue with bleeding from my Copic Markers. I added some extra details to the image using a white Gelly Roll pen which I will link up a few options for you.


I used patterned papers from Kaisercraft Little One Collection, this is an old paper collection so I do apologise if you have trouble tracking it down. I love the aqua colours in this paper pad and it was exactly the colour I was after for this card. 

I fussy cut the image using my EK Success Cutterbee Scissors, I recommend these all the time because they are perfect for fussy cutting, they have a nice sharp point on them and allow a nice roll around cut of the image. 

I cut the layers of patterned paper down using my Cutterpillar Pro and adhered them to a Couture Creations Pre Made Card Base, then adhered the image. 

The card needed more to finish it off before I added the sentiment so I punched out some Stars using EK Success Star Confetti Punch and some leftover white cardstock (I keep two small boxes next to my desk with offcuts of white and black card stocks for these things). 


The sentiment is from Taylored Expressions Simple Strips, I stamped them out using Memento Tuxedo Black ink then ran them through my Sizzix Big Shot.


I decorated the inside of the card using matching papers, sorry I forgot photos before I sent it out.

Everything was adhered using Helmar Acid Free liquid Adhesive. 


I hope you have enjoyed my post today, if you have any questions feel free to send me a message or contact me via facebook (all links can be found below).

Watch the You Tube Video Here

No Video today sorry

Products Used On My Card (Affiliate Links Used Where Possible)


Copic Markers Used

Sorry no Copic List today

Thanks for stopping by, Deni

CAMERA SET UP - FOR YOU TUBE VIDEOS ONLY
Blue Yeti Microphone
Sony Handycam HDR CX4-05
Tripod – Manfrotto MKCompactaCN-BK

S O C I A L MEDIA 
B L O G : https://ldli.co/e/3xky6x 
I N S T A G R A M : https://ldli.co/e/5dn20x
YOU TUBE: https://ldli.co/e/ej5l90 
F A C E B O O K: https://ldli.co/e/mjxn2r
PINTEREST: https://ldli.co/e/2l9zom


I was a 2018 Ambassador for Copic Marker Australia and NZ


Wednesday, 12 January 2022

Whimsy Stamps - Meljens Dr. Bear

Hi Everyone, 


Today I am sharing with you a card I have created for Whimsy Stamps using Meljen's Designs Doctor Bear. This is such an adorable image. 

I merged the image and sentiments on my Apple MacBook Air's Pages App, then printed onto X-Press It Blending Cardstock using my Brother Laser Printer.


I coloured the image using Copic Markers, I will have a full list of the markers I have used below the video at the end of this blog post. 

I ran the image through my Sizzix Big Shot using a Lawn Fawn Stitched Circle Die, I will link up a few different branded ones in the picture links below. 


The RX was cut from some scrap Aqua cardstock using a die from Club La La Land Crafts February 2016 Kit, this die is now for sale as a separate die as part of the Medical Elements set. 


I also cut some other dies from the kit - Bandaid die and Stethoscope die.


I used a Uni-Ball Angelic Gel pen to add details to the image. 


Using some leftover patterned papers from Whimsy Stamps Christmas Cool Mix, I trimmed them down layered one onto some white cardstock then adhered all the them using Scotch ATG onto a Couture Creations Card Base. 


The RX I adhered using Helmar Acid Free liquid Adhesive. 

I used leftovers of the patterned papers and those extra die cuts to the inside of the card. 


I hope you have enjoyed my post today, if you have any questions feel free to send me a message or contact me via facebook (all links can be found below).

Watch the You Tube Video Here


Products Used On My Card (Affiliate Links Used Where Possible)


Copic Markers Used

E23, E25, E27, E29
N0, N3, N7
R20, R22
R43, R56

Thanks for stopping by, Deni

CAMERA SET UP - FOR YOU TUBE VIDEOS ONLY
Blue Yeti Microphone
Sony Handycam HDR CX4-05
Tripod – Manfrotto MKCompactaCN-BK

S O C I A L MEDIA 
B L O G : https://ldli.co/e/3xky6x 
I N S T A G R A M : https://ldli.co/e/5dn20x
YOU TUBE: https://ldli.co/e/ej5l90 
F A C E B O O K: https://ldli.co/e/mjxn2r
PINTEREST: https://ldli.co/e/2l9zom


I was a 2018 Ambassador for Copic Marker Australia and NZ


Wednesday, 29 December 2021

Whimsy Stamps - Don't Make Me Get My Flying Monkeys

Hi Everyone,


Today I am sharing with you a card I have created using Get My Monkeys plus Sentiments. 


I printed the image onto X-Press It Blending Cardstock using my Brother Laser Printer then coloured him up using some markers from Kmart's Anko Collection. There is a few different packs which all work together so I will link all of them up, such a great price for those starting out. 

I ran the image through my Sizzix Big Shot using a Stitched Square die, this one in particular is from Lawn Fawn however there are a few options out there so I will link them up for you. 


I had some leftover Whimsy Stamps papers that I had printed from other projects. I will link up what I can. 


I trimmed the papers down and adhered them to some American Crafts black cardstock. 


Using an EK Success Star Confetti Punch I punched out some stars in various leftover cardstocks I had.


I used my Cutterpillar Pro to trim down the sentiment then my EK Success Cutterbee Scissors to banner it up. 


All the layers were then adhered to a Couture Creations Card Base, I used some more of the patterned papers to decorate the inside of the card. 


I hope you have enjoyed my post today, if you have any questions feel free to send me a message or contact me via facebook (all links can be found below).

Watch the You Tube Video Here


Products Used On My Card (Affiliate Links Used Where Possible)


Graphic Markers Used

183, 74
E33, E37
E37, E29
E09, C9
C5, C7
0 Colorless Blender
C4, C0

Thanks for stopping by, Deni

CAMERA SET UP - FOR YOU TUBE VIDEOS ONLY
Blue Yeti Microphone
Sony Handycam HDR CX4-05
Tripod – Manfrotto MKCompactaCN-BK

S O C I A L MEDIA 
B L O G : https://ldli.co/e/3xky6x 
I N S T A G R A M : https://ldli.co/e/5dn20x
YOU TUBE: https://ldli.co/e/ej5l90 
F A C E B O O K: https://ldli.co/e/mjxn2r
PINTEREST: https://ldli.co/e/2l9zom


I was a 2018 Ambassador for Copic Marker Australia and NZ


Wednesday, 15 December 2021

Whimsy Stamps - Very Thoughtful Yeti

Good Morning, 


Today I am sharing with you a card I created using Yeti All Ready and Fairy Thoughtful from Crissy Armstrongs collection over at Whimsy Stamps. I merged the two images together on my computer. 

I coloured the image up using Copic Markers and added extra details to the image using a Sakura Gelly Roll pen.


I ran the image through my Sizzix Big Shot using a Spellbinders Labels Eighteen die. I did fussy cut a little of her beanie so that it didn't get chopped off. 


I used a Stitched Square die to a white layer for the bottom of my car, I will link up a few different brand ones.

I created a sentiment using the Pages App on my Apple MacBook Air, I downloaded a few different ones - this one in particular is Christmas Wish from Dafont.


I added some Wink Of Stella to the image, I love adding extra sparkle when and where I can on an image.


I added foam squares behind the image and behind the stitched square die.


I hope you have enjoyed my post today, if you have any questions feel free to send me a message or contact me via facebook (all links can be found below).

Products Used On My Card (Affiliate Links Used Where Possible)


Copic Markers Used

E000, E00, E11, E04, R20
E34, E37, E59
W2, W4, W6
T7, T10
C2, C4, 0
E74, E77, E79
E71, E74, E77
G03, G07, G19
Y18, YR24, YR27
R05, R27, R89
R81, R83, R85
B000, BG02

Watch the You Tube Video Here


Thanks for stopping by, Deni

CAMERA SET UP - FOR YOU TUBE VIDEOS ONLY
Blue Yeti Microphone
Sony Handycam HDR CX Tripod – Manfrotto MKCompactaCN-BK

S O C I A L MEDIA 
B L O G : https://ldli.co/e/3xky6x 
I N S T A G R A M : https://ldli.co/e/5dn20x
YOU TUBE: https://ldli.co/e/ej5l90 
F A C E B O O K: https://ldli.co/e/mjxn2r
PINTEREST: https://ldli.co/e/2l9zom


I was a 2018 Ambassador for Copic Marker Australia and NZ


Wednesday, 24 November 2021

Whimsy Stamps - The Magical Bug

Good Morning Everyone. 


Today I would like to share with you a card I have created for Whimsy Stamps using one of the images from the Bug Friends Digital Set. 


I printed the image onto X-Press It Blending Cardstock using my Brother Laser Printer, I then coloured it up using Copic Markers. 


Once I was finished colouring I used a Sakura Gelly Roll White Gel Pen to add details to the image, including adding polka dots to the wings, this is my favourite part :-)


I ran the image through my Sizzix Big Shot using a Spellbinders Nestabilities Labels Eighteen die. I also ran through a piece of Kraft Cardstock with the next size die. I also added some white details the Kraft die cut. 

Using some leftovers from a previous creation I used the pink stripes and the flowers from the Sweetness Digital Paper, I trimmed it down and adhered it to a piece of Kraft Cardstock. 


On top of the Digital Papers I added a doily from my stash.

I adhered all the layers to a Couture Creations Card Base, I purchase these in bulk with matching envelopes. 

I added a sentiment that I had leftover from another project, just trimming it down a little and bannering the edge. 


Finally I used an EK Success Butterfly Confetti to punch out some butterflies from pink and purple cardstocks. I layered them on top of each other then added polka dots to the top butterfly, some Nuvo Crystal Drops in Liquid Mercury to the centre.


The Bug needed more, so I added Derivan Kindy Glitz to the wings, I really love the way the image turned out in the end. 


I decorated the inside of the card using the same Kraft and Digital Papers. 

I hope you have enjoyed my post today, if you have any questions feel free to send me a message or contact me via facebook (all links can be found below).

Watch the You Tube Video Here


Products Used On My Card (Affiliate Links Used Where Possible)


Copic Markers Used

W2, W4, W6
YG06, YG67
V01, V22, V15
YR14, YR27
R20

Thanks for stopping by, Deni

CAMERA SET UP - FOR YOU TUBE VIDEOS ONLY
Blue Yeti Microphone
Sony Handycam HDR CX4-05
Tripod – Manfrotto MKCompactaCN-BK

S O C I A L MEDIA 
B L O G : https://ldli.co/e/3xky6x 
I N S T A G R A M : https://ldli.co/e/5dn20x
YOU TUBE: https://ldli.co/e/ej5l90 
F A C E B O O K: https://ldli.co/e/mjxn2r
PINTEREST: https://ldli.co/e/2l9zom


I was a 2018 Ambassador for Copic Marker Australia and NZ