Wednesday, 10 June 2020

Whimsy Stamps - Sassy Cheryl - Batter Up

Good Morning All,

Today I am sharing with you a new Digital Stamp for Whimsy Stamps from the Sassy Cheryl Collection, this is Batter Up.


I printed the image onto X-Press It Blending Cardstock using my Brother Laser Printer, I also printed some papers from Flourishing Blooms and sentiments from Everyday Banners.


I coloured the image up using Copic Markers, you can find a list of these at the bottom of my post.


Using a Uni-Ball white gel pen I added some details to the image including some polka dots on her hair ribbon.


I trimmed the papers and sentiments down using my Cutterpillar Pro.


I ran some American Crafts Cardstock through my Sizzix Big Shot using Lawn Fawn Stitched Circle Dies,  I used some washi tape to adhere two of the dies together so that I could create a frame.


I adhered all the layers to a Couture Creations Card Base using Helmar Acid Free liquid adhesive.


Finally I used some Tonic Studios Nuvo Drops in Summer Sunrise and Red Berry.


I hope you have enjoyed my post today, if you have any questions feel free to send me a message or contact me via facebook (all links can be found below).

Watch the You Tube Video Here


Products Used On My Card (Affiliate Links Used Where Possible)


Copic Markers Used

E000, E00, E21, E11, E04, R20
R81, R83, R85
G20, G21, G03
C00, C2, C4
E31, E33
E74, E79
R14, R17, R59

Thanks for stopping by, Deni

CAMERA SET UP - FOR YOU TUBE VIDEOS ONLY
Blue Yeti Microphone
Sony Handycam HDR CX4-05
Tripod – Manfrotto MKCompactaCN-BK

S O C I A L MEDIA 
B L O G : https://ldli.co/e/3xky6x
I N S T A G R A M : https://ldli.co/e/5dn20x
YOU TUBE: https://ldli.co/e/ej5l90 
F A C E B O O K: https://ldli.co/e/mjxn2r
PINTEREST: https://ldli.co/e/2l9zom


I was a 2018 Ambassador for Copic Marker Australia and NZ


Monday, 8 June 2020

Helmar Worldwide - Happy 17th Birthday Boy

Good Morning All,

Today I am here with Helmar Worldwide to share with you a card using my favourite Liquid Adhesive - the Acid Free from Helmar.


My tip with this adhesive is "Less Is More" you do not need much of this adhesive at all to put a project together, and that means this bottle will last you ages.


I made a 17th Birthday Card today using a some patterned papers from Kaisercraft's Blubelle Collection, I love the blues and oranges in this paper pad, they gave my black bits and pieces a good bounce.


The number 17 is from Paper Rose Jumbo Numbers, I ran them through my Sizzix Big Shot using some black American Crafts Cardstock.


MFT Lucky Stars dies were used to cut the stars - unfortunately these are an old retired product, but they are one of my favourite star dies so I find it difficult not using them on a project. The happy word die is also from MFT Stamps and is also retired so I have linked up some others.


I used a Lawn Fawn Stitched Circle die to run some white cardstock and some of the patterned paper through my Big Shot.


Finally my sentiment is from Honey Bee Stamps Hooray Stamp Set, I stamped it onto some of the patterned paper using Memento Tuxedo Black and a Lawn Fawn Acrylic Block.


I adhered all my layers to a Couture Creations Card Base using the Helmar Acid Free Adhesive, you will see in all my videos this is the adhesive I use to put all my cards together, it gives me those couple of extra seconds to manoeuvre if I'm not completely straight with my layers.


I hope you have enjoyed my post today, if you have any questions feel free to send me a message or contact me via facebook (all links can be found below).

Watch the You Tube Video Here


Products Used On My Card (Affiliate Links Used Where Possible)


Thanks for stopping by, Deni

CAMERA SET UP - FOR YOU TUBE VIDEOS ONLY
Blue Yeti Microphone
Sony Handycam HDR CX4-05
Tripod – Manfrotto MKCompactaCN-BK

S O C I A L MEDIA 
B L O G : https://ldli.co/e/3xky6x
I N S T A G R A M : https://ldli.co/e/5dn20x
YOU TUBE: https://ldli.co/e/ej5l90 
F A C E B O O K: https://ldli.co/e/mjxn2r
PINTEREST: https://ldli.co/e/2l9zom


I was a 2018 Ambassador for Copic Marker Australia and NZ


Friday, 5 June 2020

Build A Birthday Bee - Honey Bee Stamps

Today it's all about building a bee with Honey Bee Stamps.

This is such an adorable stamp set.. and it's huge! So many different options for these little bees, how could I not make this many cards :-) I had made a few cards already using these images you can see them a few weeks back, and in addition I had all these little guys.


I stamped all the little bees out onto X-Press It Blending Cardstock using Memento Tuxedo Black and coloured them using Copic Markers, I then added some Wink Of Stella to the wings.

I don't own the die set for this stamp set so I fussy cut them all by hand using EK Success Cutterbee Scissors. They are pretty rounded and not a lot of intricate details so doing it by hand wasn't as hard as it probably sounds.


I used another product from Honey Bee Stamps - Hexagon Bunches, I ran it through my Sizzix Big Shot a couple of times using American Crafts Black Cardstock then again using some yellow cardstock so I could inlay some parts.


I used Ranger Ink Marigold Embossing Powder with Ink on 3 Embossing Ink to emboss some sentiments from the Honey Bee Stamps Hooray Stamp Set onto American Crafts Black Cardstock, I then ,melted it using my Heat Tool. (I also did prepare the card using a powder tool to make sure the embossing powder only went where it was supposed to go).


I trimmed the sentiments down using my Tim Holtz Guillotine, this is great for small piece cutting (I only own the small guillotine not the bigger size one).


I adhered all the layers to a Couture Creations Card Base using Helmar Acid Free liquid Adhesive.

Finally to finish the cards off I added some Tonic Studios Nuvo Crystal Drops in Dandelion Yellow and Ebony Black. I left the cards over night to dry so I didn't mess up the drops as I have a habit of doing this lately,.. patience is not my virtue when it comes to things drying on my cards.


I hope you have enjoyed my post today, if you have any questions feel free to send me a message or contact me via facebook (all links can be found below).

Watch the You Tube Video Here


Products Used On My Card (Affiliate Links Used Where Possible)


Copic Markers Used

Sorry I don't have a list of these for my projects today

Thanks for stopping by, Deni

CAMERA SET UP - FOR YOU TUBE VIDEOS ONLY
Blue Yeti Microphone
Sony Handycam HDR CX4-05
Tripod – Manfrotto MKCompactaCN-BK

S O C I A L MEDIA 
B L O G : https://ldli.co/e/3xky6x
I N S T A G R A M : https://ldli.co/e/5dn20x
YOU TUBE: https://ldli.co/e/ej5l90 
F A C E B O O K: https://ldli.co/e/mjxn2r
PINTEREST: https://ldli.co/e/2l9zom


I was a 2018 Ambassador for Copic Marker Australia and NZ


Art Impressions - Oh wow it's a Giant Cake!

Good Morning Everyone,

This video went live but I completely forgot to do the Blog Post :-P

This is Giant Cake from Art Impressions, I love these oldie stamps, they are so perfect for so many different cards. I think I have about 10 or so in my collection now but of course there are so many more awesome ones out there that I need to get my hands on.


First I ran some X-Press It Blending Cardstock through my Sizzix Big Shot using a Lawn Fawn Stitched Circle die, I did this first because I wanted to make sure of exactly which parts I was stamping onto the circle (knowing it was not all going to fit).

I stamped the image out onto the X-Press It Blending Card (Circle that I had already cut out) using Memento Tuxedo Black ink and my Fiskars Stamp Press. I then coloured it up using Copic Markers.


I will have all the Copic Markers listed at the end of my blog post but here is a quick pick of all the markers that I used on this project.


I cut some papers down from American Crafts Day Dreamer - Dear Lizzy Paper Pad using my Cutterpillar Pro, some of them I bannered up the ends using my EK Success Cutterbee Scissors.


I uses Paper Rose Jumbo Numbers and some leftovers of the patterned papers to cut out the number 60 with my Big Shot.


Finally I adhered everything to a Couture Creations Card Base using Helmar Acid Free liquid Adhesive, this is my go to for Liquid adhesives.


I used leftovers of the same patterned paper pad to decorate the inside of my card to match.


I hope you have enjoyed my post today, if you have any questions feel free to send me a message or contact me via facebook (all links can be found below).

Watch the You Tube Video Here


Products Used On My Card (Affiliate Links Used Where Possible)


Copic Markers Used

E50, E51, E53, E55, R20
N2, N5
N5, N8, N10
N2, 0
W3
E31, E33
Y21, Y23, Y26
R81, R83, R85
Y04
C00, C2, 0
BG02, BG05
B93, B95, B97
E47, E49
V20, V22, V25
E74, E77, E79
E13, E07, E09

Thanks for stopping by, Deni

CAMERA SET UP - FOR YOU TUBE VIDEOS ONLY
Blue Yeti Microphone
Sony Handycam HDR CX4-05
Tripod – Manfrotto MKCompactaCN-BK

S O C I A L MEDIA 
B L O G : https://ldli.co/e/3xky6x
I N S T A G R A M : https://ldli.co/e/5dn20x
YOU TUBE: https://ldli.co/e/ej5l90 
F A C E B O O K: https://ldli.co/e/mjxn2r
PINTEREST: https://ldli.co/e/2l9zom


I was a 2018 Ambassador for Copic Marker Australia and NZ

Tuesday, 2 June 2020

Whimsy Stamps - You are my sunshine

Hi Everyone,

It's the beginning of the month again which means New Release time at Whimsy Stamps.

Today I am sharing with you a Digital Stamp from Sassy Cheryl Stamps called You Are My Sunshine. I will also be pulling in some other products from Whimsy Stamps - Everyday Banner Sentiments and Flourishing Blooms Digital Paper Collection.


This is a Digital Stamp so I printed it out using my Brother Laser Printer onto X-Press It Blending Cardstock. I trimmed her down using my Cutterpillar Pro.

I coloured the image up using Copic Markers.


First I coloured up the skin using E000, E00, E21, E11, E04 and R20 for the cheeks.


I then coloured up the cute little dress and shoes using R81. R83, R85, I coloured the socks using C2 and 0 Colorless Blender.


I coloured her hair up using my favourite brown hair tone - E74, E77, E79


I coloured up the sun using some Y Markers- Y02, Y04 and Y19 and some R20 for the Rosie cheeks, finally grounding the image using W3 and 0 Colorless Blender.


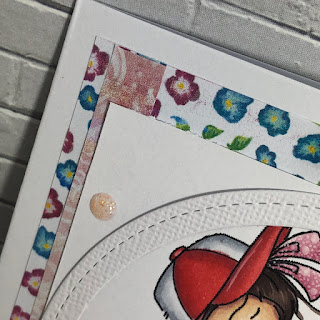
I used Flourishing Blooms Digital Paper Collection - the flourishing pink and tiny floral papers, my printer is currently low on ink so I'm hoping they have shown up as beautiful as what they are.

I cut down some American crafts cardstock mat layers using my Cutterpillar Pro, I ran one of them through my Sizzix Big Shot using Lawn Fawn Stitched Circle dies. (this will be covered later on).

I adhered all the layers using Helmar Acid Free.

I printed the Everyday Banner Sentiments onto X-Press It Blending Card (it's all I had on hand), then trimmed it down using my trimmer, then adhered this to the front of my card.

I adhered all the layers to a Pre-Made Couture Creations Card Base then added a rectangle of white card to the centre of the inside of the card using the Helmar Acid Free.

That is my card complete :-)

I hope you have enjoyed my post today, if you have any questions feel free to send me a message or contact me via facebook (all links can be found below).

Watch the You Tube Video Here


Products Used On My Card (Affiliate Links Used Where Possible)


Copic Markers Used

E000, E00, E21, E11, E04, R20
R81, R83, R85, 0
C2, 0
E74, E77, E79
Y02, Y04, Y19
W3, 0

Thanks for stopping by, Deni

CAMERA SET UP - FOR YOU TUBE VIDEOS ONLY
Blue Yeti Microphone
Sony Handycam HDR CX4-05
Tripod – Manfrotto MKCompactaCN-BK

S O C I A L MEDIA 
B L O G : https://ldli.co/e/3xky6x
I N S T A G R A M : https://ldli.co/e/5dn20x
YOU TUBE: https://ldli.co/e/ej5l90 
F A C E B O O K: https://ldli.co/e/mjxn2r
PINTEREST: https://ldli.co/e/2l9zom


I was a 2018 Ambassador for Copic Marker Australia and NZ