Sunday, 19 April 2020

Katzelkraft Coquelicot Birthday

Hope everyone has had a lovely Easter Break,

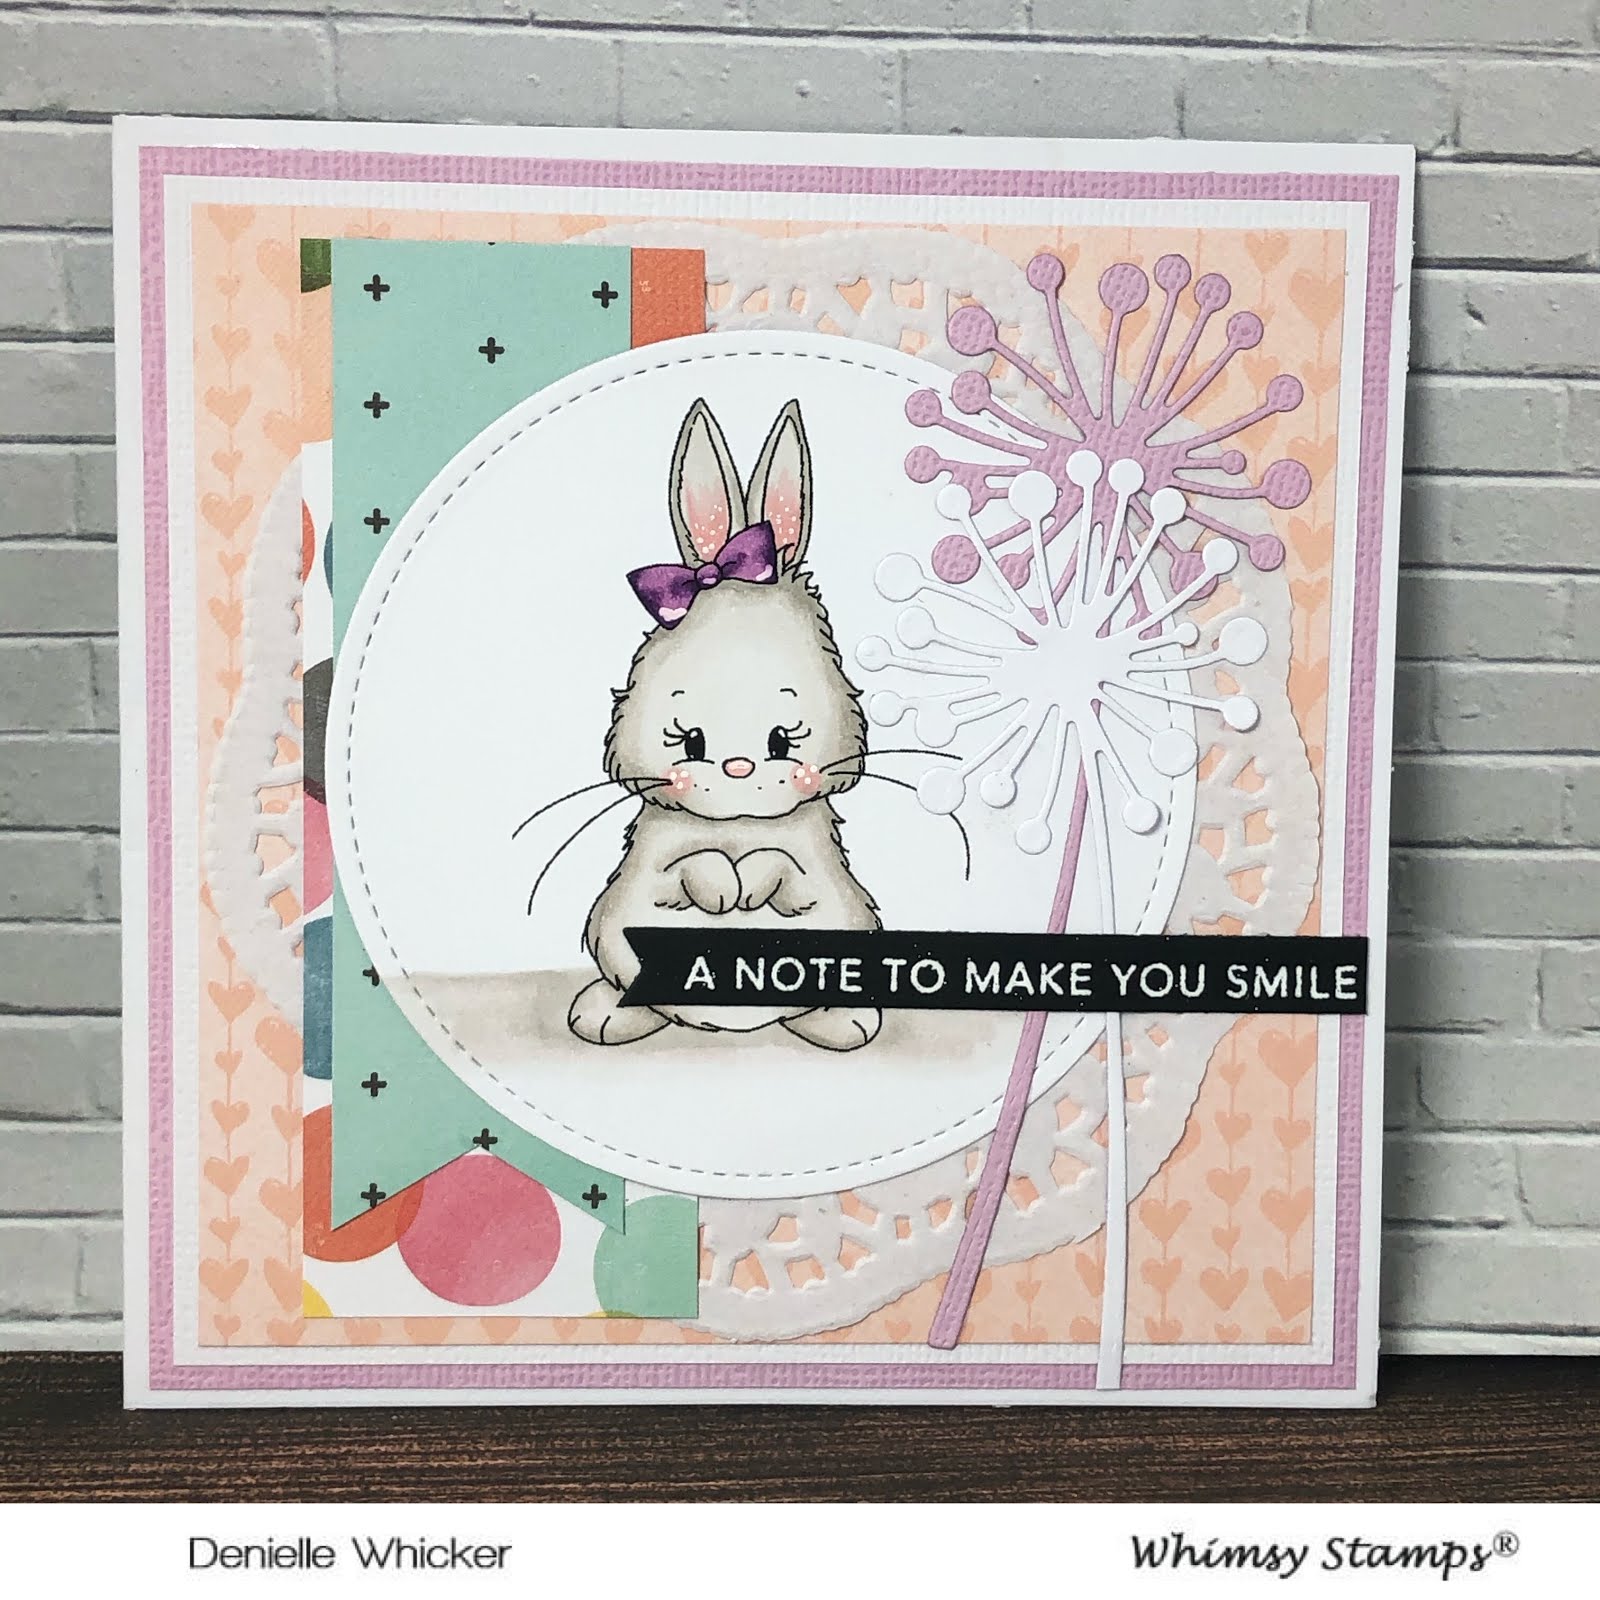
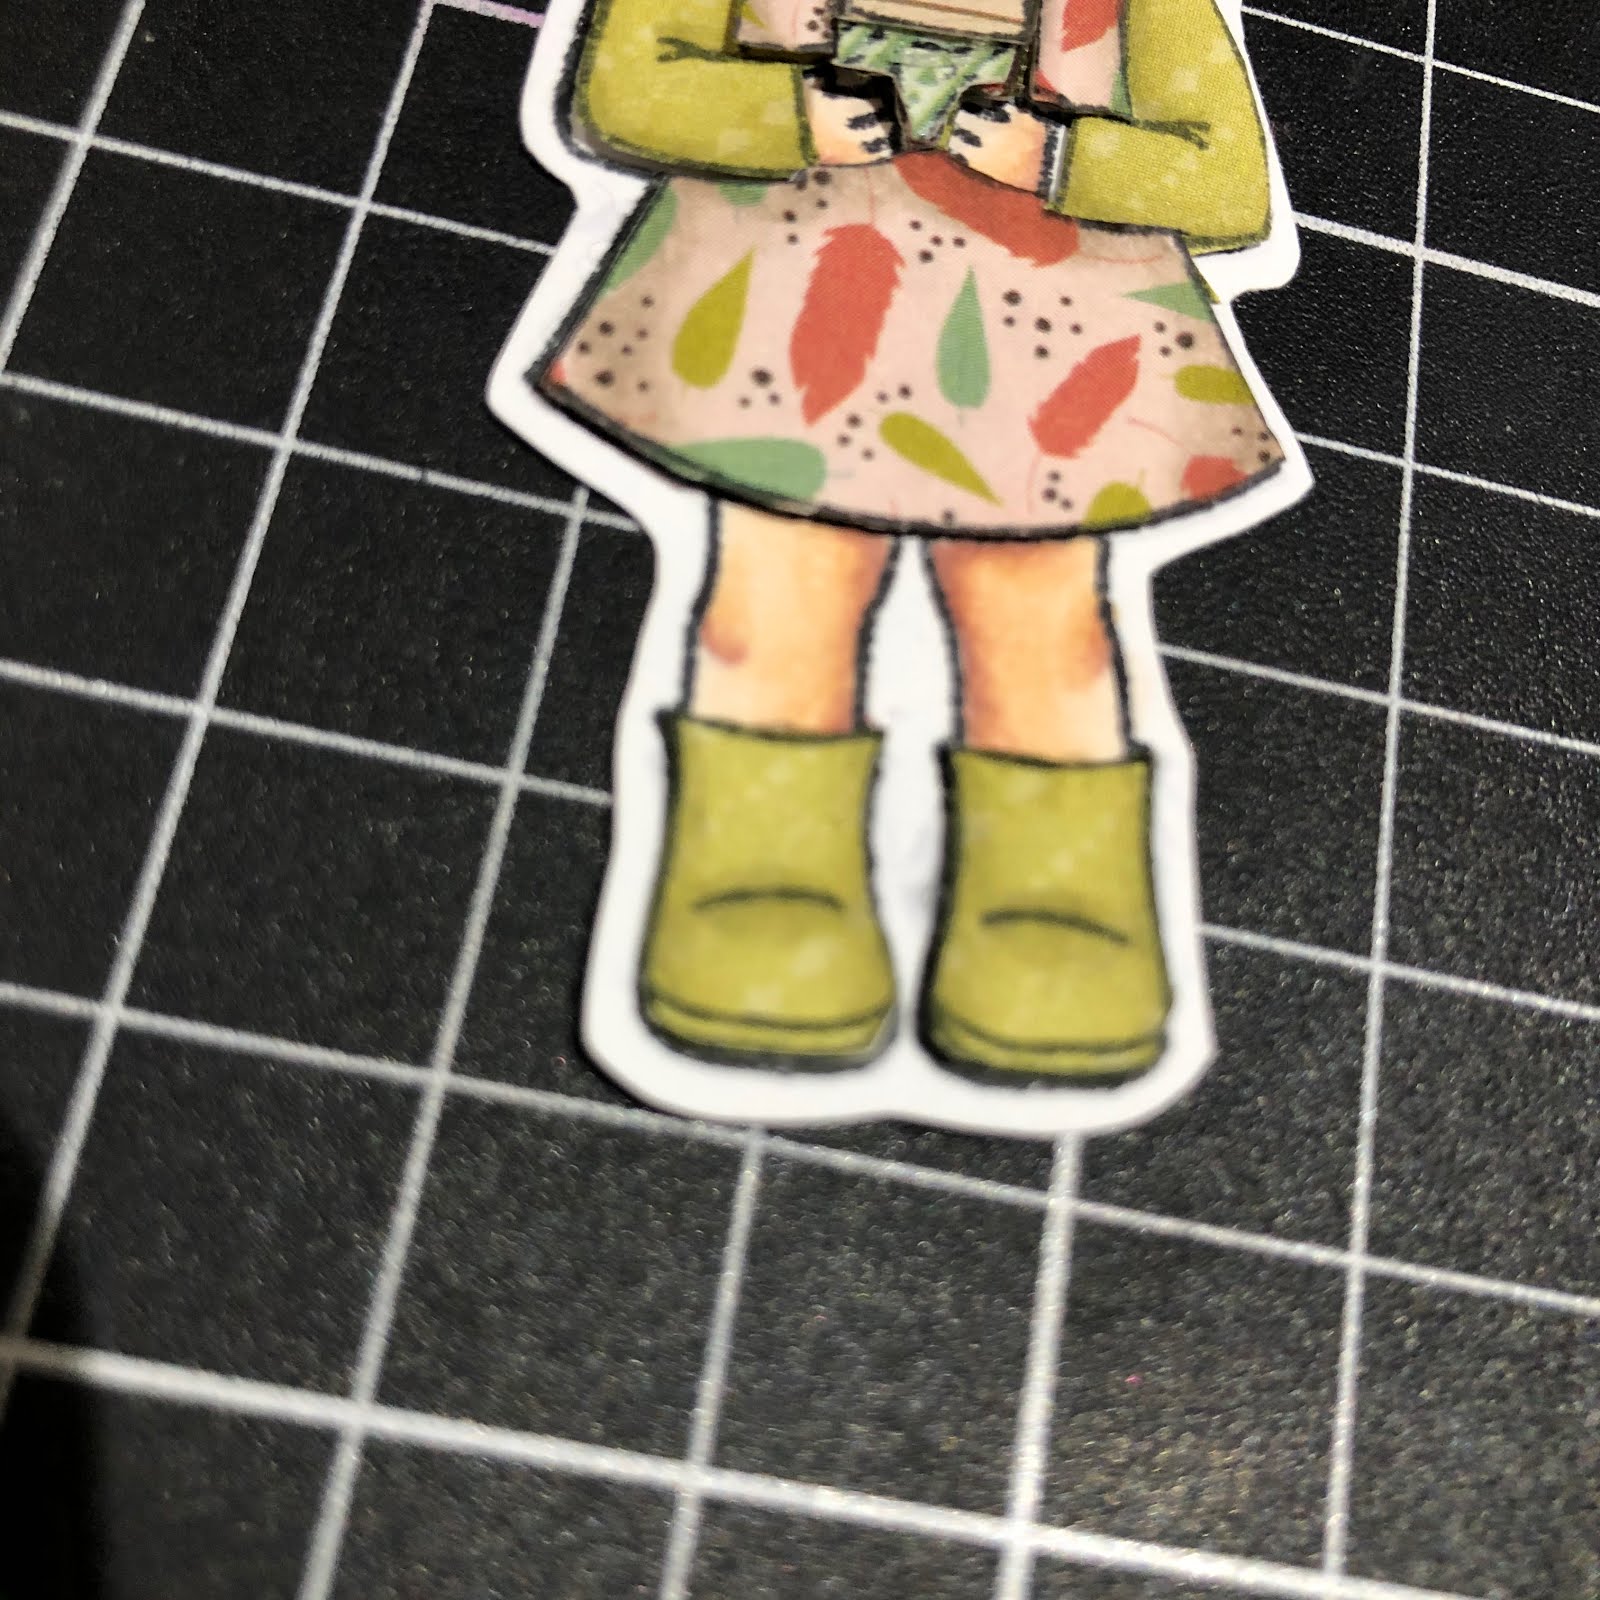
Today I am sharing with you some cards I made using Katzelkraft Coquelicot stamp. I shared this stamp with you recently in my latest haul video.


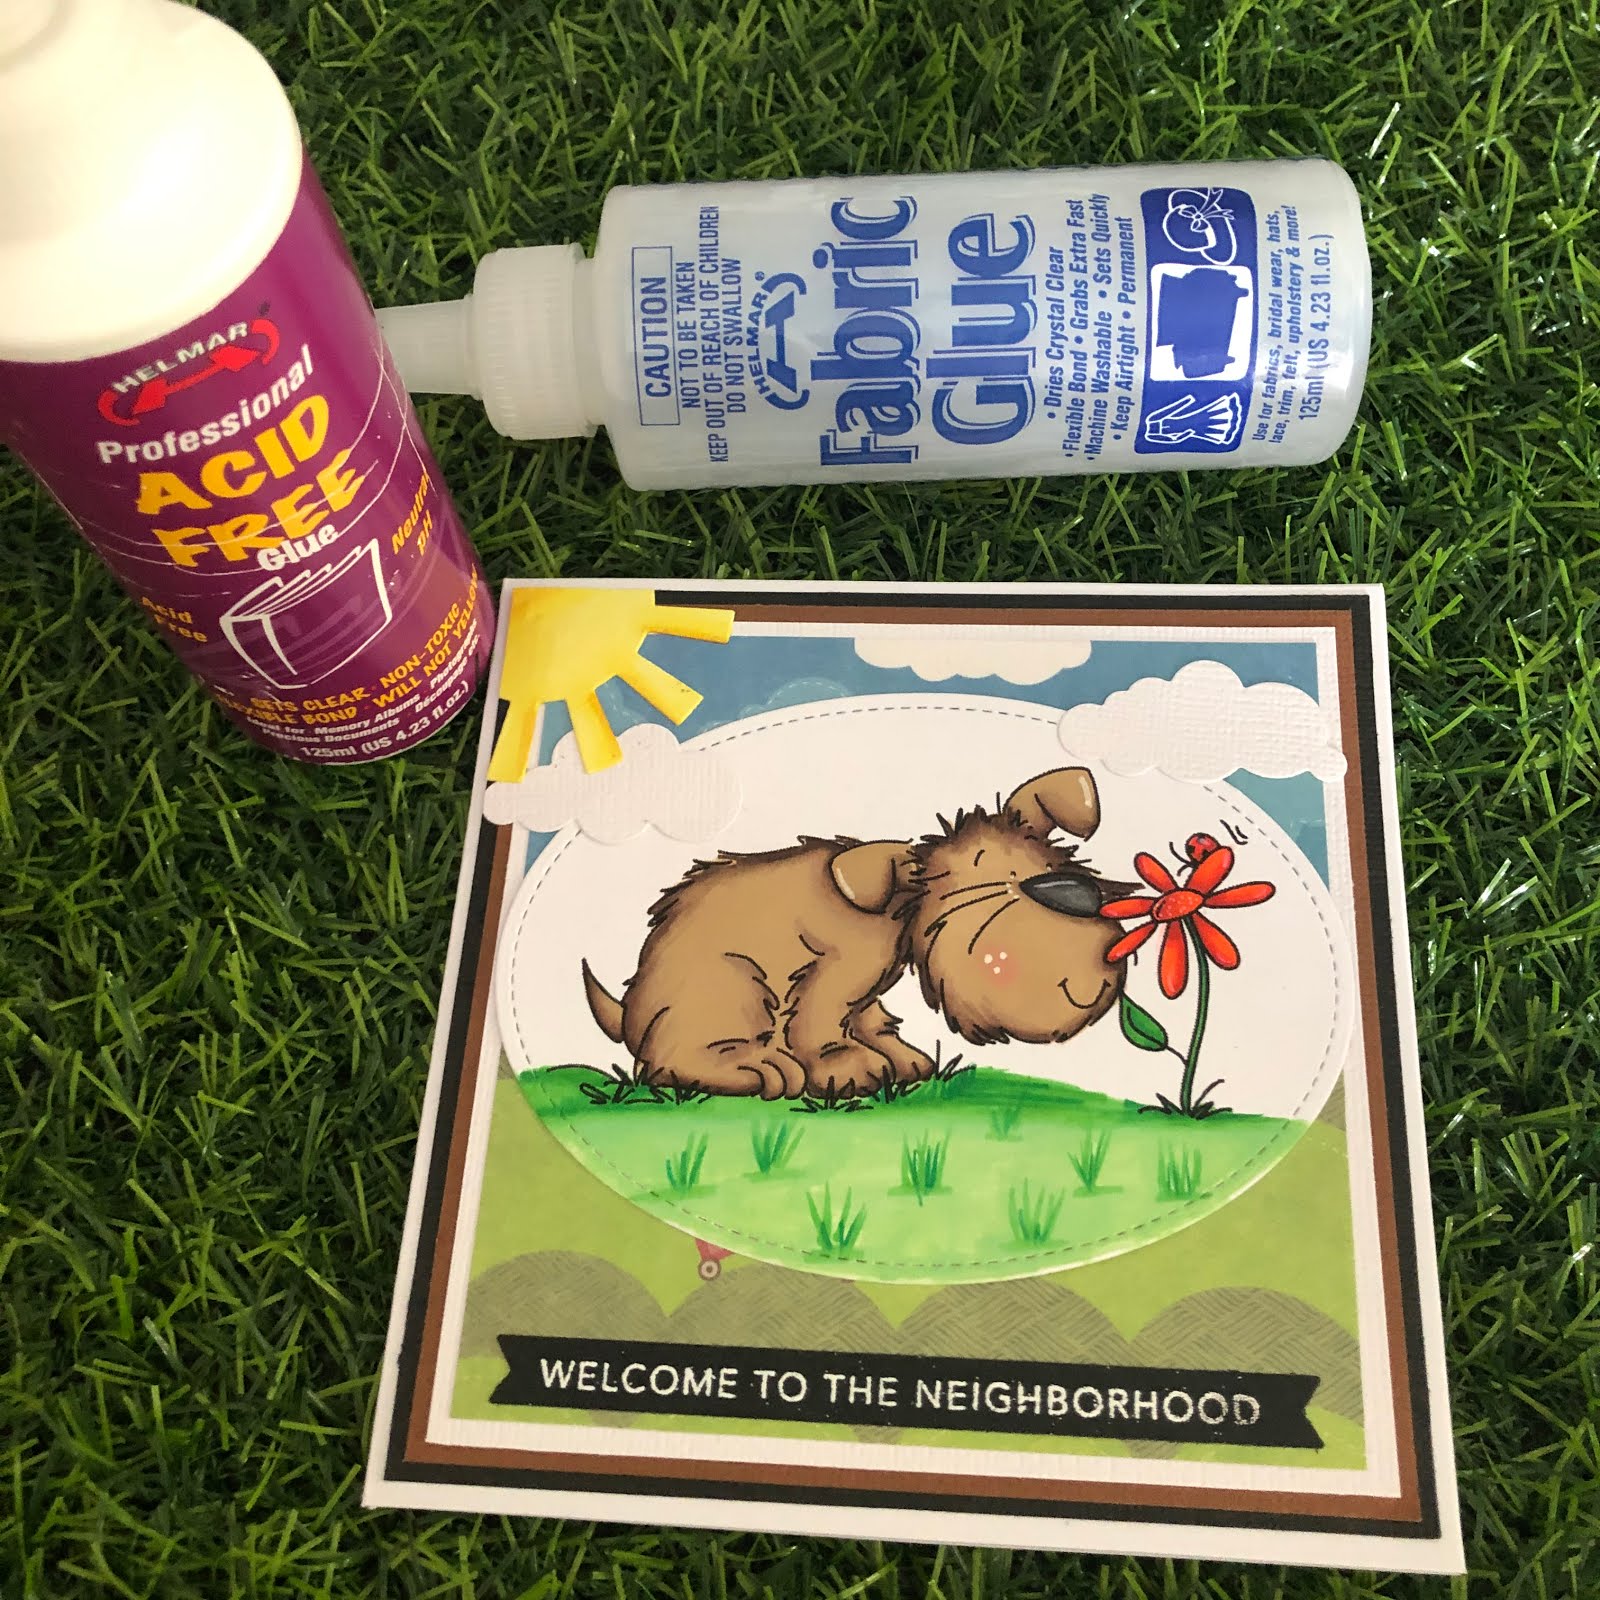
I stamped the image out onto X-Press It Blending Card using Ink On 4 Blackout Detail Ink, I wanted to colour the image using my Kuretake Zig Markers, I know this is not watercolour paper so I had to take it easy with the amount of water I was using.


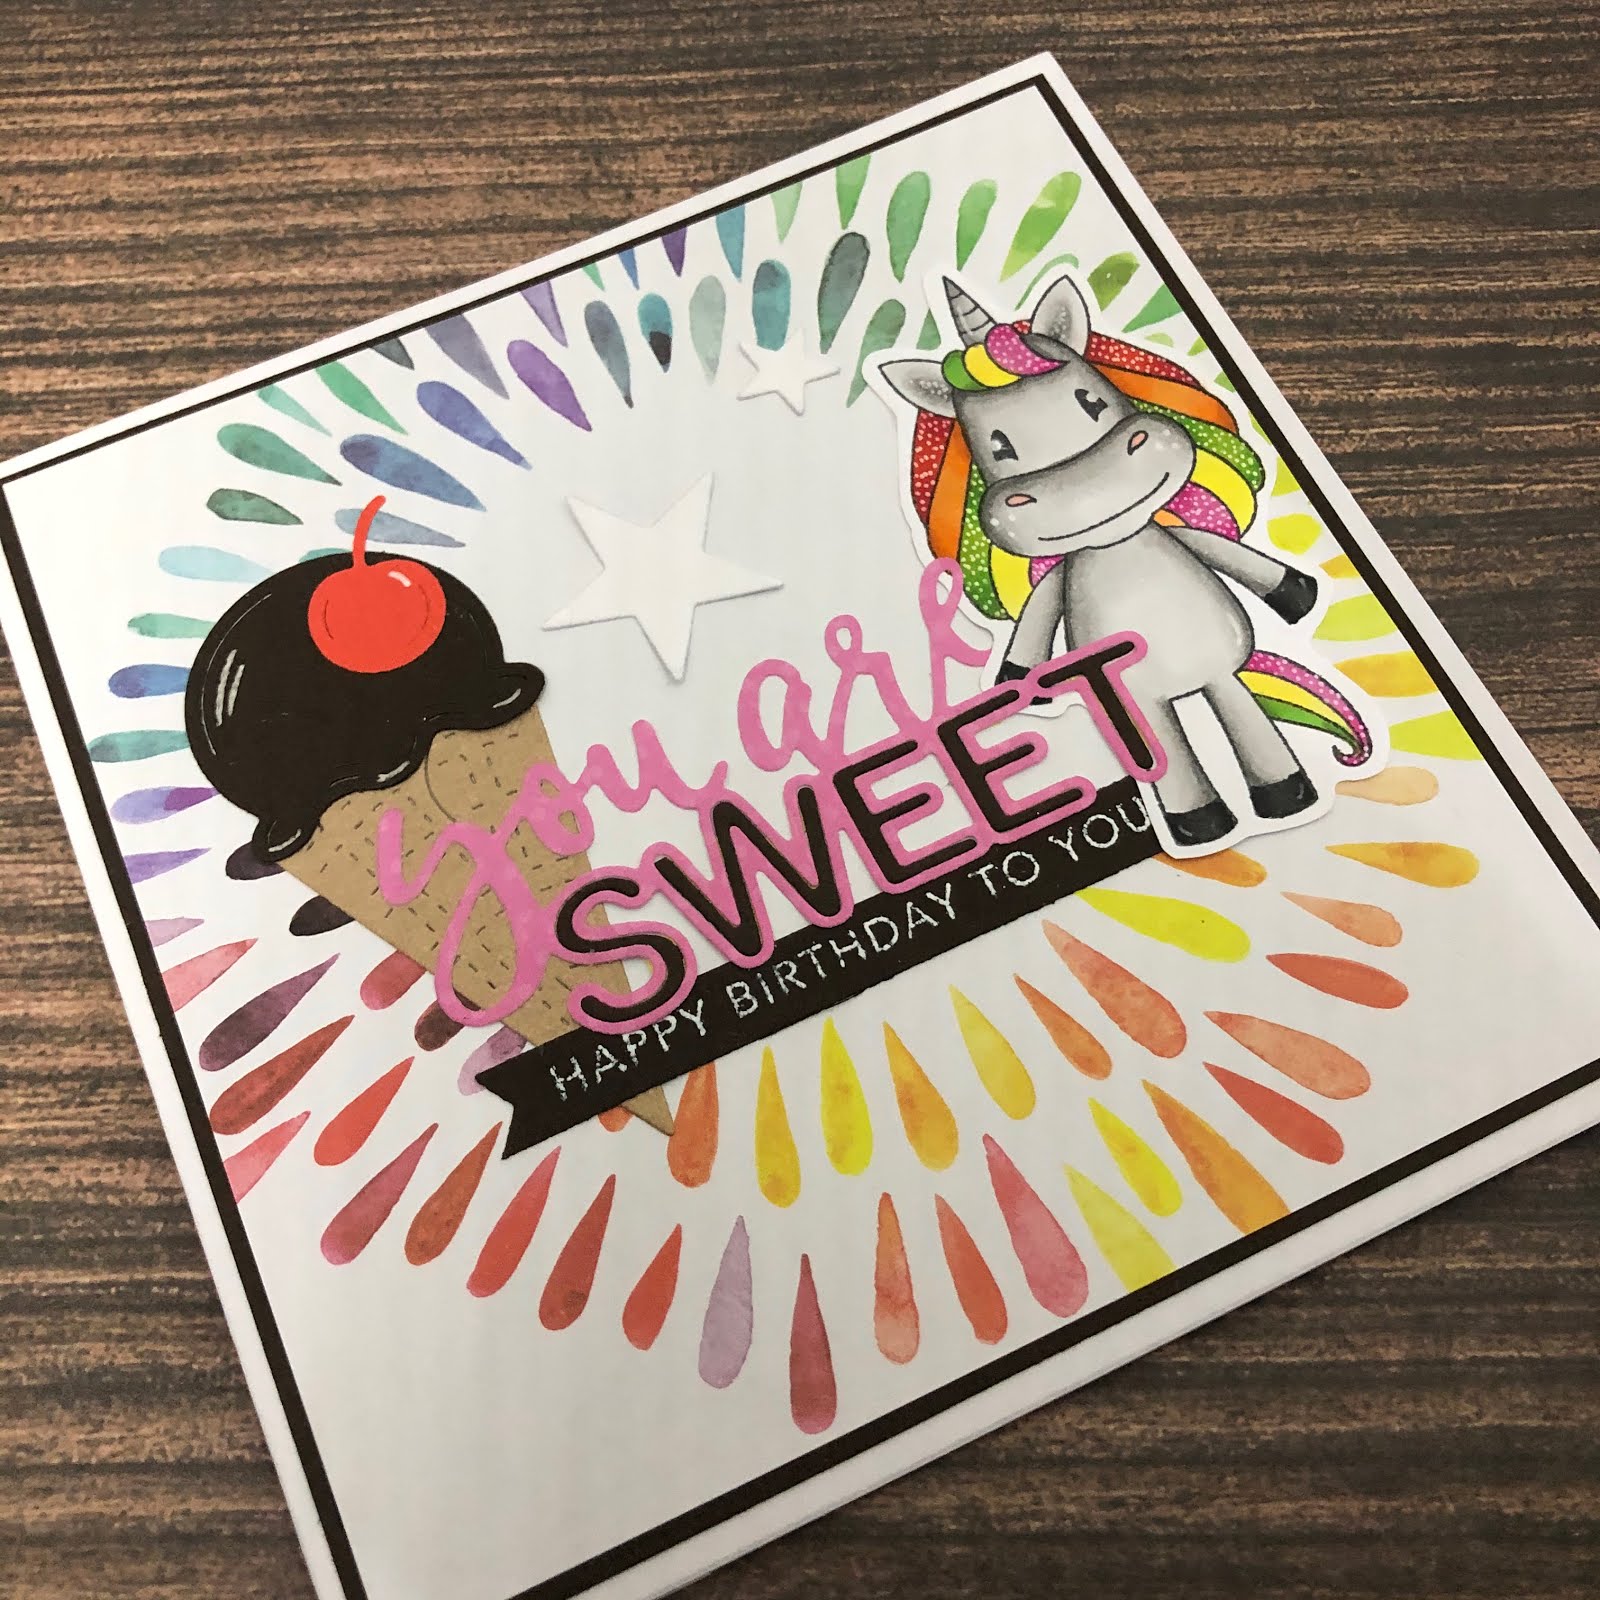
The video I have linked up below is the initial card I made using this stamp, I completely ruined the card and had to start over again so I have two cards I made after this one.

I used a piece of acetate to colour my markers on then used my Black Velvet Silver Brush Company brush and a small amount of water to colour the image.

Once I was done colouring I used some Ink On 3 Liquid Pixie Dust to add some glitter to the image.

I stamped out the Simple Strips stamps from Taylored Expressions, used Ranger Ink Super Fine White Embossing Powder, and my heat gun to melt it, I then ran them through my Big Shot with the matching dies.


The patterned papers are some leftover papers I had in my stash.

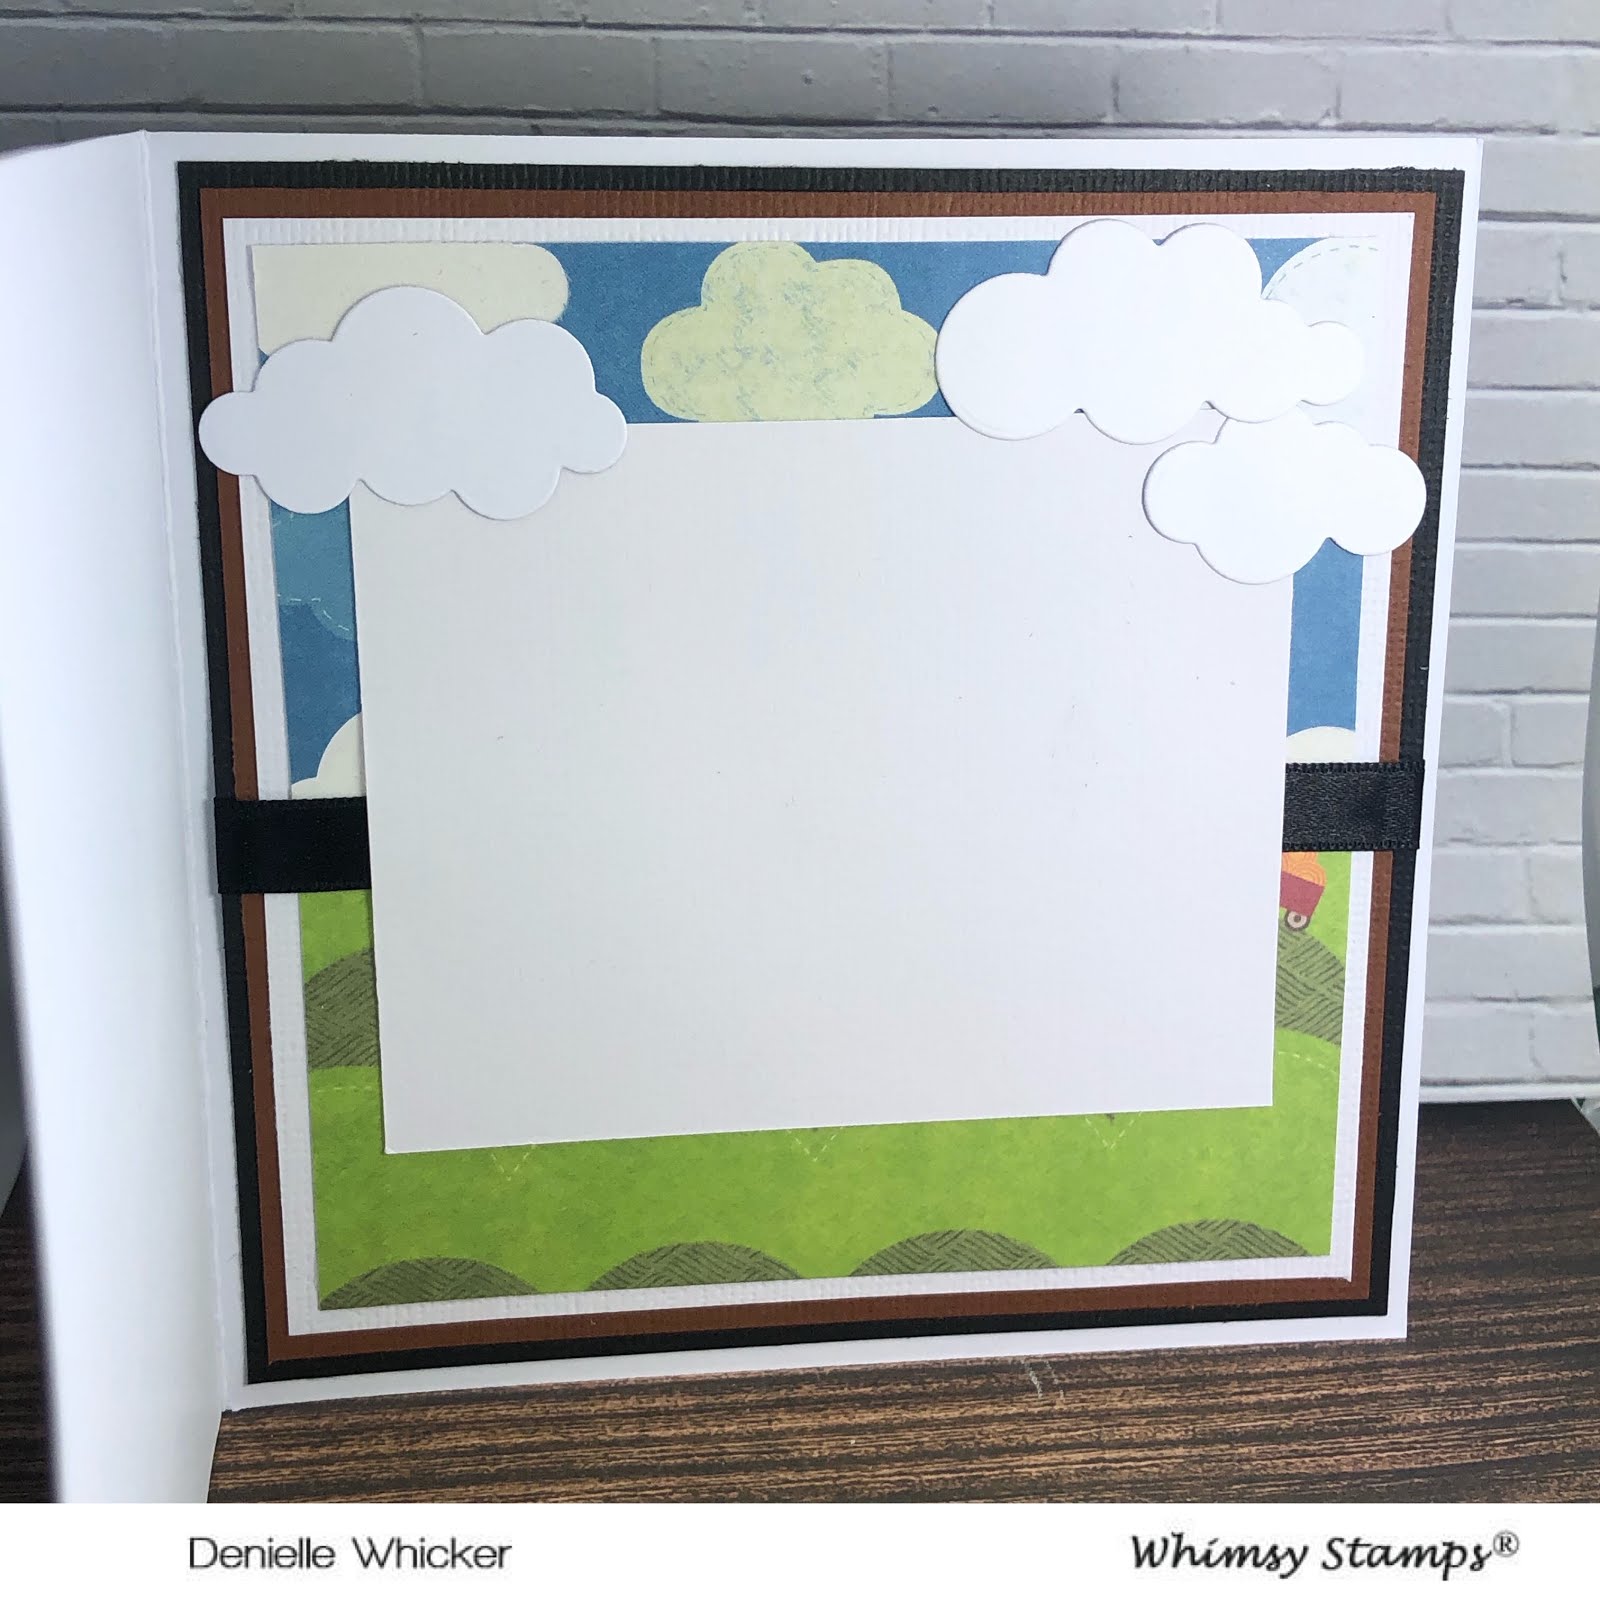
I decorated the inside of the cards using the same papers.


I hope you have enjoyed my post today, if you have any questions feel free to send me a message or contact me via facebook (all links can be found below).

Watch the You Tube Video Here


Products Used On My Card (Affiliate Links Used Where Possible)


Zig Markers Used

022 Carmine Red
002 Fl Orange
024 Wine Red
051 Lemon Yellow
044 Deep Green

Thanks for stopping by, Deni

CAMERA SET UP - FOR YOU TUBE VIDEOS ONLY
Blue Yeti Microphone
Sony Handycam HDR CX4-05
Tripod – Manfrotto MKCompactaCN-BK

S O C I A L MEDIA 
B L O G : https://ldli.co/e/3xky6x
I N S T A G R A M : https://ldli.co/e/5dn20x
YOU TUBE: https://ldli.co/e/ej5l90 
F A C E B O O K: https://ldli.co/e/mjxn2r
PINTEREST: https://ldli.co/e/2l9zom


I was a 2018 Ambassador for Copic Marker Australia and NZ


Saturday, 18 April 2020

Whimsy Stamps - Welcome to the hood

Today we are welcoming so new neighbours to the hood using Breezy Yellow Daisy from Whimsy Stamps.


This is a Digital Stamp so I printed it out onto X-Press It Blending Cardstock using my Brother Laser Printer.

I then used Zig Clean Color Brush Markers to colour the image. I used my Uni-ball white gel pen to add details to the image.


I ran the image through my Sizzix Big Shot using a Lawn Fawn Stitched Oval Die.


I used patterned papers from Kaisercraft Cock-a-Doodle-doo patterned paper pad, I used the clouds for the top section and the fields for the bottom, the image covered up the join in just the right spot.


I matted the patterned papers onto American Crafts Cardstock using Helmar Acid Free liquid adhesive.


I used some dies from MFT Stamps - Sun, Moon and Stars and Puffy Clouds.


I used Taylored Expressions Simple Strips Stamp set and stamped out the "Welcome to the Neighbourhood" sentiment using Ink On 3 Embossing Ink onto American Crafts Cardstock, then added some Ranger Super Fine White Embossing Powder.


I used leftovers of the patterned papers to decorate the inside of the card.


I hope you have enjoyed my post today, if you have any questions feel free to send me a message or contact me via facebook (all links can be found below).

Watch the You Tube Video Here


Products Used On My Card (Affiliate Links Used Where Possible)


Copic Markers Used on sun

Y02, Y06, YR24

Zig Markers Used

045 Pale Green
047 May Green
040 Green

062 Dark Brown
065 Mid Brown
064 Oatmeal
222 Pink Flamingo

095 Dark Gray
010 Black

023 Scarlet Red
020 Red
024 Wine Red


Thanks for stopping by, Deni

CAMERA SET UP - FOR YOU TUBE VIDEOS ONLY
Blue Yeti Microphone
Sony Handycam HDR CX4-05
Tripod – Manfrotto MKCompactaCN-BK

S O C I A L MEDIA 
B L O G : https://ldli.co/e/3xky6x
I N S T A G R A M : https://ldli.co/e/5dn20x
YOU TUBE: https://ldli.co/e/ej5l90 
F A C E B O O K: https://ldli.co/e/mjxn2r
PINTEREST: https://ldli.co/e/2l9zom


I was a 2018 Ambassador for Copic Marker Australia and NZ


Friday, 17 April 2020

Mo Manning - A Rose For Our Anniversary

Hi All,

Today I am sharing with you all a card I made at a request from a friend needing a 20th Wedding Anniversary Card for a friend.

This image is A Rose from Mo's Digital Pencil it is a Digital Stamp Designed by Mo Manning.


I printed the image onto X-Press It Blending Card using my Brother Laser Printer, then coloured up using Copic Markers.

I ran the image through my Sizzix Big Shot using a Lawn Fawn Stitched Circle Die.


The patterned papers are from Bella Wedding, these are really old papers so they are no longer accessible to purchase.


The sentiment is from Taylored Expressions Simple Strips, I stamped it out using my Misti Stamping Tool onto American Crafts black cardstock using Ink On 3 Embossing Ink, I added Super Fine White Embossing Powder from Ranger Ink and melted it with my heat tool. I also did prepare the cardstock using a Powder Tool to remove all the static. I ran the stamp set through my Sizzix Big Shot using the matching dies.


The hearts are from MFT Stamps Lots Of Hearts Outlines, I ran the dies through twice.. once using black cardstock then again using white cardstock.


The numbers are from Concord & 9th Tall Typenumbers, I ran them through my Sizzix Big Shot using the Bella papers I used on the card.


I adhered all the layers to a Couture Creations Card Base using Helmar Acid  Free Liquid Adhesive.

Finally I used leftovers of the patterned papers to decorate the inside of the card.


I hope you have enjoyed my post today, if you have any questions feel free to send me a message or contact me via facebook (all links can be found below).

Watch the You Tube Video Here


Products Used On My Card (Affiliate Links Used Where Possible)


Copic Markers Used

E000, E00, E21, E11, E04, R21
B95, B97, B99
E31, E35
N0, N2, N4
R14, R35, R89
YG17
Y21, Y26, E33

Thanks for stopping by, Deni

CAMERA SET UP - FOR YOU TUBE VIDEOS ONLY
Blue Yeti Microphone
Sony Handycam HDR CX4-05
Tripod – Manfrotto MKCompactaCN-BK

S O C I A L MEDIA 
B L O G : https://ldli.co/e/3xky6x
I N S T A G R A M : https://ldli.co/e/5dn20x
YOU TUBE: https://ldli.co/e/ej5l90 
F A C E B O O K: https://ldli.co/e/mjxn2r
PINTEREST: https://ldli.co/e/2l9zom


I was a 2018 Ambassador for Copic Marker Australia and NZ


Thursday, 16 April 2020

Whimsy Stamps Critter Cuties - Smile Bunny

Morning All,

We are in lock down at the moment with the Covid-19 Virus Scaring us all, and I have been lucky enough this morning to pump out a few cards.

I spent a few hours a week or so ago colouring up a whole lot of images so today I am trying to use a few of those images to get cards put together and ready for posting.

For my card today I have used the Critter Cuties Collection from Whimsy Stamps, in particular I have used the cute little bunny. I wanted to think outside of the box on my card and create something other than an Easter Card.


I had printed the image onto X-Press It Blending Cardstock using my Brother Laser Printer and coloured him up using Copic Markers. I also added some details using a Uni-Ball White Angelic Gel Pen and Wink Of Stella Clear.


I ran the image through my Sizzix Big Shot using a Lawn Fawn Stitched Circle Die.

I also ran a Memory Box Die called Chandra Stem through using some leftover X-Press It Blending Cardstock and some American Crafts Cardstock.


I used patterned papers from American Crafts Dear Lizzy Day Dreamer paper pad.  I cut some layers of plain card stock from Kaisercraft and American Crafts, I cut these down using my Cutterpillar Pro.


I pulled in a doily from my stash to add inbetween the layers.


I adhered all the layers to a Couture Creations Card Base using Helmar Acid Free liquid Adhesive.


I stamped out the sentiment from Taylored Expressions Simple Strips using Ink On 3 Embossing ink and white Ranger Embossing Powder onto American Crafts Black Cardstock, and then ran them through Big Shot using the matching background dies.


I hope you have enjoyed my post today, if you have any questions feel free to send me a message or contact me via facebook (all links can be found below).

Watch the You Tube Video Here


Products Used On My Card (Affiliate Links Used Where Possible)


Copic Markers Used

W2, W3, W4
W0, W3, 0 Colorless Blender
R20, R21
V12, V15, V09

Thanks for stopping by, Deni

CAMERA SET UP - FOR YOU TUBE VIDEOS ONLY
Blue Yeti Microphone
Sony Handycam HDR CX4-05
Tripod – Manfrotto MKCompactaCN-BK

S O C I A L MEDIA 
B L O G : https://ldli.co/e/3xky6x
I N S T A G R A M : https://ldli.co/e/5dn20x
YOU TUBE: https://ldli.co/e/ej5l90 
F A C E B O O K: https://ldli.co/e/mjxn2r
PINTEREST: https://ldli.co/e/2l9zom


I was a 2018 Ambassador for Copic Marker Australia and NZ


Tuesday, 14 April 2020

La La Land Crafts - What's The Scoop

Welcome to my blog.

Today I am sharing with you "What's The Scoop", This gorgeous Stamp and the dies I have used on my card are from the Club La La Land Crafts March 2020 Release. They will be for sale individually in approximately 12 months.


I stamped the image out using Memento Tuxedo Black onto X-Press It Blending Cardstock using my Misti Stamping Tool.


I ran the dies through why Sizzix Big Shot just using some leftover cardstock. Once I had the images and die cuts ready I used a Uni-Ball Signo white gel pen to add finishing details to them. 


I used my EK Success Star Confetti punch to cut out some stars using some leftover X-Press It Blending Cardstock (When I am layering whites on white I like to use all the same cardstock).

I stamped the sentiment out from Taylored Expressions Simple Strips sentiment set using Ink on 3 Embossing Ink, I then added some Ranger Ink Super Fine White Embossing Powder and melted it using my Heat Tool. I ran the sentiments through my Sizzix Big Shot using the matching dies.


I hope you have enjoyed my post today, if you have any questions feel free to send me a message or contact me via facebook (all links can be found below).

Watch the You Tube Video Here


Products Used On My Card (Affiliate Links Used Where Possible)


Copic Markers Used

G21, G03
RV55, RV66, RV09
T1, T2, T4, R20
YG25, G14, YG67
Y02, Y06
YR12, YR16, YR27
R08, R27, R37
B93, B97
T6, N10


Thanks for stopping by, Deni

CAMERA SET UP - FOR YOU TUBE VIDEOS ONLY
Blue Yeti Microphone
Sony Handycam HDR CX4-05
Tripod – Manfrotto MKCompactaCN-BK

S O C I A L MEDIA 
B L O G : https://ldli.co/e/3xky6x
I N S T A G R A M : https://ldli.co/e/5dn20x
YOU TUBE: https://ldli.co/e/ej5l90 
F A C E B O O K: https://ldli.co/e/mjxn2r
PINTEREST: https://ldli.co/e/2l9zom


I was a 2018 Ambassador for Copic Marker Australia and NZ


Monday, 13 April 2020

Helmar Scrap Dots - How To Paper Pierce

Hi All,

Today I am sharing with you a How to Video, using a product from Helmar and a stamp set from MFT Stamps.

The Product I am using today is Scrap Dots, this stuff is awesome for any of you that like to add dimension to your projects, my way of explaining it is that it's like liquid foam dots.


For my project today I have used a stamp set from MFT Stamps called Grande Sized love, something I have received in a recent order.

I am not going to share the card today as I have not made one yet, this is more of a how to use a product.


I stamped the image out first onto some X-Press It Blending Cardstock using Memento Tuxedo Black in my Mini Misti Stamping Tool.

I then pulled out my Kaisercraft Bow and Arrow paper pad and stamped out the image again onto three different patterned papers.

I fussy cut out certain bits of the image that I needed for my paper piercing and used my Copic Markers to add some extra shadow detail and make them a little more life like.


I Copic Coloured my initial image (X-Press It) one, I will have all the Copic Markers listed below that I have used on my project.


I then began piecing everything together using Helmar Scrap Dots.


It's awesome when you hold it sideways and you can see all the layers built up :-)


** Post EDIT, I have now finished the card. 


I hope you have enjoyed my post today, if you have any questions feel free to send me a message or contact me via facebook (all links can be found below).

Watch the You Tube Video Here


This project is now complete, you can watch the completed card video here, this video does include the above footage also so feel free to skip through the video to the card making process.


Products Used On My Card (Affiliate Links Used Where Possible)


Copic Markers Used

E000, E00, E21, E11, E04, R20
E74, E77, E79
W2, W4

Thanks for stopping by, Deni

CAMERA SET UP - FOR YOU TUBE VIDEOS ONLY
Blue Yeti Microphone
Sony Handycam HDR CX4-05
Tripod – Manfrotto MKCompactaCN-BK

S O C I A L MEDIA 
B L O G : https://ldli.co/e/3xky6x
I N S T A G R A M : https://ldli.co/e/5dn20x
YOU TUBE: https://ldli.co/e/ej5l90 
F A C E B O O K: https://ldli.co/e/mjxn2r
PINTEREST: https://ldli.co/e/2l9zom


I was a 2018 Ambassador for Copic Marker Australia and NZ