Sunday, 27 May 2018

Time For Tea - All Loved Up

Hi Everyone!

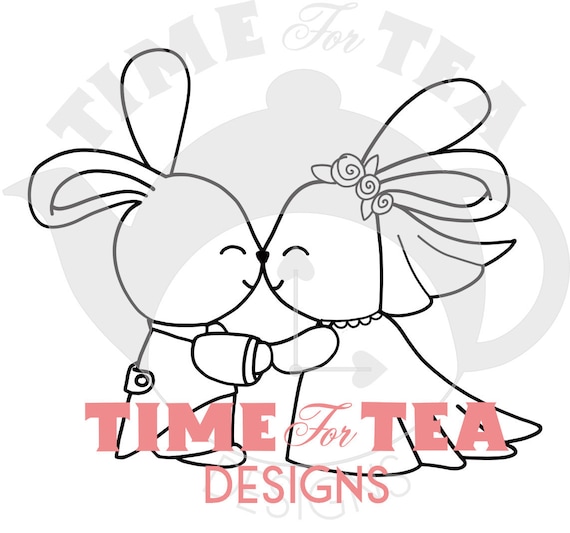
This is one of my all time favourite images from Time For Tea Designs, so i'm so excited to be sharing it on my card today. I have used "Wedding Couple" which is available in the Time For Tea Shop. You can stop by the Time For Tea Blog here and if you would like to join in on the current challenge you can click here May 2018.

 Time For Tea May 2018 Challenge


I printed the image on my Brother laser printer using Mondi Color Copy.


I coloured the image up using Copic Markers, I don't have a list for you today as this is one that I had coloured up a while ago.. sometimes I like to just sit and colour so I will colour up multiple images and pop them into a tray on my desk to use at another time when i'm not in the mood for colouring (this doesn't happen very often obviously as this has been sitting on my desk for a while haha).

The Sentiment is from a Whimsy Stamps set called Elegant Labels which you can purchase here.

I cut the image using a die from a My Favorite Things Stitched Squares die, I ran it through my Sizzix Big Shot.

I used my Cutterpillar Pro to cut all the layers from Crate Paper Love Notes 6x6 Paper Pad. I then adhered the image to the first layer, I then popped those onto foam tape and adhered the rest of the layers using Scotch ATG. I then cut a layer of dusty pink cardstock from Canson to mat everything onto.

I then used my Ek Success Cutterbee scissors to trim a few leftover pieces to create little banners for the top of my card. I decided the card still needed something else so I added a sentiment from Whimsy Stamps.

Once I had all these layers to my liking I added them to a Pre-made Twiddleybitz Cardbase using Scotch ATG. I also added some more foam tape just to the right side of the sentiment where it was sitting up off the card.

As always I also decorated the inside of the card. I don't bother showing and taking photos of the inside as i'm sure you guys are not interested in that.

I hope you have enjoyed my post today, if you have any questions feel free to send me a message or contact me via facebook (all links can be found below).

Products Used On This Card

Twiddleybitz Cardbase
EK Success Cutterbee Scissors
Cutterpillar Pro
My Favorite Things Stitched Squares
Whimsy Stamps - Elegant Labels
Canson Cardstock
Scotch 3M ATG
Crate Paper love Notes 6x6 Paper Pad
X-Press It Foam Tape
Copic Markers
Sizzix Big Shot 


Thanks for stopping by, Deni

You can find my cards for sale here
https://www.facebook.com/angelhandmadepapercraft

My You Tube Here
https://www.youtube.com/user/Denielle1983/

My Blogs Here
Angel Handmade Papercraft http://angelhandmadepapercraft.blogspot.com.au/

Auzz Trinklets N Crafts http://auzztrinkletsnkrafts.blogspot.com.au/

Whimsy Stamps https://whimsystamps.blogspot.com.au/


Saturday, 26 May 2018

Whimsy Stamps - Welcome Little Chicks

Hello my wonderfuls!

Today I am sharing some cards for Whimsy Stamps, I recently purchased this stamp so thought it would be cute to make some new baby cards with.

The stamp set is a red rubber and is called "Little One", it's has really nice details that stamp perfectly. I used my Fishers Stamp Press to stamp the image out onto Mondi Color Copy 250GSM (I normally would use my Misti but it was in our bedroom from trying to get some work done the other night whilst we were watching a movie in bed and I was too lazy to go and get it lol).

                                                       Little One
I used Memento Tuxedo Black to stamp the image out and I just used a wet baby wipe to clean the stamp off when I was done. You will find generally red rubber stamps do not stain but I am annoyingly OCD when it comes to cleaning my stamps.


I wanted to use one of my MFT Blueprints die sets to make these cards today as I wanted to make two cards exactly the same but one in pink and one in blue (so I was also able to use the same paper pad).

I coloured the images up using Copic Markers  then carefully used my EK Success Cutterbee Scissors to fussy cut the images out. Thinking now after the fact that I should have cut the grass off but originally I wanted to use the stamp in one piece.

All the papers are from a Patterned paper pad that I purchased on sale at Kmart a few days ago, it was on clearance for $1 each, so like every other crafter I grabbed all the ones that were left on the shelf hahah. The Kraft coloured cardstock was also part of the patterned pad. I ran the patterned paper sheets I decided to use with the MFT Blueprints 14 dies in my Crafter's Companion Gemini machine. I then ran them through a second time in the opposite colour.

I cut the sentiment on my Tim Holtz Tonic Studios Guillotine, then used my EK Success Cutterbee scissors to banner the end and cut the excess off once I adhered it.

I adhered all the layers using Scotch ATG, this is my go to tape runner when it comes to my cards, I go through so much tape it's not funny. I actually have a monthly subscription with Create By Me Studio, so every month I have an automated debit and they auto send me a package every month, it's fantastic.

Once all my layers were attached together I added them onto a Twiddleybitz pre-made card base.

I added some Wink Of Stella - Clear Glitter Brush to the bonnets of the little chick's and their ribbons.

I hope you have enjoyed my post today, if you have any questions feel free to send me a message or contact me via facebook (all links can be found below).


Thanks for stopping by, Deni

You can find my cards for sale here
https://www.facebook.com/angelhandmadepapercraft

My You Tube Here
https://www.youtube.com/user/Denielle1983/

My Blogs Here
Angel Handmade Papercraft http://angelhandmadepapercraft.blogspot.com.au/

Auzz Trinklets N Crafts http://auzztrinkletsnkrafts.blogspot.com.au/

Whimsy Stamps https://whimsystamps.blogspot.com.au/

Monday, 21 May 2018

The Greeting Farm - Kisses by the cake

I am loving Wedding Cards at the moment this is another one of my favourite Wedding Images, it's called Caketopper Kiss.

            Caketopper Kiss - digi

I printed it onto Mondi Color Copy 250GSM using my Brother laser Printer.


I coloured the image up using Copic Markers, then ran it through my Sizzix Big Shot with a Lawn Fawn Stitched Circle Die. I used a Whimsy Stamps Sentiment from Graduation Sentiments that I had leftover from another project , I cut it out using My Favorite Things Stitched Banner.

I used patterned paper from Crate Paper - Love Notes Collection 6x6 Paper Pad. I ran the aqua coloured piece through my Crafter's Companion using My Favorite Things Stitched Rounded Rectangles die.
I added a doily from my stash which I adhered using Tombow Mono Multi Liquid Adhesive.. everything else was adhered using Scotch ATG.

The bottom pink layer was a piece of Canson Card Stock.


Products Used On This Card

Tombow Mono Multi Liquid Adhesive
EK Success Cutterbee Scissors
My Favorite Things Stitched Rounded Rectangles
Lawn Fawn Stitched Circle Stax
Crate Paper - Love Notes 6x6
Whimsy Stamps - Graduation Sentiments
Canson Cardstock
Scotch 3M ATG
Crafter's Companion - Gemini
Doily - Stash
Mondi Color Copy 250GSM
Mondi Color Copy 100GSM


I hope you have enjoyed my post today, if you have any questions feel free to send me a message or contact me via facebook (all links can be found below).


Thanks for stopping by, Deni

You can find my cards for sale here
https://www.facebook.com/angelhandmadepapercraft

My You Tube Here
https://www.youtube.com/user/Denielle1983/

My Blogs Here
Angel Handmade Papercraft http://angelhandmadepapercraft.blogspot.com.au/

Auzz Trinklets N Crafts http://auzztrinkletsnkrafts.blogspot.com.au/

Whimsy Stamps https://whimsystamps.blogspot.com.au/

Sunday, 20 May 2018

Time For Tea - New Release May 2018 Love Bunnies

So excited to share the new images from Time For Tea Designs for May 2018, they are all love related, whether it be Wedding, Hens Night etc.

Our current challenge over at Time For Tea Designs is "I Do Two" so on my card today I have 2 Sentiments, 2 patterned papers, 2 Colours of Copic Markers (not two markers but two colours), 2 Die Cuts and of course 2 Bunnies :-) You can join in on the challenge here.

The image I have used on my card today is "Wedding Couple Bunny"  It can also be purchased as a package here which will include all the New Releases plus a few extra bits and pieces.


Here is the card I have created, hope you guys like it :-)


Products Used On My Card

American Crafts Cardstock
Bella! Wedding Smitten and Fancy
Scotch 3M ATG
Cutterpillar Pro
Twiddleybitz Card Base
My Favorite Things Wonky Stitched Circle Stax
My Favorite Things Stitched Heart Stax
Sizzix Big Shot
EK Success Cutterbee Scissors
Copic Markers
Mondi Color Copy 250GSM

Copic Markers Used

N1, N3
0
R83, R85


Now for the details for the Challenge:
The challenge will run from May 1 – May 31.

Time for Tea Designs Challenge rules
1. Must use a Time for Tea Designs image
2. Must be a new creation; no back dating
3. Must follow the challenge theme
4. Must link the image to the Time for Tea Designs store
5. Projects must be posted by the deadline to count.
One voted winner will receive 3 digis of their choice and a randomly selected participant will receive 1 Digi of their choice.
Please join our Facebook Community and share your projects there…or post to your blog and leave a comment on the Time For Tea Blog post with the project posting link.  Please be sure to list your “twos” in  your posting so we know what they are.

Good luck and happy crafting!!!


I hope you have enjoyed my post today, if you have any questions feel free to send me a message or contact me via facebook (all links can be found below).


Thanks for stopping by, Deni

You can find my cards for sale here
https://www.facebook.com/angelhandmadepapercraft

My You Tube Here
https://www.youtube.com/user/Denielle1983/

My Blogs Here
Angel Handmade Papercraft http://angelhandmadepapercraft.blogspot.com.au/

Auzz Trinklets N Crafts http://auzztrinkletsnkrafts.blogspot.com.au/

Whimsy Stamps https://whimsystamps.blogspot.com.au/
SaveSave

Saturday, 19 May 2018

Whimsy Stamps - Sick? Ick!

Let's just start with how much fun I had making this card!

I absolutely love this image from Crissy Armstrong called Penguin Doctor, he is so adorable and being that I work in the medical field I loved him just that bit more. But on this card today my Penguin is a Female Doctor.

Penguin Doctor Cute - Digital Stamp


I started off by using a stencil and some Texture Paste and a stencil I had in my drawer from My Favorite Things, which I have now put in that safe place in my craft room and can't find it lol (yes it was cleaned). I don't use stencils very often.. actually very very rarely would be more accurate.. just another thing I like to hoard.. but I do like to bring them out when the cob webs start on them heheh.

Not only did I use a stencil and texture paste but I also pulled out my Pastel Gliders... they are pretty much a Gelato but just a cheaper version of them.. again something i've had in my drawer for a very long time and never use. I carefully scraped a little into my texture paste and mixed it all together to turn it the blue colour you see on my card.

I left it for hours to dry while I worked on the rest of my card then went back and ran the image through my Sizzix Big Shot using a Lawn Fawn Stitched Circles die.. just make sure the texture paste is really dry or you will ruin it all running it through.

I cut some layers of car stock from Canson and some from American Crafts, on the largest white piece I used a sentiment set from My Favorite Things called Feel Better to stamp some of the words out all over. I didn't end up showing as much of the wording as I had originally planned, but it still looked ok. I used Memento Tuxedo Black and a Lawn Fawn Acrylic Block.

I adhered all the layers using Scotch ATG, but added some Scotch Foam Tape behind that largest white layer to bring it off the page a little.

I stamped the "Sick? Ick!" Sentiment onto a strip of leftover white card stock using Memento Tuxedo Black. I found a hugs die I had in my stash and ran that through my Big Shot using some Black Canson Cardstock. The card still needed something else at this stage, I then realised I had purchased the Bandaid dies from My Favorite Things and figured that would be perfect to finish off my card. I ran the die through my Big Shot a few times until I got all the pieces in all the colours I was wanting. I adhered it all together using Tombow Mono Multi and added it to my card. I also added some Wink Of Stella Clear Glitter Brush. Perfect my card was then finished.. oh no.. of course I finished off the inside of my card also :-)

Products Used On This Card

Memento Tuxedo Black
Scotch ATG
Scotch Foam Mounting Tape
Uni-ball Signo White Angelic Gel Pen
Wink Of Stella - Clear Glitter Brush
Tombow Mono Multi
Lawn Fawn Acrylic Block
Sizzix Big Shot
My Favorite Things Bandaids Dies
My Favorite Things Feel Better
My Favorite Things Sending Hugs
Lawn Fawn Stitched Circles Dies
Mont Marte Texture Paste
Mont Marte Pastel Gliders - Silky Smooth
Twiddleybitz Card Base
EK Success - Cutterbee Scissors

Copic Markers Used

R83, R85
YR65, YR24, YR04
B01, B02, B04
R05, R27, R59
C2, C4, 0
C6, C8, C10

I hope you have enjoyed my post today, if you have any questions feel free to send me a message or contact me via facebook (all links can be found below).


Thanks for stopping by, Deni

You can find my cards for sale here
https://www.facebook.com/angelhandmadepapercraft

My You Tube Here
https://www.youtube.com/user/Denielle1983/

My Blogs Here
Angel Handmade Papercraft http://angelhandmadepapercraft.blogspot.com.au/

Auzz Trinklets N Crafts http://auzztrinkletsnkrafts.blogspot.com.au/

Whimsy Stamps https://whimsystamps.blogspot.com.au/

Digi Stamp Boutique Pony Ride

Who doesn't love a pony ride! Well me actually because I am allergic to horses.. i'd love to though :-)

Today I am sharing with you Abi and Pony from Digi Stamp Boutique, I have had this image for a while but for some reason had not used it, I found it in my printed tray so I was in colouring mood and decided to colour her up.

Abi and pony


I love the way this little horsey is drawn, it's a great style and makes me happy.

I printed the image onto Mondi Color Copy 250GSM using my Brother Printer, I then coloured the image up using Copic Markers.

I ran the image through my Gemini machine using a Lawn Fawn Stitched Circle Die, I then used Ranger Distress Ink in Walnut Stain and a Ranger Mini Ink Blending Tool to carefully ink around the edge of the circle.

Patterned papers were from Crate Paper Hopscotch 6x6 Paper Pad, I cut them using Cutterpillar Pro and inked all the edges using the Walnut Stain ink. I used my EK Success Cutterbee scissors to create banners out of some of the leftover pieces. I used the edge of my scissors to rough up all the edges before I inked them.

I adhered all the layers using Scotch ATG and Tombow Mono Multi on all the smaller pieces.

I then added all the layers to a Twiddleybitz Card Base using the ATG then added Nuvo Crystal Drops in Antique Rose and Bubblegum Blush.

Products Used On This Card

Tim Holtz Ranger Distress Ink - Walnut Stain
Scotch 3M ATG
Tombow Mono Multi Liquid Adhesive
Nuvo Crystal Drops - Antique Rose and Bubblegum Blush
Ranger Mini Ink Blending Tool
Lawn Fawn - Stitched Circle Dies
Cutterpillar Pro
Crafter's Companion - Gemini
EK Success - Cutterbee Scissors
Twiddleybitz Cardbase
Copic Markers
Mondi Color Copy 250GSM


I hope you have enjoyed my post today, if you have any questions feel free to send me a message or contact me via facebook (all links can be found below).


Thanks for stopping by, Deni

You can find my cards for sale here
https://www.facebook.com/angelhandmadepapercraft

My You Tube Here
https://www.youtube.com/user/Denielle1983/

My Blogs Here
Angel Handmade Papercraft http://angelhandmadepapercraft.blogspot.com.au/

Auzz Trinklets N Crafts http://auzztrinkletsnkrafts.blogspot.com.au/

Whimsy Stamps https://whimsystamps.blogspot.com.au/

Friday, 18 May 2018

Whimsy Stamps Challenge May 2018

Good Morning Everyone,

I'm a little late in posting but wanted to share with you guys the card I created for the May 2018 Challenge over at Whimsy Stamps. You can check out the current challenge here and the shop here.

I have used a rubber stamp this month - Penguin Bride and Groom, this stamp just drew me in and i've been hanging to use it :-) At the time of this posting, the stamp is also on sale so jump on it quick.. you need it..

Penguin Bride and Groom 

I stamped the image using Memento Tuxedo Black onto Mondi Color Copy 250GSM, I then coloured the image up using Copic Markers, I don't have a list of them today as I was in my own little world colouring this one up and had put them away before I wrote them down. I ran the image through my Crafter's Companion Gemini using a My Favorite Things Stitched Circle Die.

The patterned papers I was using came from a 6x6 Paper Pad Called Love Notes from Crate Paper. I actually use this paper pad a lot and it's almost finished, and this is why when I buy a new paper pad I try to purchase more than one lol.

I cut the patterned paper layer using Cutterpillar Pro, I cut the banner from the same patterned paper using My Favorite Things Stitched Fishtail Flags Stax die which I ran through my Crafter's Companion Gemini. I adhered the flag off centre onto the first paper sheet I cut then trimmed the excess from the top using EK Success Cutterbee Scissors. I adhered using Scotch ATG.

I grabbed a doily from my stash, not sure of brands I have had them for a very long time, and adhered that over the tops of the banner and completely centre. I had a strip of the arrow paper inside my paper pad (I normally pop all the leftovers back into the paper pad never know when you may need something to finish a card off) which I adhered to the centre of the doily.

Next I grabbed the image I had already die cut and used some Tombow Mono Multi Liquid Adhesive to adhere it down to the doily and the strip.

Lastly I found a page in my paper pad with cut sentiments on it so I carefully used my EK Success Cutterbee scissors and fussy cut the "Remember This" sentiment and the "You Make My Heart Sing" Sentiment. I popped the larger sentiment onto some Scotch 3M Foam Mounting Tape and adhered it to the left hand side of my image. The smaller sentiment I just used some of the Tombow Mono Multi Liquid Adhesive to adhere it. I used my Tonic Tim Holts Guillotine to do the cutting of the smaller pieces. I normally switch between my Guillotine and my Cutterpillar Pro depending on what I'm doing.

Once everything was done I applied Scotch ATG to the back and adhered it to a Twiddleybitz Pre-Made card base.


Products Used On This Card

EK Success Cutterbee Scissors
Tombow Mono Multi Liquid Adhesive
Scotch 3m ATG
Scotch 3M Foam Mounting Tape
My Favorite Things Stitched Fishtail Flags Stax
My Favorite Things Stitched Circles
Crate Paper - Love Notes 6x6
Doily - Stash
Twiddleybitz Cardbase
Tim Holtz Tonic Guillotine
Crafter's Companion - Gemini
Cutterpillar Pro


I hope you have enjoyed my post today, if you have any questions feel free to send me a message or contact me via facebook (all links can be found below).


Thanks for stopping by, Deni

You can find my cards for sale here
https://www.facebook.com/angelhandmadepapercraft

My You Tube Here
https://www.youtube.com/user/Denielle1983/

My Blogs Here
Angel Handmade Papercraft http://angelhandmadepapercraft.blogspot.com.au/

Auzz Trinklets N Crafts http://auzztrinkletsnkrafts.blogspot.com.au/

Whimsy Stamps https://whimsystamps.blogspot.com.au/